Sunday, May 12, 2013

Cleaning for Tour of Artists' Homes and Studios

With less than a week before the Tour of Artists' Homes and Studios (buy your tickets today at Larson Gallery, Oak Hollow and The Bindery--only $20 per person; $5 with a student ID card), we tried to spend most of the weekend cleaning. We've lived in the house for about 6 years now, so some of the things we cleaned haven't been cleaned in at least that long. I washed a window that required me to climb on a ledge over the stairs. As far as I am concerned, that window can be cleaned again in 2019.

We worked on the house last weekend too, but the pressure was a little less intense so we didn't work quite as hard and we interspersed other activities. Friday was a school holiday so I mostly cleaned my studio, dusted and cleared all the magnets off the fridge. The biggest task I took on last weekend was trying to make the front of the house more attractive.

Our beautiful-ish house

When we moved into the house there were thorny overgrown rose bushes everywhere, including on old trellises in the front. We took them down and took out the brick edging around the entire yard but never quite figured out what to do to replace them. On a trip to the Master Gardener's Plant Sale, I got some good advice about putting out some planters in front of the house. Getting the right planters and plants took a long time, but planting was pretty easy.

This type of plant is easy to grow, it prefers a large empty planter and a reasonable amount of silliness to flourish.

I'm not much of a green-thumb, so hopefully the plants will last through next weekend at least. It would be a bonus if they actually make it through the summer. Apparently you have to remember to water them regularly. I also put out some sculpture, but sculpture in the front of the house runs the dual risks of the lawn mower and general vandalism. These pieces are already a little hard-worn, but I think they do okay for the lawn.

I couldn't find the actual plants that were recommended to me, hopefully these will play well together.

The sculpture to the right has mysteriously lost at least three of its original parts, but not because of the lawnmower.

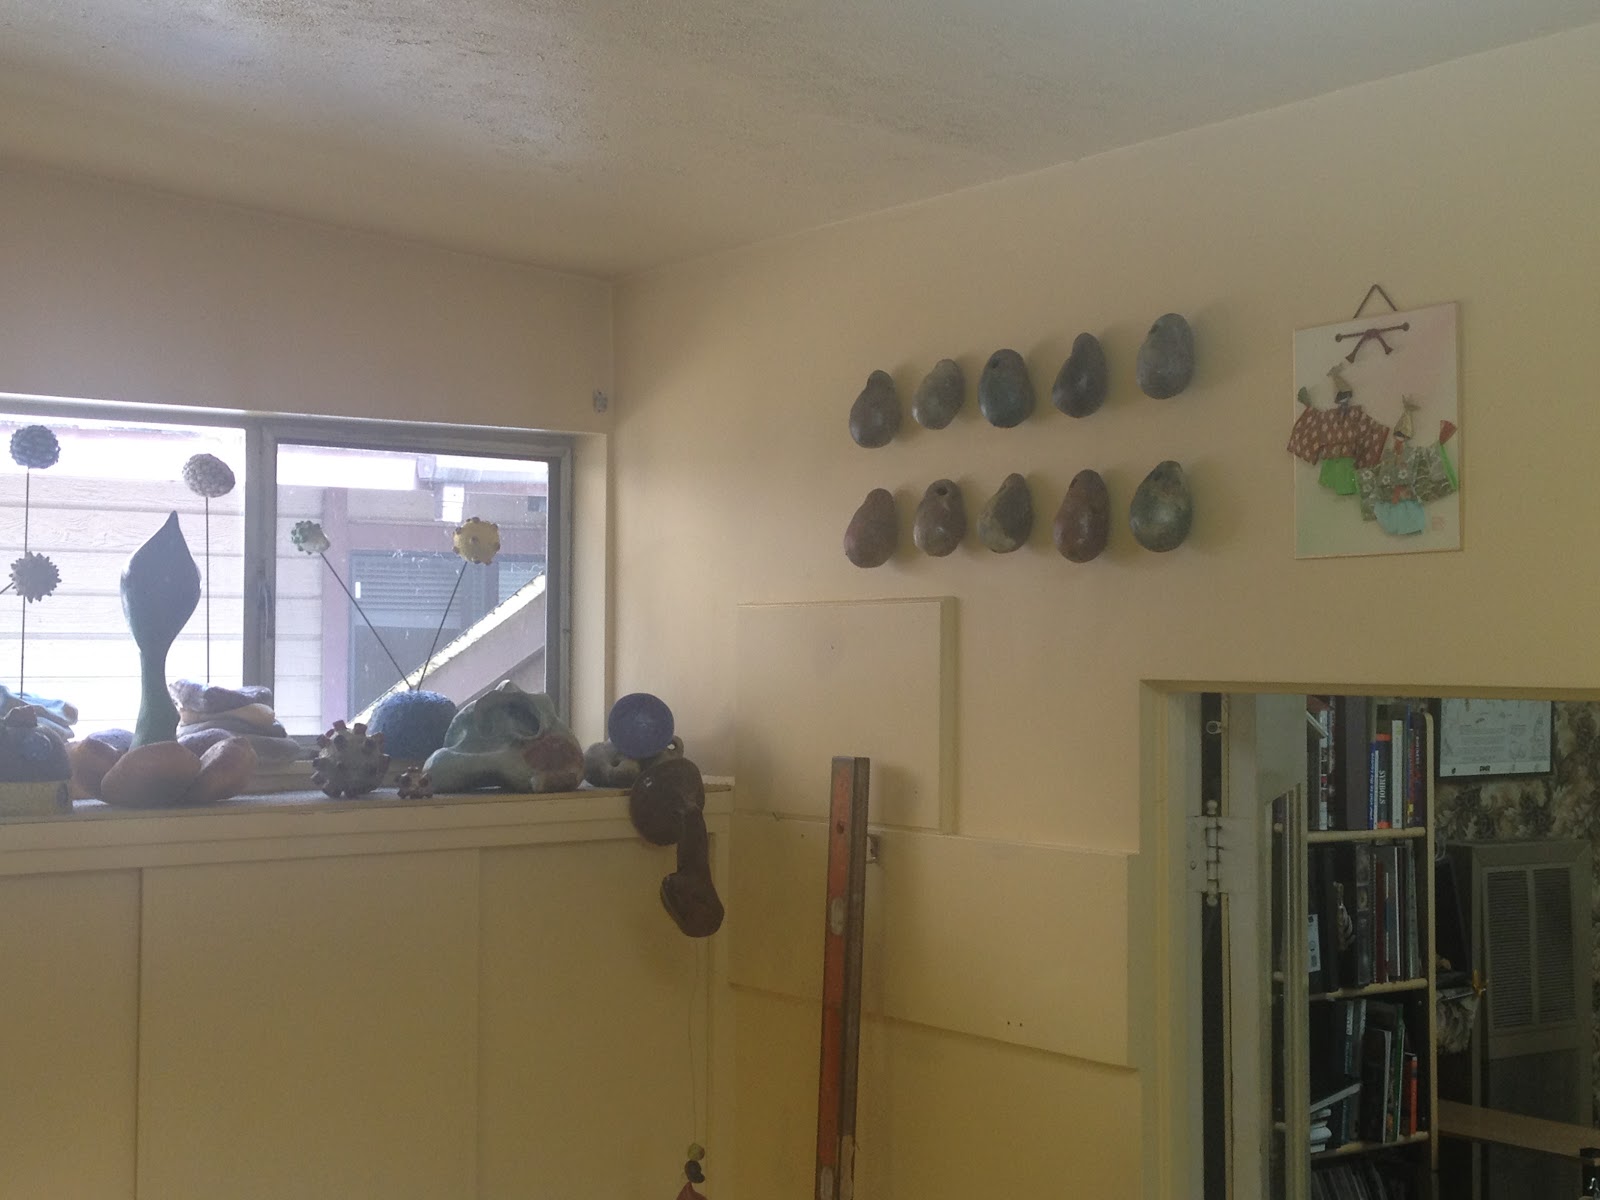
This weekend, with the time running out I was all over the place. I washed windows, inside and out, climbed over the stairway to dust and rearrange sculpture in the high window area of the laundry room (it's hard to picture until you see our house) and started hiding the food containers that don't normally fit in the cupboards. (We have a lot of storage in the house, but the kitchen storage isn't ideal.)

The view (up) from my studio.

On Saturday, thinking I had tons of time I guess, I decided to install some of my sculptural wall pieces above the oven. I'd been planning to do this for a long time, but never got motivated before. I had a good run Saturday morning, so I was extra productive between about 7:50 and 11:30am.

They say you can catch the drill dust with a post-it. They lie.

A lot of potters keep "kiln gods" above the kiln. I am more likely to need them above my oven.

The wall installation went so well in the kitchen, I added to the laundry room/stairway as well. I only had ten pieces installed there before I started feeling scared of standing on a stool at the top of the stairs. I think I also ran out of L-screws.

Admire the beautifully clear window, washed at great personal risk by your author.

My husband, meanwhile, decided to take off our dining room door and hang it from the tree in the back yard. It seems bizarre at first that he wanted to paint it, but I had gotten used to the missing handle and hadn't considered that might be strange for guests. The handle has been off for a few months. He wanted to repair the drippy paint before replacing it. Preparing it to be painted with a sprayer yielded a weird photo. Now it is back in the house, has a handle, and we don't have to stick our fingers in the raw wood hole to open the door.

Magical levitating door.

On Sunday I helped out with Larson Gallery's booth at Articipate downtown by the Farmer's Market. We were trying to sell tickets for next weekend and we had a texture rubbing Mother's Day card activity going on as well. I helped set up around 7am and then came home for a few hours to install some more bulbs on new L-screws and clean the spiderwebs out of my daughter's sandbox. Children are welcome at my house for the Tour and we will have a fresh clean sandbox and will have some other kids and kids toys in the back yard. Buy your tickets today!

More bulbs (window still clean).

A few hours after I finished the installation, I opened another cabinet in the studio and found about 20 more bulbs hiding in a corner. There have been at least three 100-bulb sets of these used for various installations. I'm starting to think that the little guys reproduce.

Seriously, from whence didst ye come?

The newly sanded and painted dining room door was to be painted with a second color in the afternoon. The paint was half-done and wet when my daughter and I came home from the Farmer's Market (second trip). She immediately went to her swing, where a towel was draped. She picked up the towel and tossed it behind her where it landed, with all its little dirty tree droppings, on top of the wet paint. I took over painting, since my husband couldn't handle the horror, and picked out little bits of tree gunk (don't look too closely).

I was thinking of using half of this picture as my Facebook profile. Know why?

Getting the house ready is a bizarre experience. We cleaned things we never ever clean (things we literally have never cleaned before) and worried about washing windows and making sure top shelves are dusted and paint is patched right. But how surprised would I be if anyone commented on the clean windows or even paint job during the tour. Seriously, you should come. My work will be all over the house. My advanced clay students will have their work at my house and the talented Monika Lemmon will have (hopefully a bunch of) her paintings at my place. And of course there are lots of other artists and homes to see that day too.

The main attraction: my bizarre studio. There's no way to improve that wall carpet.

Thursday, May 2, 2013

Busy Art Week for Yakima / Ellensburg

Javier Lopez Ortiz
This evening was the opening for Javier Lopez Ortiz's exhibition at Allied Arts in Yakima. Lopez Ortiz is visiting Yakima from our sister city, Morelia, in Mexico. The artist works with water color and smoke, making quite a varied range of brightly colored and more subdued works. My favorites tend to be those which are more ambiguous. The show isn't up long, just through May 18. I highly recommend you try to get there to see it while it is in town.

For those who are interested, it appears Allied Arts is hosting a watercolor workshop with the artist while he is here. On Monday YVCC students will be able to participate in workshops or demonstrations with the artist. Monday is also a busy day on campus because the Latin Music Festival will be taking place on campus that day.


Alfredo Arreguin
Tomorrow (Friday) the the First Friday opening reception for Gallery One's Alfredo Arreguin exhibition, "Primevera." Saturday Arreguin will be participating in the Dia de la Familia activities in the gallery. I plan to drive up to Ellensburg to see the show on Saturday and bring my daughter.


YVCC DoVA Exhibition
Tuesday night from 5-7pm Larson Gallery hosts the YVCC Department of Visual Arts Student and Faculty Exhibition. We selected most of the award winners today. There are more than 10 (I can't remember exactly how many) cash awards for student work and, of course, many of the works are for sale. The awards will be announced during the reception Tuesday evening. The show continues through June 1.


YVCC Clay Sale
Thursday at 11:30 is the YVCC Clay Sale, featuring work by students and faculty. Much of the work is functional and it's all priced to sell. We have done several extra firings and a series of glaze tests in the last quarter, meaning there should be plenty of brand new work for this sale. We are hoping to fire one last load on Tuesday so it will be fresh out of the kiln for the sale.


Picasso at the Lapin Agile
And, finally, though I'm not sure when I am going to fit it in, the Warehouse Theatre Company's art-related production opens this weekend. The show, written by Steve Martin, is about Picasso and Einstein and I believe the star is one of my previous Design students. In my limited experience, Warehouse Theater does a great job. The show continues through May 18, so I'm hoping to fit it in sometime or another.


Tour of Artists' Homes & Studios
That rounds out a busy week of events, though my mind is focused on the upcoming Tour of Artist Homes and Studios on May 18. My home and studio are featured on the tour. Tomorrow, Spring Holiday for YVCC will be my studio and house cleaning day as I try to get the place ready for visitors. 


Sunday, April 28, 2013

Raku Firing for Continuing Students

In response to requests from my increasingly large continuing clay student cohort, today we held a raku firing just for intermediate, advanced and independent clay students. Everyone present had participated in at least one raku firing previously, and several students had done many firings.

Tonya's "horse hair" technique. She got some impressive results with feathers

Grace moving hot work. Mike adding combustibles to the barrel.

We instituted a new policy designed to get the work to the kiln more quickly. Though the pilot run of the new policy had a few snags, the overall effect was to reduce firing time significantly. Also, because everyone followed directions and was prepared, nothing exploded during the firing, I didn't have to stand next to the kiln calling for more work and, to my knowledge, no one left the firing unhappy because their work didn't get in.

Our kiln setup in action.

Katie removing a hot pot with her new red glaze.

We fired in the afternoon today and I didn't have to do very much work since the students took the lead on set up, running the reduction buckets and removing work from the kiln, and even clean up. I even found myself in a few conversations about reduction, the burner set up and some other, more advanced level conversations, since the basics were running smoothly.

Janice's flashy vase.

Tonya's horse hair pot.

Adding leaves to a reduction bucket.

Janice's successes.

Resolution for next time: remember (on the first try) how we set up the counterweight.

Saturday, April 20, 2013

Clay events in May

May is full of exciting art events this year, involving my work and the work of my students.


DoVA Show:
First up, The Department of Visual Arts Student and Faculty Exhibition, or DoVA Show at Larson Gallery. The show opens Tuesday, May 7 with a reception from 5-7pm. This month we are having work delivered, cataloging it and getting it ready for the exhibition. 


Clay Sale:
A few days after the DoVA show opens, we will be having the semi-annual YVCC Clay sale. The sale features functional and sculptural ceramic work created by myself and my students at the YVCC clay studio. The sale happens during lunch on May 9. We have a lot of work ready now and we plan to have more work fired next week for the show. The sale is open to the public and is held in the Hopf Union Building on the Yakima Valley Community College campus.


We've been trying to get advertising out into the community as well as on campus. The new Humanities Office Assistant, Jill Tominosky, has been a great help creating the advertising for both the sale and the DoVA show.


Proceeds from the clay sale go to fund improvements in the studio. I am using these funds to buy an oxyprobe to help determine oxygen levels in the kiln during firing. I've also make a few other orders for additions to our studio equipment.


Tour of Artists' Homes & Studios:
And finally, on May 18 my studio and home will be opened for the Larson Gallery's Tour of Artists' Homes and Studios. Mine is one of the featured studios this year. Besides my work, I will have YVCC clay students' work at my house as well as paintings by Monica Lemmon and clay work by Yvonne Pepin-Wakefield. 


Tickets for the Tour are available for purchase at Larson Gallery. You can also buy tickets directly from me through May 6. Tickets are $20 for adults, $5 for students. A ticket booklet admits guests to all the homes of artists and collectors on the tour. Work will be for sale that day and the DoVA show will also be open, with donuts and coffee in the morning when the tour begins.


Friday, April 12, 2013

Plates

I've been thinking a lot about plates lately. Several students last quarter were throwing plates for their projects, which got me started contemplating foot rings, rim shapes and the ideal curve for a lip. Yesterday my daughter caught me pondering the breakfast plate after I finished eating. "What are you doing, Mommy?"

mmm, crumbs from my breakfast waffle
For years we have used two main sets of plates at home. At the end of college I traded a sculpture for a set of dishes with what I called a mint chocolate chip glaze. Stephanie Engelbart made functional pottery for her senior show and my senior show was all ceramic sculpture. Interestingly, when I looked for Stephanie online, I discovered her featured as a successful alumnus on our college art website. I have an artwork from my senior show featured (under my maiden name).

mmm, mint chocolate chip
Most of our other plates at home are ones I threw as a graduate student for our wedding reception. I didn't want the kids to be bored and I didn't want people to feel like they needed to buy us stuff (especially since we didn't have a big wedding). So for the reception I threw a bunch of plates and bowls and things. I fired the the dishes (and a few little sculptures) and put them at a table in the garage with some colored slips. We encouraged our guests to paint a dish for us. Even now its fun to think about the origin of these dishes when we eat.

friendly decoration on a wobbly plate
One disadvantage of the wedding reception work is that I didn't throw as well eight years ago as I do now. All of my MFA exhibition work was hand-built sculpture. I started practicing on the wheel around this time, in part because I thought I might need to know how to throw in order to get a teaching job after graduation. And, since the job I did get requires regular throwing, I have practiced (and learned) a lot more in the last seven years.

pottery students, look away from the amateur foot (uh, it's Linda's fault!)

Throwing practice for class has influenced me so much that my ceramic sculpture now frequently incorporates thrown sections. And, of course I can now make functional work that is more than a canvas for painting, a joke or obfuscation of throwing deficits.

yep, wheel thrown parts

Gradually my worn home pottery collection is becoming balanced with functional work designed with purely functional intentions, and created in the last decade. As I make more of my work, and as my pottery choices become more about what I want than what I can make, trade for, or afford on a college budget, I am starting to realized that I am excessively biased about my plates in particular. In class I talk to my students about ideal characteristics in plates, and I even made the students a video discussing these characteristics.

This was one of several plates created for a joke. I showed a couple times in the Cambridge Pottery Festival around 2005. After the show there was a dinner. Artists were asked to bring a plate to trade. Bring a plate you made, leave it on the table and take another plate from the table. Ha ha, funny joke for a sculptor. My little sculpture was just about the only non-functional work on the table the first year. The next year I planned to be read with a (non-functional) plate.
Most plates are too big for regular use at the table, in my opinion. I want my plate to just hold a sandwich and maybe a few chips. This may be in part for portion control, but mostly for durability. A big plate is either a heavy big slab or a a thin big slab, in which case I am going to bang it against something and break it. Of course, as Clary Illian suggests, if people love it, they'll use it and break it and have to buy another one--thus keeping the potter employed.

nice glaze, too bad about that thin rim

I also think plates should have a high, round rim. The rim should be high so that spaghetti sauce can't slide off the side of the plate. (In my house its a bit of a running joke with my daughter that Daddy can only use a rounded plate to eat his pot pie because he slides stuff off the side of a flat plate). The rim should be round so that it doesn't chip in the dishwasher.

not the kind of chips I want to eat with my sandwich
Of course the glaze should be designed for function (something that wasn't really a major concern for the wedding reception work, which has since experienced glaze chips and wear) and even a small plate shouldn't be too thin or it will eventually crack from wear. I haven't experienced much breakage with my plates (besides the rim chips), but I have at least two bowls that we are all pretending don't have serious cracks developing down the middle (I love those bowls).

drying plates waiting to be fired

I've gotten quite comfortable throwing plates (though the video I link to is a bit old) that have all the positive characteristics I have described. I can crank them out pretty quickly most of the time, though not as quick as the student who informed me yesterday that she doesn't need to center her plates before throwing. However, I have to admit that once the quarter ends, I will be in my studio making sculptural, not functional work.

one of my recent plates
I guess this is all to say that if you want a well-made plate, you should come to the YVCC Clay Sale on May 9 from 11:30-12:30 in the HUB on Yakima Valley Community College's campus in Yakima. The flight to Washington might be expensive, but I'm sure a good plate is worth that.

Monday, April 8, 2013

Kiln Atmosphere


Last quarter I offered the students more options than usual for firing temperature and atmosphere. Each quarters we fire our work in a bisque kiln to prepare it for glazing. Most work is then glazed for cone 10 reduction and fired in the gas kiln. A handful of pieces might be raku fired or smoke fired during our one quarterly raku/smoke firing day.

a student's horse hair raku pice fired in the fall
On the occasions when I have a hand-building class, I generally allow those students to fire glazed work to a low temperature. Since their sculpture is not meant to be food safe or water-tight it does not require a mature clay body and the glaze does not need to be food safe. The low-fire work can be glazed with underglazes, stains, slips and low temperature glazes. The work is then fired in the same electric kilns that are used for the bisque firings.

unfired work loaded into an electric kiln for bisque firing

Last quarter I tried to offer a high-fire oxidation firing in addition the the usual high-fire reduction firing. I say "tried," because despite my best efforts, the "oxidation firing" produced some very reduced results. Reduction or oxidation refers to the amount of oxygen and fuel available inside the kiln. Electric kilns generally produce oxidation (or neutral) atmospheres because no fuel is added and plenty of oxygen is available inside the kiln. Gas kilns can be manipulated to produce oxidation or reduction atmospheres by either introducing more air or gas in the burner or by allowing or preventing air from entering the kiln from other openings.

the studio gas kiln about to be unloaded

The most efficient firing is a neutral atmosphere, though I believe many potters tend to blur the line between neutral and oxidizing atmospheres, referring to both as oxidizing because the glaze results and clay body color are similar. As with most areas of life, there isn't a pure distinction between oxidizing, neutral and reducing. Instead there is a gradual shift from one end of the spectrum to another so that a kiln can be very reduced or only slightly reduced, etc. Reduction levels can also vary over the course of the firing.

clay bodies (without glaze) containing iron turn darker or speckled in reduction; porcelain turns white

Some functional glazes call for a reduction atmosphere in the kiln in order to create the desired color or texture on the work. In a reduction firing, the kiln has more fuel than air, causing the fuel to look for any available oxygen with which to react. In a reduction firing the fuel can react with the iron oxide in the clay, causing the clay body to turn brownish or speckled. The fuel can also react with oxides in the glazes, such as copper oxide, pulling out the oxide and leaving the metal. This process causes green copper oxide to turn into red copper in a reduction fired glaze.

copper glaze reduced in what I thought would be an oxidation firing

Until recently most of what I knew about atmospheres and glaze reactions came from what I was taught in school and what I had read, particularly as pertained to glaze recipes and specific effects. However, this weekend I read Nils Lou's "The Art of Firing," which explains this process much more thoroughly. The book also talked about when during the firing process atmosphere affects the materials in clay and glazes. I knew that the clay body reduction happens earlier than glaze reduction, but this weekend was the first I'd ever heard that copper reduction happens during cool down.

Copper reds don't flash until they are cooling!
Copper reduction happens during cool down. This one short line at the bottom of the page blew my mind. For those of my readers not amazed by this bit of missing chemistry information, this means the copper oxide in the glaze is not affected by the lack of oxygen during the firing. Instead, the copper reacts after the firing, during the cool down time. 

Usually when I finish firing, I close the damper and the other kiln openings up tight to prevent the work from cooling too rapidly. Though I am not adding any fuel, I am also not allowing any air into the kiln. According to the Lou, the oxygen deprivation around 1500 to 1100 degrees is what causes my reduced copper glazes. This bit of information blew my mind because it suddenly solved a mystery for me from last quarter. When I tried to run an oxidation firing for my students, I tried to allow more air during the firing but closed the kiln up normally at the end of the firing. Students were disappointed in the resulting bright red coppers, since I had promised them greens. At the time I thought this was an error in my firing, now I suspect it was an error in my cooling.

Now I wish I had finished reading Lou's book years ago when I started. I stopped because I found the writing dry and the information too simple and too specific. The first chapter deals with kiln construction and the second with the basics of atmosphere. I'm not building a kiln, I want to improve my firing. I understand the basic concepts, I wanted some insight into how I might adjust my firing protocol on a good kiln to create better results.


When I started reading again, I was still frustrated because the book's initial solution to recognizing kiln atmospheres is to use an oxyprobe. That's great if you've got one, but we don't. (On a side note, I plan to order one ASAP.) An oxyprobe is a much more accurate way of gauging the reduction happening in the firing. The other methods are watching the flame color and how big the flame is in the chimney or coming out the spy hole. I was hoping the book would give some more subtle suggestions, but besides the oxyprobe it was stuff I already knew.

reducing flame after I opened the spy hole

I learned to fire a variety of kilns in college and graduate school, but I hadn't fired high temperature gas firings all that often. My most extensive practice has been in the YVCC studio. When I first came to YVCC the kiln was an old updraft kiln, which means it had an opening at the top for air to exit. The air inside the kiln could be controlled with a damper across the top opening. The damper consisted of a couple of shelves with handles to push them across the center opening. In my experience this kiln was difficult to reduce, which may have been a result of the kiln's age or the kiln's structure. The opening at the top and the cracks at various places allowed air out. I rarely got bright reds in that kiln and the clay body was generally pretty light. Knowing what I do now, I would guess that the kiln was hard to close up after the firing, resulting in plenty of air in the kiln and therefore oxidized (green) copper glazes.

oxidized copper on the interior of a raku fired piece

In any kiln, one can adjust the mix of air and gas at the burner or one can also adjust some of the openings in the kiln, mainly the damper in the chimney or at the exit of the kiln. These adjustments can cause the atmosphere during any stage of firing (or cooling) to be oxidizing or reducing. On the current YVCC gas kiln we have a chimney which opens into the kiln near the floor. The air exit at the bottom makes our kiln a downdraft. It also tends to make for a more reducing and more even firing. In the old updraft kiln there was a significant temperature difference from the top to the bottom. The new kiln fires pretty evenly as long as the firing is controlled well.

Though I have fired the kiln many times and can comfortably get repeatable results with little variation caused by weather or the type of work in the kiln, the oxidation firing results shook my confidence and made me want to figure out what was wrong. It is easy to get into a comfortable habit of firing and a bit intimidating to try something else in case it doesn't work as well. Last quarter a bisque firing for tall work (too tall for our electric kilns) didn't work out perfectly and that also bothered me. There may have been some thickness issues in the work, but what I have now read makes me wonder if the kiln was reducing during the cool down, resulting in some of the cracks that showed up in the work.

tall bisqued work in the gas kiln

Though I thought it was helpful, I was also bothered by the tone of "The Art of Firing." The book sorta hinted that anyone who was firing kilns and didn't know this stuff wasn't using common sense. On the other hand, the book was written--for whom? Having learned firing basics in college and then bits and pieces of kiln loading and firing from at least ten different people, I am surprised that this was the first I had heard of things like copper flashing in cool down. There were other parts of the reading that were more of a reminder. In that way it was like talking with someone who knows about firing. In my current position I am the clay, firing and glaze expert so there are few people nearby with whom I can discuss firing adjustments and errors. Reaching out to an expert or colleague in another town seems like asking for a solution rather than engaging in a discussion or brainstorming to come up with an adjustment.

reduction fired load ready to come out of the kiln

"The Art of Firing" had some useful information, as I said, but I was surprised that some of the information contradicts the hand-me-down knowledge I had hitherto learned in graduate school. This quarter I hope to find time to test some of Lou's recommendations. I threw some plates bowls and mugs last week after classes in hopes that I can fill most of a kiln with my work for a second test oxidation firing.

Tuesday, April 2, 2013

Local Graffiti

A short time ago I posted about graffiti and street art because I had just finished about book on the topic. Even more recently I have noticed more and more graffiti and other street art near our house and school. There are some newish pieces on the "Addiction" tattoo place. You can see them from Summitview Ave just before it connects with Yakima Ave. 

painting on the north side of Addiction

I first noticed the paint splatters when I was driving past. I think I noticed them because of the irregular shapes of the splatters on the white background and the color contrast of the greyscale with the bright flat red and blue. The whole piece looks very clean, an unusual descriptor for graffiti.

to the right of the paint splatter piece
A ways over, there is a glasses-wearing turtle in a doorway and around the corner, a woman's portrait. I like the portrait less than the paint splatters, but it is unusual to see this more realistic style of painting on the walls around here. I'm generally a fan of street art becoming more carefully crafted and more varied.

I think particularly the irises and the lips work well here.

Near the various medical facilities south of Yakima Regional Hospital there are several fish stickers on stop signs and other surfaces. My camera died before I got a picture, but there were several and I plan to get back there soon. The fish were pretty small, maybe 4 to 6 inches long and done on mailing labels. I've seen the mailing labels around for years, but the fish were more fun than what I have usually seen on the labels. They had cut out sections and the two or three I saw were each a little different.

winner!
Last week I walked back from YVCC via one particular road that doesn't have a sidewalk just to see the purple and green piece on the fence a few blocks east of the school. I found out this week that the piece was the winner in a graffiti battle. I didn't get a picture of the second place piece --I liked this one better. I think the color works well, the shapes are fun and I particularly like the cracking detail near the top. The piece caught my attention from a few blocks away and pulled me down the street to look. I found out about the competition from someone who lives near the battle scene and came home to see it in progress.