Showing posts with label school. Show all posts

Sunday, December 7, 2014

Raku Firing & Kiln Trouble

This was a busy firing week at school. We fired two and a half cone ten glaze firings in the gas kiln during the week and spent Saturday raku firing outside. We also fired several bisque and low temperature glaze firings in the electric kilns. Monday is the final critique for my beginning classes, so we are obviously getting as much work finished as possible.

Our school raku kiln shortly after we started firing on Saturday.

Now normally we don't fire half a glaze firing, but this was my first experience with a thermocouple that failed during the firing and caused the kiln to automatically shut off. The kiln went from 1949 degrees Fahrenheit at 4:20pm to 2400 degrees at 4:40 and the kiln shut itself off. I wasn't worried that it had actually gone up 450 degrees in twenty minutes, since the kiln has fired in a predictable way for dozens of firings and the pyrometric cones in the kiln weren't even soft. However, when I tried to restart it, the kiln kept automatically shutting off and I eventually gave up and let the kiln cool down.

Loading the barrel smoke firing.

Later I learned that the thermocouple is designed to read the highest possible temperature when it breaks, thus triggering the automatic shutoff. I also learned how to bypass the broken thermocouple for future firings. That night, however, I didn't feel comfortable taking the wiring apart during the firing. We let the kiln cool, added a few more cone packs to help us gauge temperature and refired on Saturday.

An independent student instructing a beginning student on how to load the barrel.

The raku firing this weekend went fairly well as far as weather and the pieces were concerned. We finished a bit early with all the pieces fired and my students helped clean up the leaves and paper in the kiln yard. The day was sunny and relatively warm by the early afternoon.

Adding shredded paper to the barrel before lighting it.


Our first propane tank froze up after the third firing.


Red/orange heat in the raku kiln top during firing.

After the firing I encouraged the students to move some of the detritus of the studio, including extra shelves, bricks and kiln posts to a different part of the kiln yard.

Pulling work from the reduction bucket after raku firing.

I think the students who fired were generally pleased with their work. The day included more students studying than most raku firings. We had intended to fire in November, but the weather prevented the firing. This firing was about as last-minute as it could have been as classes ended Friday and finals begin Monday.

A raku glazed piece cooling after post-firing reduction.

Saturday, September 20, 2014

22 Year-Old Candy Canes, An Enormous Room (Unfinished), and Some Wet Clay

What a strange week. On Wednesday, after some of our convocation events were over, I decided to tackle cleaning my work office. I moved into the strangely shaped room in Palmer Hall last February after the painting and drawing instructor retired. He left behind drawers and shelves full of old paperwork, equipment and files. 

I didn't take pictures in my office (too scary), but it looked kinda like a paperwork version of these trays of recycled clay.

Cleaning out someone else's old stuff is not exactly a priority during class time and in June I wanted to get right into my clay studio. Even this week cleaning out someone else's stuff didn't sound appealing, but it would be nice to be able put things away and use my file cabinets. So I turned on my audiobook and started the project.

Deciding to recycle the course catalogs and schedules dating back to 1983 was easy enough and quickly freed up one whole file drawer. Next I moved on to the hanging files with information about the department, the renovation of Palmer Hall (in the early 90s, I think) and old course outlines. The drawings of the proposed renovations for Palmer Hall were most interesting and I kept them just for fun.

The office cleaning process was as exhausting but less sticky than scooping up the partially dried clay to wedge.

For those of you who haven't been in Palmer Hall, its a funny building. It is round--in fact I usually give directions by telling students to find the round building. It used to be a library before it was repurposed for the art department, print shop, mailroom, security and media services. A few years ago media services moved to the newly renovated library, but the rest of us remained.

The art department has about half the building in three studios with exterior entrances and two offices in the center of the building. The very middle of the building is a series of rooms and halls that make it difficult for students to find the part-time office. The part time office is absolutely tiny and shared now by four faculty who literally cannot all sit in the room at once.

During the week I didn't get my studio work done at home. This weekend I had to try to salvage some clay I was trying to recycle. Some of it got too hard so I sliced the chunks of clay up and stacked them, interspersing dry and wet slices before re-wedging them.

As a contrast, yesterday the art department (and a few extras) took a tour of the replacement Palmer Martin building being constructed on the south side of Nob Hill Avenue. A three-person part-time office in that building is at least four times the size of the current four-person office.

The tour of the new building was fantastic. We had to wear hard hats and stand in the blazing sun for a while as we gathered, but we were taken all through both floors of the new building. The walls and windows are mostly in place and they are working on flooring in some areas. None of the rooms have sinks, cabinets or other built-in furniture, but there are visible electrical and plumbing connections that give clues as to the eventual use of the rooms.

Unlike my studio, where I have to reclaim my clay by slaking, drying, cutting and wedging by hand, the new building will have a dedicated clay storage and mixing room.
The clay studio looks absolutely immense. Of course we will fill it pretty full with tables, wheels, carts, sinks, shelves, and cabinets, but it is still impressive. The other faculty were teasing me about having the biggest space, but there are two large studios for drawing/painting and design, a lecture room, a computer studio, and another studio/classroom space.

The hallway down the middle of the first floor will have an enormous, long painting by Robert Fisher and a central area for a small student "gallery" space. The office area is downstairs and similar to, though smaller than, the Glenn-Anthon office space. For those of you out-of-state, understand that the office area is just really nice. 

I was able to finish recycling and wedging my clay on Saturday. Unfortunately I was not able to finish cleaning my office during the week.

And our public art installation in the entryway should be beautiful and inspiring. The building should be ready for us to start moving in this summer and classes will start next fall. I absolutely cannot wait. Which is why I have to clean my office. 

I spent all day Wednesday cleaning my office and in the early afternoon realized that I wasn't just cleaning the detritus of one other instructor. In the third drawer I discovered grades and old files and memos from the instructor who was in the office until about 2006. (I wasn't in Yakima at that time so I'm a little unsure about the timeline.) The odd thing is that when I came in 2006, I inherited whole shelves of books and a stack of files from that earlier instructor myself. She managed to have so much stuff that she left it stored in two offices. And I got to clean them both.

I spent Thursday night comparing and contrasting the strengths and weaknesses of four new (to me) Art Appreciation textbooks

The cleaning effort was eased somewhat by the discovery of entertaining oddities and bits of history. The strangest was found in a file of grades and old communications from 1992. Filed there with the old letters and test scores was an aged candy cane. I did not try it. Guessing that we had passed the date that people would need to reference the candy cane, I threw it away and shredded the grades. 

Unfortunately the most workable of the new texts has a sadly plain front cover--at least there's a cut-out. 

Unfortunately, I was not able to finish organizing my office this week. I had every intention of spending most of Thursday and Friday cleaning, but Thursday morning brought a surprise in the form of textbook troubles which took two days to sort out, more or less. Classes start Monday but I am still hopeful that I might have a chance to at least clear some surface space early in the week before students come rushing in with questions and things that need to be graded. 

Thursday, May 30, 2013

Good Year

I bragged about my clay students in my last post, but I've had a great year too.

At School
I've had a great year in my teaching career. At the YVCC graduation ceremony in June I will be receiving the Sherrie and Daryl Parker Faculty Award. Award winners are nominated by students. My clay students (the one's I just bragged about) nominated me this year.

The Distinguished Service Award goes to the Larson Gallery Guild of which I am a board member.

I was also nominated for ASYVCC (Associated Students of Yakima Valley Community College) Teacher of the Year. Both full time art instructors and three Humanities instructors were nominated this year.

And finally, I was awarded a sabbatical for next fall. I will be working in my home studio, preparing work for an exhibition in January at Columbia Basin College, exploring the problem of integrating non-ceramic materials into my clay sculpture, and preparing an article about my research.

Top half of "SRAM Gears" currently on show at the DoVA Exhibition at Larson Gallery

bottom half of "SRAM Gears" recently shown at Collective Visions Gallery in Bremerton, WA


In My Work
It has also been a good year for my sculpture. At the end of summer I completed a small set of work incorporating bike parts. I am pleased with the direction of this work and have shown the results in New York City, Bremerton, Ellensburg and Yakima

"SRAM Supported Botany" donated to World Bicycle Relief as part of the pART Project fundraiser


"Big SRAM", recently show at Central Washington University and the Tour of Artist's Homes; soon to be on exhibit at the Larson Gallery Membership Exhibition


I have also had success with other work in national and local shows. This year I have shown work in Texas, Illinois, Washington state (of course), and I have work currently en route to New Hampshire for a show called "Human/Nature." I was so busy with Tour of Artists' Homes and my students' events or other local events, that I completely neglected to even mention the "Women's Works" show in Woodstock, Illinois or the "Human/Nature" show in Manchester, New Hampshire before this. The New Hampshire show runs June 15-August 1 and I know at least two people who will be able to see the work in person.
"Zebra Mussels" on its way to New Hampshire for "Human/Nature."

It appears I will also have work making its way from its temporary home in my parent's basement in Wisconsin to St Croix, Wisconsin for a continuation of a Climate Change exhibition that traveled Wisconsin, Michigan and Minnesota from 2006-2009. 

"Taka Kozonanka" is in Texas for the "Texas National" exhibition.

Coming Up
Locally, my work is currently on display at Allied Arts of Yakima for the exhibition, "In Case You Were Wondering..." and I have work in the Larson Gallery through the end of this week for the DoVA Student and Faculty Exhibition. Next Friday the Membership Show opens at Larson Gallery and I plan to have work there as well.


Allied Arts Exhibition (their website is not up to date as of this writing)


My next big local event is June Art Fest at Chalet Place Mall (near Oak Hollow, Wray's and Inklings). Mike Hiler and I will share a booth. June Art Fest runs from 9am to 5pm on Saturday, June 8.


Wednesday, March 20, 2013

Glaze Leaching Tests

The big clay class project this quarter was an extensive leaching test on all our functional glazes. In January I read an article about liner glazes and testing functional glazes. The article, written by Deanna Ranlett, was in November/December 2012 Pottery Making Illustrated. I believe you need a subscription to read it online.

Sets of glazed bowls after setting up the test

I had my intermediate, advanced and most of my independent study students read the article, then we met as a group to discuss how we might implement testing of our glazes. Most of the current studio glazes were used at YVCC before I was hired, though we've added a few more over the years. The glazes are supposed to be food safe, but we are basing this assumption on historical use or on what the glaze recipes suggested when we first started mixing them for studio use. To my knowledge, we have never actually tested them ourselves.

A reduction copper glaze that has been in the studio for at least 7 years.

After reading the article, the students discussed what needed to happen and I was pleased to find that I didn't need to direct them much, mostly the students were able to determine how to divide the project between themselves. Each student make six bowls or plates for the project and each student was responsible for glazing their two sets of three pieces using the same coordinated glazing approach.

glazed bowls and plates with detergent and lemon

The students also worked together to set deadlines for their throwing, firing and glazing. One set needed to be re-glazed and was finally out of the kiln on Thursday, so we set up the actual glaze testing that morning. Each glaze was applied to three bowls, marked "control," "lemon," and "detergent." The control was left empty, a lemon was squeezed into "lemon" and left to sit, and a small amount of powdered dish detergent was poured into the third, then wet with a small amount of water and mixed lightly.

our glaze testing station

We left the whole set of bowls out on the counter, labeled, over the weekend. When we came back, we cleaned out each bowl, to get rid of the sticky lemon and bits of mold and the crusty line of dried detergent. Then we compared our results for each set of bowls, looking for signs of leaching.

new studio glazes. I expected the glaze on the right to leach

Glaze leaching was supposed to be shown by changes in the color or surface qualities (shininess) of the glaze. I anticipated that most of our long-time studio glazes would show no changes, but I guessed that some of the new, untested glazes would show signs of leaching. I was actually hoping that at least one glaze would leach, since 18 sets of unchanged pottery wouldn't prove a very interesting test.

Blue Matte glaze with leaching effects shown in middle bowl

The obvious flaw in our plan was the timeline, since students were using these glazes during the planning and execution of our tests. Any pots with glazes that leached should not be used for eating, serving or cooking and any functional pottery students making work, would likely expect the pots to be used for these very tasks. The article recommended that we use what are called liner glazes, to line the interior of funtional works. These liner glazes should not leach and, since they are generally white glazes, are cheaper to make than colorful glazes with a variety of expensive oxides and colorants added.

discoloration in Blue Matte glaze
The results of our test were unfortunate for a few students, but good overall. In our testing, almost none of the glazes leached. The newest glaze, just starting to be added to the studio options this quarter, was the only one with obvious discoloration with the lemon juice test. This new "Blue Matte" glaze contains lithium and copper carbonate, is a beautiful color, but obviously shouldn't be used functionally--who wants copper and lithium in their Cheerios?

Mary's Special (on bottom) with signs of texture change (center)

One other glaze, "Mary's Special" also appeared to have a change in surface sheen after a weekend's contact with dish detergent. I would consider this test result worrisome but inconclusive and I plan to re-test another set of bowls using this glaze while also urging students not to use the glaze functionally.

Sunday, March 3, 2013

Second Grade Clay Rattle Project

This coming Thursday I have agreed to do a project with some second graders at a local school. My initial plans were altered as I started to think about the logistics of directing 60 or 70 kids in one project. I don't want the project to be so complicated that the students will get lost or frustrated. I won't be able to directly assist all the students or correct individual mistakes, so I need to make the project simple enough for the kids to follow and do with little assistance.

turtle "rattle" made as a test of the methods I plan to use

woman whose skirt is a rattle, also made as a test

I also need to make the project interesting enough to keep the students engaged and to provide a challenge for those students who finish the basic project early. A good kids clay project, in my opinion, is one that "works" for a kid who is able to do only the bare minimum, providing that kid with an object that they can be proud of. A good project also needs to be flexible enough to interest the kids who find the basic steps too easy. Kids need to be able to decorate, add to, or improve on the basic design.

start with a ball of clay (two, actually)

 I also need to be able to do this project with minimal equipment, tools and hand-skills.

flatten the first ball of clay

The project I have chosen to do with the second graders is a small bell or rattle. I have done at least 3 iterations of this project with students over my years of teaching. The only tool that is absolutely necessary is a toothpick or needle tool and the only other requirements are clay and slip (or water).

squish together any cracks or irregular edges so they are flat and round

It is also nice to have a scoring tool, a paintbrush, some stamps and some scraps of paper. Opportunities for additions and modifications are essentially endless, but the central form of the project is pretty simple to make.

create a pinch pot with a second ball of clay, squeezing the clay at the bottom first


The project requires students to roll out two balls of clay and flatten one. They need to create a pinch pot with the other, and this is the most complicated skill required of them. To create the pinch pot, they need to start with a round ball of soft clay, push their fingertips straight down into the clay and then gradually increase the size of the opening by squeezing and turning the ball of clay. The key is to start squeezing at the bottom and leave the top rim thick until the end. If kids don't listen or understand this step, they will make a pancake pinch pot with no space inside for the rattle.

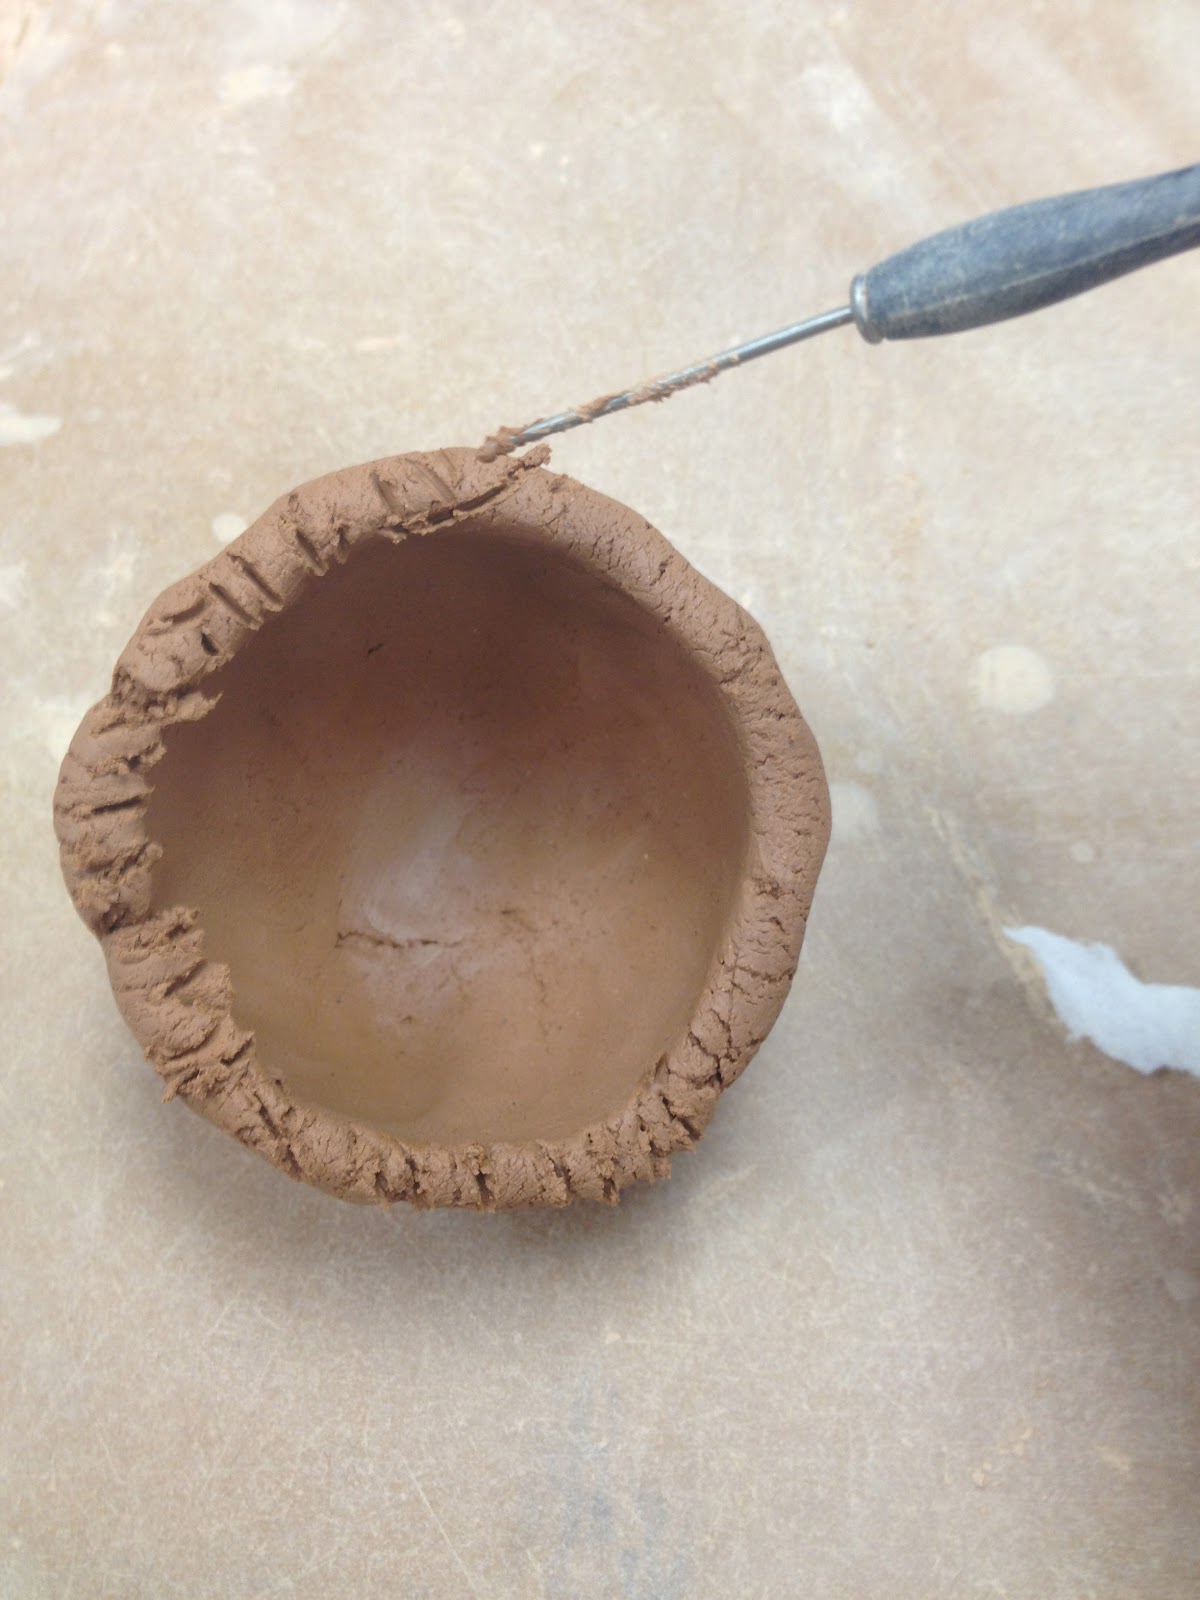
score the edges of the base and the pinch pot

Students then score (or scratch little lines in) the edge of the pinch pot and the outer edge of the flat piece of clay. It's a good idea to punch a hole in the flat piece of clay now, though it can be done later too.

       
make balls of clay and (optional) wrap them in toilet paper


Students make little balls of clay (to be the rattling sound makers) and wrap them in paper. The little balls of clay don't need to be wrapped in paper, but it helps prevent them from sticking if kids get slip on the balls of clay. The rattles won't make any sound when they are wet. During firing the paper will burn off and the balls of clay will become hard. After firing, when someone shakes the rattle, the hard ceramic balls of clay will hit the hard ceramic interior walls and make noise.

poke a hole in the base (now or later)

The little rattling balls of clay are put in the middle of the flat piece of clay. Students need to slip the attachment by adding water or, preferably slip (watery clay) to the seam. I recommend the kids put slip on the edge of the pinch pot so that they aren't too messy with the slip. I also recommend slip rather than water because students (and teachers) can see the slip better and know that the whole piece of clay won't be getting soggy.

add slip (watered down clay) to scored edges

The pinch pot is pushed onto the flat base, trapping the little balls of clay inside. A little pressure will help keep the pinch pot attached to the base. A little slip may squeeze out the edges. It can be wiped away. Excess clay can also be trimmed away if the base is too wide. 


place the pinch pot on the base, lining up the scored edges and trapping the clay bits inside

As I was making a couple test pieces, I was concerned that the project might still be too difficult for such a large group of students. I don't have regular access to dozens of second graders, but I do have access to one preschooler, so I brought my daughter into the studio to try the project. I figured if one preschooler could do the project without help, then 70 second graders could do it with minimal help. Also, I hear second graders can read and follow multi-step directions, so I plan to bring pages for each table that show step by step illustrated directions of the process.

it's a good idea to work on paper 
score the edges using a needle too, toothpick or scoring tool
add slip with a brush, don't get slip on the clay balls or in the middle of the base
put the two pieces together. it doesn't have to look perfect so long as it sticks

My daughter was able to make the form. She had the most trouble with the pinch pot, but I didn't need to take it away or have her start over again. Of course my daughter couldn't resist decorating her rattle. She added a body and arms, decorated with a clay stamp and drew in a face. Her piece wasn't as round as mine, but she was able to make a passable pinch pot without my assistance and all her attachments were strong. Her piece will not explode during firing, since she put a hole in the base when she was almost done.

scratching in the face
The most important thing I will need to check, or have my clay student assistants check, is that each piece of clay is attached securely and that each rattle has a hole in the hollow area to allow the hot expanding air to escape during firing. It is also important that no solid clay pieces are thicker than about an inch.

adding the air hole
I always tell kids about the "wiggle test" and the "rule of thumb."  The "wiggle test" means that if I gently wiggle the clay now (when it is wet) and it comes off, it will fall off later. Usually students have forgotten to score and slip their attachments and they can do that now. The "rule of thumb" means that no piece of clay can be thicker than their thumb. If it is thick, it risks exploding in the kiln.

decorating with a clay stamp
The only other risk in this project is that students will be frustrated that they can't make the clay do exactly what they want. I plan to distract the students with clay stamps and other tools they can push into or stick onto their clay. The fun of new tools should help appease the frustrated perfectionists.