Thursday, May 26, 2016

Raku Firing During Class in the New Building

Today was our second class raku firing in our new building. We have a new counter lift system to lift the top-hat off the kiln base. The kiln base is all new bricks this year, though we haven't yet replaced the insulation in the top hat itself.

Wax on the bottoms of cool pieces loaded into a hot kiln starts to burn before the kiln is relit. (image by Dave R.)

Students in my functional pottery, intermediate and advanced wheel and independent study classes met starting today at 9am for the firing. We set up the kiln top on the new winch lift system and put in some glazed pieces.
A spot next to the top hat on the kiln helps dry a pot that was glazed after the deadline.

Our kiln runs on propane tanks and a Venturi burner. We heat the work up to about 1800 degrees in an hour or so. Then when the glaze is molten, the pots are lifted out of the kiln with tongs and placed in buckets of combustibles.
Hot pots coming out of the kiln look black on the outside because the matte glaze doesn't melt. 

Our new space is fairly small, but well protected from the wind and isolated from the main classroom by two sets of doors that help keep the smoke smell contained. We fired, maybe five or six loads of work today, including a few pieces that were refired after less nice results.

Hot pots put into the buckets instantly ignite the combustible materials inside. Students are ready to add more paper on top for even reduction.

We also had a few students try horse-hair raku, where the horse hair is applied to the unglazed surface of a hot pot. The horse hair burns black lines in place on the pot. I think next time we raku, I will prepare the students a little more clearly on how the horse hair process works before they are staring at a hot pot.

Applying horsehair to a small bowl like this takes precision and planning.

As for the glazed, pieces, after the pieces are placed into the reduction buckets filled with shredded paper or leaves, we place a lid on top and let the pieces cool and smoke. The lack of oxygen and the heavy smoke affects the surface of the glaze and the unglazed surfaces of the pots.

Reduction buckets are left to smoke and cool in between firings.

This time we used maple leaves and shredded paper for most pieces. The largest piece was so hot that we had trouble keeping the flames contained inside our reduction bucket. 

Pulling a fired pot out of a bucket sometimes causes the paper to relight.

The reduction atmosphere inside the kiln and in the reduction bucket gave us some pretty good results with at least one of our matte copper glazes. These glazes can look like they have oil spills or flamelike colors on their surfaces.

Our classroom's "Hawaiian Copper Blue"

The matte copper glazes can also be combined with clear gloss glazes to add some shine to the surface. 
This piece has been fired about four different time with glaze added at least twice.

Students who used wax resist to keep glaze from some surfaces of their pots ended up with deep black areas where the smoke was absorbed into the bare clay. 

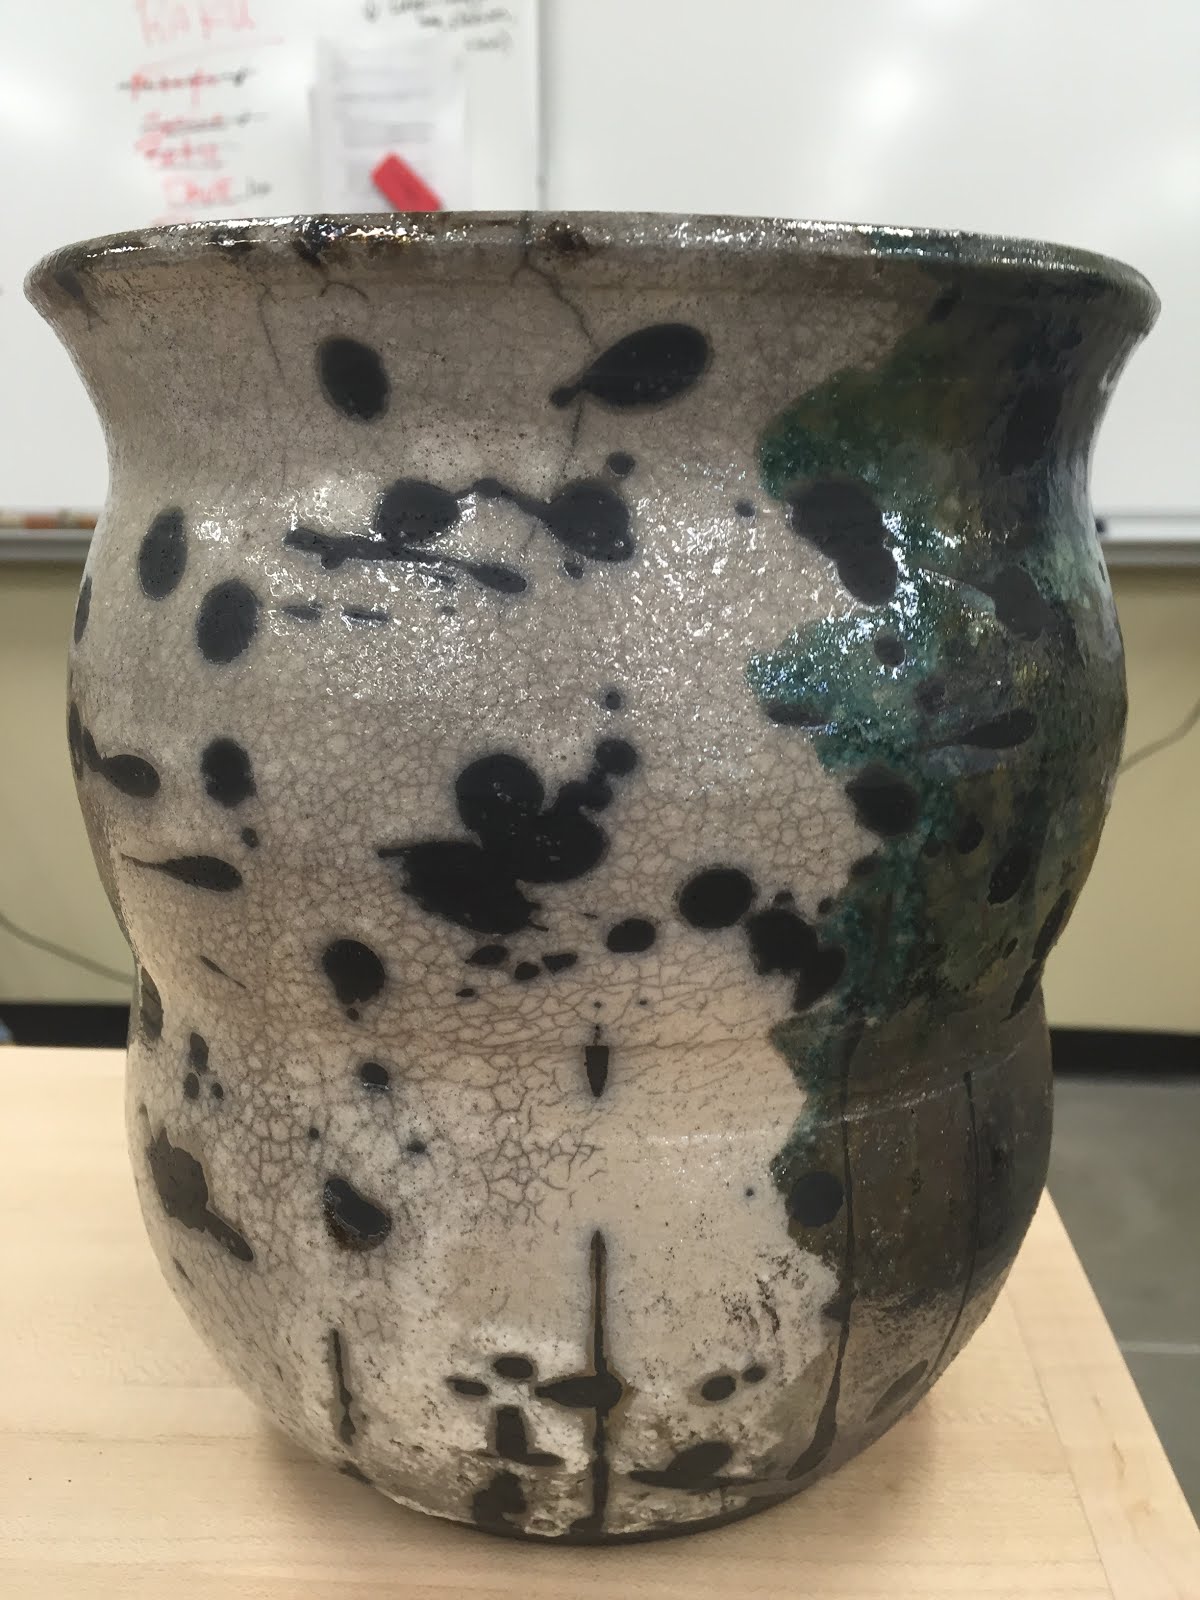
The white side is a White Crackle Raku glaze with wax resist dots, the green is our classroom's "Texas Twister" copper glaze.

Our most unusual results came from a fairly thick coat of a glossy copper glaze with maple leaves heavily packed on top. 

This glaze benefited from heavy reduction with leaves. The underside is a brighter blue green color.

Sunday, May 1, 2016

Spring Firing Results, Organizing, and Underglaze Color Reference Tiles

I have now fired thrice in the last six weeks, meaning I've been eking out time in my studio to glaze and weekend time to load and fire. The firings have been fairly dull so far; just some low fire odds and ends that had been waiting since last summer.

This is a staged shot, I forgot to actually snap a picture when I was unloading the kiln.

I have a new small kiln that my parents brought me from a friend in Wisconsin. It doesn't have more than one shelf at the moment, but I was able to balance a large domed piece on stills in place of a shelf and thus fire, essentially, two layers of work. 

This is the real firing, after I pulled out the dome piece.

The dome on stilts fired just fine, but either the entire kiln or just some of the pieces under it wobbled at some point, probably when I was closing the lid, and fell off their stilts and into one another. 

Oh no, those red pieces are stuck together!

One small piece fell of its stilt and just glazed itself to the stilt. After unloading that kiln, I realized that it would be beneficial to reorganize (by which I mean organize for the first time ever) my fairly massive stilt collection. 

And that weird purple thing is also stuck to the stilt.

That I have so many stilts is mostly a function of how I got the kilns and partly a function of another  donation of stilts from a now forgotten source. Some of them are great, some of them are not, but I think I've only ever actually purchased one small container of metal stilts.

So many stilts, now sorted by size and type.

The size of my stilt collection is roughly the size of my underglaze collection. After sorting the stilts (with some help from the kid) last weekend, this weekend we sorted the underglazes. Sorting my underglazes consists, in large part, of consolidating half full and mostly empty 2 oz jars  and rehydrating quite a few of them. I have purchased numerous 2 oz jars over the years as portable sample sets and because some colors don't come (or didn't used to come) in pints. Unfortunately the pints stay liquid much better than the small containers.

Duncan Cover-Coat Underglazes

I have two different brands of underglazes (and a few odds and ends). The Amaco Velvets are my faithful standbys and what I use most of the time, but I have full box of Duncan Cover-Coats, too. The Duncan line has some colors I like and they are generally cheaper, but I've had a few instances of peeling underglaze in the last year and those seem mostly to be the Duncans. The Duncan 2 oz jars are great for pouring out glaze, but terrible for this weekend's consolidation project, as the neck of the bottles narrows, preventing a tool from scooping out the extra stuff. 

    
Amaco Velvets and Liquid Underglazes (sorted into warm and cool boxes).

After consolidation, I took a full inventory of my underglazes (and the extra precaution of labeling the lids or easier identification in boxes) so I can replace those I am missing. A few years ago I made some reference tiles for my underglazes. I painted the number of each glaze (the numbers are short and easy to find when reordering) and lines with three different thicknesses of application onto bisque tiles. I then striped one section of the tile with clear glaze and fired them. These tiles are a handy way to check which glaze I used on a fired piece, since wet and even dry glaze doesn't always look the same before and after firing.

Some of my underglaze reference tiles.

With these tiles, my consolidated and labeled bottles, and my inventory, I was quickly able to determine that I am out of Amaco Velvet underglaze V-372 (Mint Green). I needed to determine this because last year I inexplicably used V-372 it on most of the bottom of a piece, but not all. Then I fired it so that it is permanent and promptly forgot what I had done. Now I have to fix it, but at least now I know what I need.