Showing posts with label class. Show all posts

Thursday, November 29, 2018

Looking Back: Year in Review

Annual Photo Album

Every year before Christmas I made a photo album featuring photos of my daughter with family and friends. I've been doing this since 2011. I make the photo album online and order copies for our family, the grandparents, and the aunts and uncles. Making the album feels a bit like working out. I dislike starting but feel better after it's done. I do enjoy some parts of actually putting the album together, but the process is exhausting and often frustrating. The biggest stressor is always trying to make sure that all the family is represented equally.

7 years of photo albums

I don't remember to take photographs very often at family events and only one side of the extended family consistently does remember. So the photo album always has candid photos of our family, usually featuring cats, and a bunch of posed and candid photos taken by my Dad and brother, who remember to take photographs. This sometimes leaves a gaping hole where all the visits with the other side of the family should be. It stresses me out because it makes it look like I've excluded part of the family when really it's just down to who remembers to take out the camera.

Our big family project of the past few weeks--Legoland Yakima

Most years, with my family far away and my mother-in-law close by, we remember to take photos for the big event of traveling to see family and forget to take pictures the many times we visit with Grandma. This year Grandma moved away too, so maybe we'll remember to take enough photos of everyone for next year. I guess that's a silver lining.

There were an extraordinary amount of cat pictures this year.

This year, without any family in-state, we didn't do much for Thanksgiving, so I had time to start on the photo album early (usually I panic and start it right after the quarter ends). The first step is going through all my photos from the year (or since mid-December when I made the last album) and looking for the family pictures in amongst pictures of my work, my students work, and the cats. I was really surprised by what I saw when looking back at the photos from last year.


Busy Quarter

This quarter has felt exceedingly busy, busier than most quarters, for a variety of reasons that mostly matter only to me. I'm always busy, but this year the busy has been heavily focused on school-related stuff and I've spent very little time making my own work, doing shows, or even applying to or planning shows.

Also we're getting ready for the fall Clay Sale at YVC (November 29 from 11-7)

Whether the busy quarter is just a normal thing that is only noticeable in the moment, or whether this quarter is unusual, the feeling has been that I'm busier with my day-job than usual. I've felt like I'm working hard and still barely keeping up. When a break comes, like it did over Thanksgiving, it feels great to do very little.
I do have excellent support at YVC, our Program Assistant made this t-shirt that we'll be selling at clay say for $15.

During this summer, I felt strange and didn't even make work in my studio during most of August. This fall I have neglected this blog a bit, both because I feel like I spend too much time already on the computer doing grading, and because I haven't felt like I've done that much worth writing about. (Who really wants to hear about the nuts and bolts of my attempt to gamify my classes? Me!)

Last Year in Review

plates for my brother

When I looked back at my pictures from December, I was surprised to see how much I'd done last year. Actually, I was surprised at a how much I'd done from December through March. Last December I was finishing both a custom set of cat nesting dolls for my nephew AND a set of dishes for my brother and sister-in-law. How did I find the time to do that? 

nesting cats for my nephew

In January I had new work at a Nasty Woman exhibition at Yakima Maker Space and in February I had work at an Art as Activism show in Hood River. I also undertook a major studio clean-up project in January that I finally finished in May. Why did I have so much extra time?

planter commission for my aunt
In February and March I finished and shipped a commission of planter sculptures for my aunt. In February I also installed new work at Yakima Maker's Space and at the end of March I presented twice at NCECA! Also, though I haven't written about it, I did finals and finals grading at NCECA and the day I came back, then immediately spend my Spring "break" doing an on-campus ESCALA training before beginning both the Spring Quarter and my ESCALA project.

NCECA 2018
But it didn't even end there, I had work in yet another show in April at Boxx Gallery in Tieton, in May at  Gallery One in Ellensburg, and immediately after the quarter ended, I made two sets of new work for an Art a Day show in Hood River in August. Then I joined a new gallery in Yakima. And during this time made a bunch of demonstration videos for hand-buildingflipped my classes, our cat died and we adopted three more, and I made a set of 3D printed work for the YVC Viticulture program. I didn't make any work in August, in part, because I was exhausted (also, I wanted to do all this gamification and rewards for my online class).

Political Bulb from one of the installations last year
I'm exhausted even now. I guess I went full speed ahead through Winter break, through Spring break, and even skipped my usual "buffer week" in June. No wonder I haven't felt like doing anything this fall.

Best Friend at 20 years

Thursday, August 9, 2018

Gamifying My Online Class

Last month I finished making some sculptural work for a show in Hood River. That may be the end of my studio work time this year, because I've taken on a significant new project. I am planning to turn my online Art History class into a kind of game, and that daunting process looks likely to take up the bulk of my time until classes begin in September.

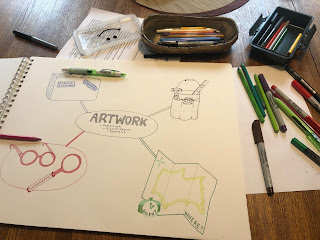
planning a mind map for the Art History class/game

I've heard a little about "gamification" over the years, but haven't encountered any faculty who've actually done much with it. The idea is to make an online class more like a video game and less like a lecture class. A gamified class would be interactive, fun, and engaging. Of course, I hope my classes are already interactive, fun, and engaging, but the idea is to make some changes that reduce the fear and test anxiety and increase the students' motivation to do the work. 

Ideally my gamified Art History class will have a kind of story, in this case the story of journey, which students can follow and tasks, challenges, and activities throughout that provide opportunities to earn points, badges, rewards, and praise. The overarching idea is to keep their attention, not just on the class content itself, but on doing the work. To determine if they have learned the content, I need them to show me what they know. Showing me what they know, through quizzes, tests, and writing assignments isn't always inherently fun, but if they are rewarded immediately for their efforts, and if the quizzes, assignments, etc can be broken up into smaller pieces, the hope is that they will be easier and/or more rewarding to complete.

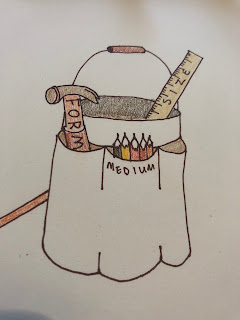
the "physical properties" tool bucket includes a form hammer, medium pencils, and a size ruler, the idea is to remind students to think about size, form, and materials when discussing physical properties

I am modeling my framework partially on things like Khan Academy and DuoLingo, both of which give credit (in the form of beeps and bings and electronic badges or points) for brief activities, quizzes, answers, and even just for watching videos. Because of the rewards, both Khan Academy and DuoLingo are fun to use, apart from what one learns. 

the first part of Art Student's journey, collecting tools, equipment and training in the first week/introduction section

I have some idea of what needs to happen and what makes games addictive and fun, but I don't have really any experience in making something like this myself. I don't know how to make the quizzes have beeps and bings (and it looks like Canvas isn't ready to enable this for me, but I'm not sure why not). I also don't know how or an unable to incorporate moving parts like a video game (I'm really thinking that Canvas' next update should include some kind of a health bar on the top and students can refill it by watching the required videos and participating in the discussion forum). 

Since my skill and the current course management system won't do all that I can imagine, it is my intention is to be somewhat reasonable with my time and simply take some steps towards gamification. The first step has been thinking through how this will work. What is the story of this game and how can the various tasks that need to be completed for the students to learn and demonstrate their knowledge, be integrated into that story? 

my first sketch of the student avatar and tools

Strangely enough, I am finding this process to be quite edifying. Generally, I am having fun envisioning what this could look like and how it might work. Next week, I am planning to attend a Webinar about how to use badges and I find that to be very exciting (because I am apparently a huge course design nerd?). This week I tried to figure out badges on my own and gave myself a pounding headache without making a great deal of progress. The next day I learned about the webinar.

"subject specs" are gear that Art Student can collect to help with quests on the journey

I hope that the webinar will be useful and will allow me to use badges as rewards without making a lot of work for me creating and activating them. On the day I developed a headache I was trying to figure out how I could make them visible, make them look like actual badges, and award them to students after certain tasks. I was hoping to use art related gifs or small images that illustrate concepts, but I was running into size issue with the gifs and permission issues with the images. 

I came up with two possible solutions, on is drawing the badges myself and scanning them, and other other is using artworks from our textbook as the badges. Both of these will probably work ok, but I'm hoping for more from the webinar. The good news is that the drawing part of the process is fun and restful in a way similar to working in my home studio, whereas looking for stuff online and trying to manipulate it is frustrating and headache inducing.


A sculpture related SpongeBob gif could be a fun reward badge, right?


There's one more tool that I've been starting to try to learn. SoftChalk is a new software/tool YVC is adopting. It has been pitched as a way to create more interactive activities than we can do within Canvas itself. Of course there is a learning curve and no one on campus who knows the tool yet. It has been suggested that the person on campus who will explain the tool to others is me. Uh oh. 

I tried watching the intro video and discovered it explained how to edit text, adjust heading size, and use folders. My mind melted from boredom after watching this 8 minute video (at 1.5 speed), I decided to just try to use the tool myself. Making the pages and importing content was basically fine (though importing from YouTube isn't as intuitive as it could be), but when I tried to create an interactive assessment, I apparently missed a very important step. The result looks like my nephew's etch-a-sketch drawing.

This first attempt does not look like an enjoyable assessment activity.
Now that my headache has abated, I do intend to go back and try again, but with so many parts of the project, I haven't done so yet. The next day, after taking care of some unrelated work at school, I sat down to sketch some plans on paper. I found the drawing to be relaxing and enjoyable, similar to working in the clay studio and unlike working on the computer. 

Sketching and drawing has been very helpful for visualizing how this class will work in this game or game-like iteration. At the start of the summer I bought a very large sketchbook and started brainstorming and categorizing ideas and plans for the first few weeks.  

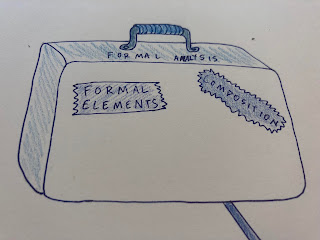
The "visual structure" section of the mind map and a suitcase of tools student will collect in the class/game. 


The process is seriously challenging in both conception and execution. I enjoy the drawing part, but it has been more difficulty to come up with a relatively cohesive "story" for the game and useful symbols or images to help the students understand how these class concepts can be used to understand art and to navigate the gamified class. At this point I am envisioning a journey, but I am not completely confident in how I will translate taking a quiz into the world of the journey.  

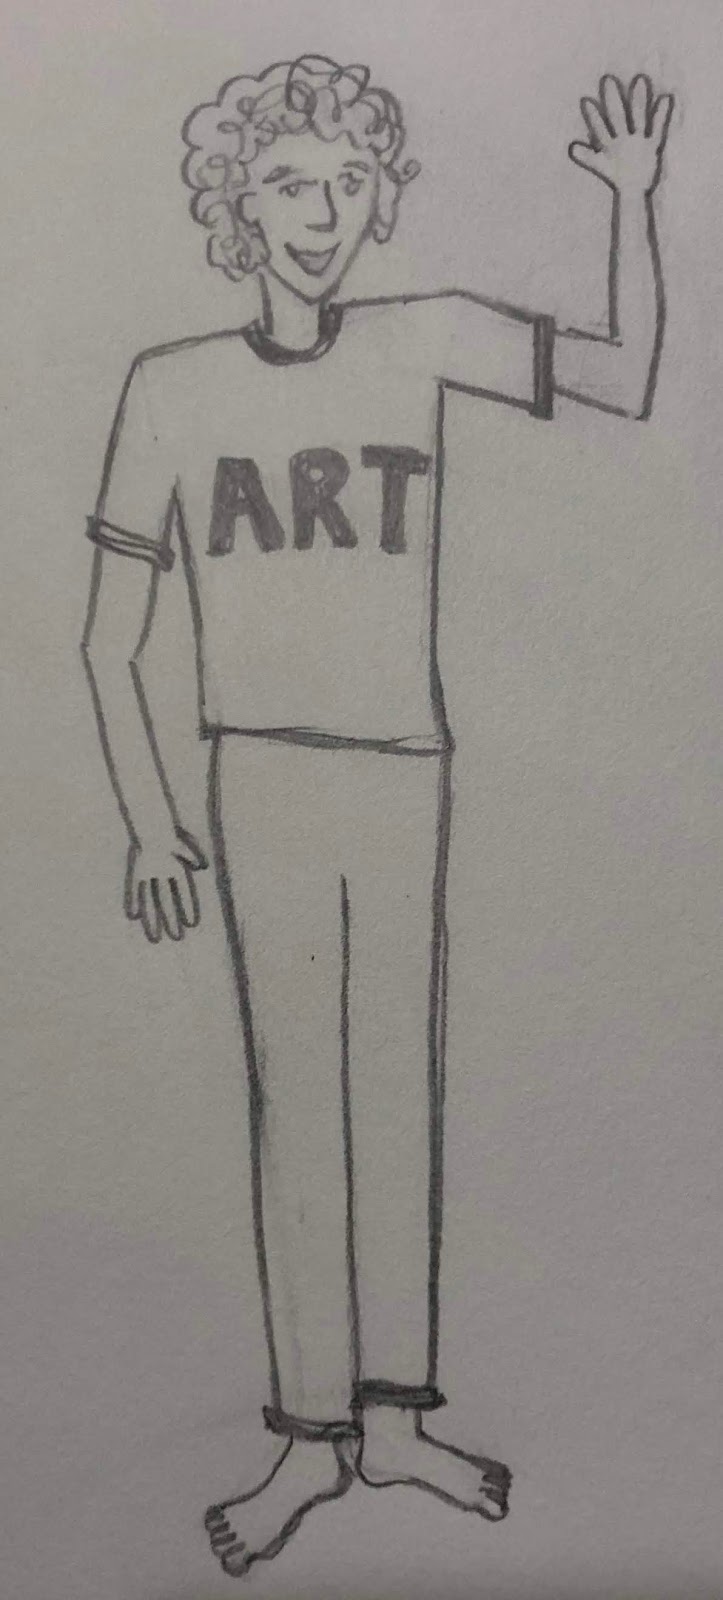
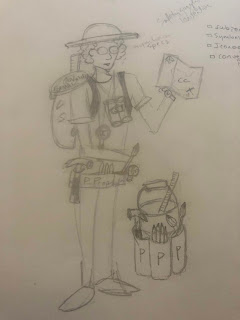
So far, I have developed an avatar for the class, an ambiguously gendered (hopefully) person named "Art Student" (I figure Art can be short for Arthur or Artemesia) who can go on a journey. In the first week of the class, students will collect some supplies or tools and equipment for themselves and the avatar to aid them on their journey. 
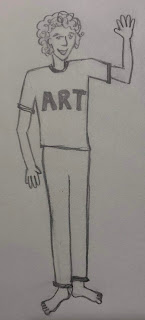
Art Student

At the start of the class, students will see a barefoot Art Student inviting them on a journey. The first step will be to learn about the structure of the class and, in so doing, earn Art and themselves a pair of hiking boots and a back pack. 

I usually record a video or two about the structure of the class, and I figure I can use a backpack as a prop when I pull out the textbook and a planner to talk about timing for the class and successful study skills. As I describe this here, I feel I'm balanced precipitously between this being a fun way to start class and an absolutely cheesy way to do it. Either the students will go along with me and my cheese drawings and limited technology integration or they will groan and flee the class in droves.


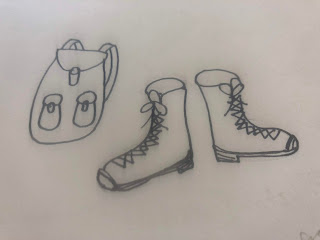
boots and backpack, the first equipment students will collect for their class

The rest of the first week will be spent on learning some terminology and attempting to set up a structure for how we approach the class. I like to work with a framework of four different categories when looking at art: subject, visual structure, physical properties, and cultural context. I've illustrated each of these as different types of tools or containers that Art Student can wear or carry. I am hopeful that this visual will help students learn the concepts, but also keep them connected to the story of the game.

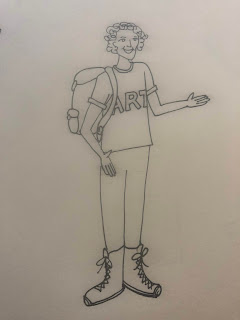
Art Student ready to begin the art history journey

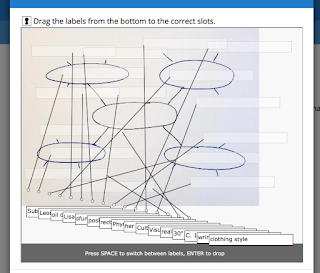
I found that SoftChalk doesn't appear to let me draw directly in the tool, which I thought it would do. Instead, it seems that importing images is the way to go. The day I was working with SoftChalk, I just drew up a quick sketch of a mind map to use in the activity, but quickly realized that SoftChalk "grading" won't allow the different parts of the mind map to be put in a different order. 

The mind map is simply a visualization of the categories I use in this class, and as such it doesn't matter if "subject" is in the top right or bottom left of the map. However, SoftChalk thinks it does matter. I realized that I will need to include some other kind of clue if I want the students to put the mind map together "correctly" in the SoftChalk tool. 

the "subject" section of the mind map

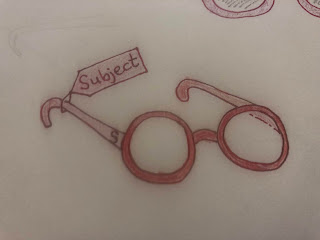
So today I drew a new mind map, but in place of the word "subject" I drew the tools or equipment I intend to have the Art Student collect when learning about subject. In this case I have developed "subject specs" as well as a symbolism sunglasses, a magnifying glass that identifies iconography and a set of binoculars that discern conventions. As I write this I realize that I might be basing this class game more on Dora the Explorer than some mature video game that teenagers and young adults will appreciate. 

In this vein, I've also created a map (Dora again) and watch to suggest cultural context, a suitcase for visual structure, and a bucket of tools for physical properties (including materials, form, and size). In the mind map activity, if I can get it to work right, these visual clue should help students correctly identify the sections of the mind map, which they will later be able to use themselves to create mind maps for particular artwork. 

"I'm a map!"

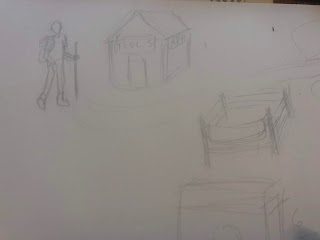
I've also sketched a graphic syllabus in the form of a map of the conceptual journey that the real students will take with Art Student through the class. The idea is that they are moving through the course content as through a physical space (even though, uh, the different sections of the class happen in some of the same spaces at different times in history/prehistory). 

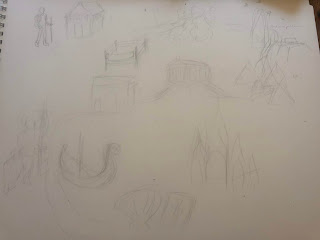
a lightly sketched version of the graphic syllabus or map of the course


The other element of the gamified class that I want to integrate is the idea of quizzes, activities, and assignments as "quests" the student/avatar/player goes on to earn points/energy/knowledge for the class/game/journey.  I am thinking of it all of these different tasks as ways of gaining energy points for the journey, and I can almost see how it will work, but I also want to distinguish between the types of practice, studying, cooperation, etc that students do when learning the content. Combining the two ideas, of the game and simply being students, is much more complicated and I don't want it to confusing things.

I have barely started on the actual integration of these new images, revisions, and changes to the class in the online course management system itself. It is a big project and less straight-forward than other revisions I have taken on in my classes in the past. I hope it will work. If you have any suggestions or if you've gamified a class or know someone who has, I'd love to hear from you. 

Friday, June 15, 2018

Fourth Grade Clay

my daughter's vase with five glaze colors


Last week I visited my daughter's 4th grade class and had the students make coil pots. Most of these kids had done at least one clay project with me before this. Here are the results of the project.

fourth grade coil built pieces

Most of the kids these year were in the same class last year because they looped up with their teacher, so most of them were in the class last year when we made critters from molds. Some of the kids were also in the class the year before when we made wind chimes (which is not my favorite clay project, and apparently I didn't even write about it in the blog), and the year before that when we did Salmon Bells and the year before that when we made plaques of the life cycle of a butterfly.   

the bottom coil on the front piece is slightly lighter clay than the clay of the top coils

I used to go to my daughter's pre school and do clay projects, like this simplified bell project and a super fun version of a name plate (Derek's still makes me laugh), but none of these kids were in her preschool. I also used to do a second grade clay project at another school every year, but their organizers changed and chose not to do the project this year.

both hearts were glazed in clear with some colored glazes highlighting the interior textures

So this year's group had lots of kids who'd had one or two or three or four years of doing clay, albeit once a year. The district elementary schools don't have art in the classroom or as a "specialist" class like music or PE, so the kids don't get to do much art ever. Strangely, their report "cards" have a spot for art, but I'm not sure what they measure. Maybe my clay project is it.

many of the students put handles on their coil built shapes

I figured that kids at this age with or without much clay experience would be dextrous enough to build with coils and could listen to directions well enough to to make a structurally sound vase or mug in about an hour. I think the vast majority of the kids would have like to have more than an hour, but they were all basically successful. 

this student was very careful about adding different textures to each coil, so we decided to glaze each with different colors

One student had a base that came detached from the walls of the piece, but I was able to reattach it using glaze as a adhesive. Another student had a decoration come off the wall of his or her piece, but that accident was helped along by one of my adult students who was loading the kiln and bumped the dry piece against the shelf.

some students added decorations to their pieces that seemed to call for contrasting colors

It would have been nice to have the students glaze their own pieces, but in just an hour I wanted the students to concentrate on building, not adding colors. Also I was a little concerned about students getting glaze on the bottoms, or getting their just-built pieces so wet from the glaze that the walls became soft and fragile.

the angel is glazed in clear with another color on the coils

Obviously if I had the students in class on a regular basis, they could have built and glazed their work over the course of several days (or weeks). Next year I might suggest a project where we come back and have the students glaze. 

the coils in the mustache mug were done with clear over a wash of another glaze, the eyes on the other mug were hard to see before I highlighted the eyebrows. I think the cup on the right had its base reattached with glaze.

I ended up glazing the pieces myself with help from my daughter. It seemed a little heavy-handed to glaze the work for them, but I also thought the students would enjoy having glossy pieces. I initially planned to just glaze everything with a simple coat of clear, but when it came to it, I discovered I didn't have much clear. 

this student added little balls of clay under some of the coils, they were fun to highlight with another color glaze

I did have a variety of glaze colors in pints and smaller sizes. I don't use these glazes a lot, so I figured we could use them on the students stuff and maybe use them up. I had some glazes that would highlight textures, but I also used some to highlight different pieces the kids used in their coil building.

this mug had so much going on that we tried most of the glazes on it


My daughter also helped glaze some, she especially concentrated her time on glazing her own, but she helped on a few of her classmates' pieces as well.

the piece on the right is the only one that is has a permanently closed top

The pieces were bisque fired first, then glazed with several cone 05 commercial glazes from Amaco and Mayco. Then I fired them in my home electric kiln and was able to get them back to the kids before school let out this week.

this one has stars all over the inside which we tried to highlight with Copper Averturine

We used Amaco's Clear Transparent, Deco Gloss Mocha, Artist's Choice Green Float, Camel and Burnt Orange, and Mayco Elements Copper Aventurine and Malachite. The Camel and Burnt Orange don't really highlight texture, but I was hoping the Aventurine would. It showed variation with application, but was also a bit distracting, at least the way we applied it.

I think this one also has Copper Aventurine

The Burnt Orange was really dried out, so we added water, but it didn't want to mix. I ended up using a wash of Burnt Orange under a coat of clear gloss. This was one of the more successful glazes, actually, because it highlighted the texture of the coils. Basically I just got as much color in the water as I could and then made sure to cover it with clear so it would be glossy.

on the mugs with smoother surfaces, we tried using some of the more opaque glazes like Mocha

All the pieces were made with some recycled clay from last year which is a mix of whatever I had around the studio. The mature or vitrification temperature of the clay is unknown. Additionally, I didn't realize this until we were in the middle of the project, but some of the clay in the bag I brought was slightly redder in color due to what was recycled. This may not have been a bag of the clay the kids recycled with me, it may have been some I recycled in a pillowcase later in the summer (the link is not where I learned this originally, but that may have been a Facebook post).

this footed bowl has mocha inside and probably Aventurine outside
Anyway, the two color clay didn't impact the attachments for the pieces or the color of the glazes, but it did show up as a very subtle different under the clear glaze in one instance where the student made the bottom coil with the lighter clay and the top coil with the redder clay.


the bowl on the left has Copper Float on the outside, I believe

One of the risks of working with kids is that they apply too much glaze or get it on the bottom. I carefully cleaned off all the bottoms before loading the kiln, but we also glazed the handles and walls all the way to the bottom, meaning that if I set the pieces right on the shelf, the handles were likely to stick and the glaze on the walls might melt down and stick, too.

drips on the bottom of my daughter's vase

To prevent that kind of trouble, I fired everything on stilts and was glaze I did. Only two dripped, but one dripped from the inside right through a faint crack in the floor and would have stuck to the shelf. My daughter's also dripped slightly down the walls and onto the bottom. Because we stilted it, it didn't stick and now sits nicely on the table.
drips running through the floor of Giselle's mug

Wednesday, October 15, 2014

Failure

Sometimes an idea keeps coming at you from various angles as if the world wants you to take notice. Or maybe you've taken notice of an idea, so it just keeps coming to your attention. Anyway, this week that idea, for me, has been failure.

Wait, that sounds awful. It sounds like this has been a terrible week. And it absolutely hasn't. I'm talking about the good kind of failure.

the bad kind of failure (because it breaks my kiln)
In my throwing classes, in particular, I encourage failure. For years, I have started class by telling students they need to make mistakes to learn about the clay. This quarter I'm either saying it more, phrasing it differently or just noticing how frequently I say it. Regardless, I was feeling pretty good this weekend when, twice, my methods were supported by outside sources.

learning to throw
First, my mother-in-law sent me a link to an article, "How Failure Molded Spanx's Founder." The Business Week interview with Sarah Blakely focuses on her successful undergarment company, but her answer to the third-to-last question was what caught my mother-in-law's attention and what caused her to share it with me.
"When I was growing up, [my father] encouraged us to fail. We'd come home from school and at dinner he'd say: 'What did you fail at today?' And if there was nothing, he'd be disappointed. It was a really interesting kind of reverse psychology. I would come home and say that I tried out for something and I was just horrible and he high-fived me."
My mother-in-law must have read more than just this article because, as she explained it to me, Blakely talked about her father working with her on each failure to improve for the next attempt. The idea here isn't that she should be bad at stuff, but that she should try stuff she isn't (yet) good at. She needs to be willing to take the risk and then, later, willing to look for ways to improve so she can try again.
a bowl with beginner mistakes
Sunday morning I was listening to the TED Radio Hour via an NPR app. The interview with Sir Ken Robinson sounded interesting because it had to do with teaching creativity, or, more accurately squashing creativity in school. I started listening to hear what he had to say about encouraging creativity in school. (Another recurring class issue for another day: why do students always tell me they "just aren't creative"?)

cutting off the mistake on a beginner bowl
The interview on NPR included segments of Robinson's TED talk. Around the start of the second minute he tells a story about a girl drawing in class. He explains that kids aren't frightened to be wrong and then identifies the value of taking these sorts of risks: "If you are not prepared to be wrong" he says, "you will never come up with anything original."

the beginning of something original?
He continues to talk about valuing creative pursuits in school rather than looking at them as dead-ends, soft options, or "easy" classes. Robinson talks about the hierarchy of subjects with STEM and language at the top, humanities and bit lower and the arts in the basement. I particularly like the way he phrases this academic focus "...and then we focus on their heads, and slightly to one side."


I'm sure I'm not the only person reading who will sympathize with students being steered away from certain subjects. My high school guidance counselor told me I should take fewer art classes in my senior year because I was "smart". I reacted by asking to see a different guidance counselor. It might be funny that I reacted this way, and ironic that I ended up as an art instructor at a college (I think about going back to tell her sometime), but the incident reveals more about what a privileged kid I was--I knew I could get away with asking for a new counselor.

yuck, my mistakes
The TED Radio Hour interview and the TED talk are both interesting and worth a listen and both talk about more than just the failure I'm focused on, but I keep noticing this theme of being wrong and failing and making mistakes as paths to success later on.

I learned about the underglazes after making these mistakes

So back to my clay studio classroom: When throwing pottery on the wheel, student naturally make mistakes that lead to the clay collapsing, in sometimes dramatic fashion. Lumps of clay fail to become bowls because the wheel is spinning too fast, or too slow, because the student pushes too hard or moves her hands or leans the wrong way. There are lots of ways to fail on the potters wheel.

centering the clay is the most difficult part of the process
There are also a few ways to avoid failure on the potter's wheel. I always tell my classes about two students who took my class years and years ago. The two would sit together, chatting about everything and anything. Their wet hands would hover over the lump of clay and the lump of clay would spin and spin and spin around the wheel, never changing. The girls would use just one piece of clay the entire class period and would never break through a wall. Because they never actually touched the clay enough to make a mistake. They didn't make much. They didn't improve and they didn't "fail." (Obviously I mean their pots didn't fail. I wouldn't discuss their grades even if I could remember). They safely passed the time in my class chatting while the wheel spun.

centering the clay
On the other hand, the students who come in a throw and throw and throw and end up with a lump of broken bowls on the side of their wheel are the students who, suddenly, in the third or fourth week are making lumps of clay into shapes that look just like bowls. They know what they need to do to make a bowl stand up because they've tested all the limits. They know what it feels like to spin the wheel too fast and too slow. They know what happens if they push too hard or move their hands or lean the wrong way. Now that they've tried all the ways to fail, they can also find the space in the middle: the right speed, the right pressure, the right angle and the right position.

yea for failure!
I tell my students if they aren't making mistakes, they aren't trying hard enough. And it seems there's some other successful folks who agree with me on this method. It applies so directly to clay. I wonder how it applies to other disciplines, or if, like Robinson suggests, it applies more to the arts than to the academic "core" subjects.


*After writing about failure this weekend, I showed a DVD to my Art Appreciation class on Monday morning and realized that even it (a film I show every quarter) illustrates the value of failure for an artist. Rivers and Tides documents Andy Goldsworthy building his temporal sculptural installations in various natural locations. The segment from about minute 18 to 26 shows Goldsworthy building one of his seed forms out of stone. We watch him build it over and over again each time it collapses, while the artist talks about how, each time, he understanding the material a little better.


(sorry if the video goes bad, I can't believe the whole thing is available on YouTube right now)