Showing posts with label planning. Show all posts

Thursday, May 25, 2017

More Protest Bulbs

slipped and unfired bulbs in the kiln before firing

Last week I fired a batch of protest bulbs I am working on for a show next month. I was disappointed in the color of some of the bulbs, so I made a slip out of the clay I was using and painted that on the pieces that had the wrong color.

   
bulb before firing (left) and bulbs from batch one and batch two after firing

I fired a few new pieces and refired the slip coated old pieces this week. Strangely, the color of both the slip coated pieces and the new pieces made with the same clay is different than the color of all the pieces in the first firing. The bright red/orange color shows up both on the pieces I have coated with slip and the new pieces that were made with the same clay, from the same bag, using the same techniques. 

two bulbs, made in the same batch, one with a coating of slip

The reddish color doesn't bother me on the new pieces, but my application of the slip was not consistent, so it looks bad on the old pieces. Since I'm not sure why the color is different, its hard to know if refiring will solve the problem. I did fire in two different kilns. One is older, and perhaps the elements have stuff on them. I also forgot to plug the spy holes until partway through the second firing. I guess this might be the answer, but it seems like the spy holes would have counteracted the old kiln elements. 

the problematic slip is streaky on the bulb. The flag is ok.

I was hoping that the pieces could be colored and glazed minimally so I could show off the color of the clay, but if the clay color changes mysteriously, I'm not sure if the effect will be what I intended.

 
bulbs fired twice, once with slip

I also applied underglaze to a few pieces. The deadline I am attempting to meet is coming up next week, so I don't have much time to make decisions or fix issues. At this point I'm thinking color, maybe a bit of glaze, and done.

 
bulbs with underglaze accents, unfired

I unloaded the kiln today. I have two more pieces that are unfired. I can actually show the with the underglaze applied and not yet fired, but a few of the pieces are meant to be mixed media, so I'm going to have to carve out some time next week or this weekend to get them finished.

I knitted a pussy hat for one of them, but it doesn't fit correctly. I haven't decided if I'm going to reknit, refit, or scrap that bulb.


Tuesday, March 24, 2015

Schedule Planning

This week is spring break for YVCC. I don't have a much of a break myself, since I am installing work for Storefronts in Seattle (on Mercer in the South Lake Union area) on Thursday and Friday. I'll also be working at CORE Gallery this coming Saturday for the last day of the current show.

Yesterday I spent most of the day at YVCC working on curriculum with my department, so today and tomorrow are the only days I can get my classes prepped and spend some time in the studio.


Today I am firing a kiln (which doesn't look very exciting) and preparing for spring quarter classes which start next week. Next quarter I will be teaching an alarming sounding six classes, several of which overlap with each other in time. I teach overlapping classes so that I can offer upper level classes for students continuing in clay. This quarter I will be teaching Intro to Clay, Intermediate Wheel, Intermediate Hand-building and two sections of Functional Pottery, as well as a handful of Independent Study students.

The only class I haven't taught before is Intermediate Hand-building, though I taught an experimental version of it a few years back for a student who was technically registered for Independent Study. One of my most daunting tasks today was putting together a calendar for the various classes. I like to keep a calendar posted in the clay studio so that students know what to expect for lectures, demos or due dates on a given day. It also helps me keep track of which classes are doing what on which days. Especially with two sections of the same class and two sections of overlapping classes, it helps me to not forget a demonstration or assignment.


Usually I can just recreate the previous quarter or year's calendar, but this spring's schedule has a few extra surprises I need to factor in. I have the new hand-building class and I'm going to miss a few days for various things, but I want to make some changes to my Intro to Clay class schedule. The class is relatively new (this will be the third time I've taught it) and though I was generally pleased with the class last fall, I didn't feel that the students had enough time on the wheel.

Additionally, with the Intermediate Hand-building class meeting at the same time, I need to leave enough time for introductions, demonstrations and discussions with students in both classes. With only 2 hours of class per day, I don't have much room for error if I'm going to cover all the material I wish to cover.

The schedule looks a bit messy in it's current draft, but I'll be revising it tomorrow when I go in to school. My work time today is already almost over, since the kids are on short days for conference week. If you'd like to take Functional Pottery, I still have room in my classes.

Saturday, July 19, 2014

Measuring Shrinkage

I talk sometimes about measuring my work so that I can account for shrinkage during firing. Clay shrinks during the drying and firing process but metal and plastic bike parts do not shrink, obviously. I need to build my ceramic sculptures a bit larger than I intend them to be when fired. The same issue comes up when building lamps, water fountains, sinks and more lamps.

Bike gear set on top of a fired shrinkage tile. The clay impression of the bike gear is visibly smaller than the gear itself.

At school I tell students we have about 12-13% shrinkage from wet to glaze fired. We tested it quite a while ago, but my clay at home I haven't tested. I suppose I could look up Seattle Pottery's listed shrinkage rate, but I'm firing to a lower temperature and mixing old clay bodies together, so it's best to check shrinkage myself.

Shrinkage tile after firing

The easiest way I know to test shrinkage is to make a shrink tile. I rolled a slab out of my clay (in this case I am using Seamix with sand from Seattle Pottery) and cut it into a rectangle at least 12 centimeters long. I used a ruler and a needle tool to mark a 10 centimeter line in the clay. I labeled the tile with the clay name and punched a hole in case I want to hang the tile later. Then I let it dry slowly before firing to prevent warping. Shrinkage can still be measured accurately with a flexible ruler on a bent tile, but it's easier if the tile stays flat.

Shrinkage tile with ruler to compare measurements before and after
  
I marked each centimeter just in case I made a mistake on one of the marks. With more marks, I can check shrinkage for 10 centimeters or each centimeter individually. (For those of you who enjoy a math challenge, go ahead an use inches for your marks, but calculating shrinkage rates and double checking measurements is much easier in a base ten system.) After firing I remeasured the original line. The new length is 9.4 centimeters. I lost .6 centimeters during firing. My shrinkage rate is 6%.

Metal rod standing inside wet clay form. Notice the 6% gap.

Knowing the shrinkage rate is helpful to give me a sense of how much the clay changes. I could buy or make a shrink rule to help with measurements (we have one in the YVCC clay studio), but my usual approach is to guess and estimate. This week I decided to guess during building and then use the fired shrinkage tile and my ruler to check my guessed measurements. 

Measuring the bike rod against the shrinkage tile measurements.

I built a form into which I will insert a tall black metal rod (the part that holds up the seat on a bicycle). I measured the diameter of the rod using my shrinkage tile. The diameter was about 3.5 marks on the tile, which translates to 3.5 centimeters before firing. (I didn't bother to check the actual diameter of the rod because it doesn't exactly matter using this method.)

Measuring the wet clay opening with standard centimeters

Interestingly, the interior diameter I had built into the form using the highly precise art of guessing was almost exactly 3.5 centimeters. Go me!


Pressing a bike part into the wet clay

For the smaller attachments, I pressed the plastic piece into the wet clay to mark the location and general shape--in this case a circle with a little bit sticking out at the top. Then I measured the plastic on my shrinkage tile and used my ruler to mark the clay with the appropriately enlarged dimensions. The result was very similar to what would have happened if I had pressed the plastic into the clay and wiggled it around a bit (my method for the metal rod) or cut out around the plastic piece using a thick cutting tool.

Impression of the plastic bike part outlined with dashes marking the scaled up measurement 

Six percent shrinkage is almost insignificant at a small scale, but being able to measure correctly becomes more important at a larger scale, such as when I am planning for large gears to be inserted into the clay. I am drying the work slowly, again, since any warping during drying will obviously result in the measurements being inaccurate. After firing I can check the ceramic openings against the actual bicycle parts to make sure my process is efficient.

Round shrinkage tile with impression of bike gear (I made this to have a visual of the size change in relation to a larger bike gear.)

Wednesday, June 25, 2014

Jomon Pottery Class

This weekend I will be teaching a clay workshop through Larson Gallery. The class is for kids and families, but unaccompanied adults are also welcome. Last year I taught a clay workshop in which we built ceramic bells. This year I will be focusing on Jomon inspired pots.

Jomon pottery. This piece, or one very similar was used to advertise my workshop

Jomon Pottery comes from the prehistoric Jomon civilization in Japan. The name comes from the rope texture impressed into the wet clay when building, though the most recognizable pots are known for their complex coil surfaces and multilevel decorative rims. The pots were used for cooking, though the more complicated pots with flame shaped rims were likely used for ceremonial cooking rather than purely functional cooking.

look at the inside edge of the farthest "flame"

I often show these pots to both my wheel pottery students and my hand-building classes at YVCC. For the wheel students, I point out the characteristics that make these forms inconvenient for contemporary daily use and ask them to consider how they might have been used in their original context. The bases tend to be narrow compared to the tops. At first this seems like a poor design choice, but remember that these pots weren't set on tables in prehistoric Japan. The pots were often put down into the fire for cooking, so that the base was actually buried. In refreshing my memory on Jomon dates today (the pots I'm talking about are 2500-1500 BCE), I read that some of these forms, particularly earlier forms, actually had rounded or pointed bases, pointing to their function in the earth rather than on a flat surface. (Did you know that ancient greek wine amphorae also had pointed bases? It is because of how they were transported in the bottoms of ships.)

The smooth interior contrasts with the linear swirls and gaps at the top and the complex patterned base

The tops of the elaborate forms are fairly fragile, compared to today's dishwasher safe bowls and microwavable  mugs. Just imagine serving stew out of these forms, there are plenty of places to rest the spoon, but I can imagine clumsy servers would perpetually be bumping their spoons into the sides of the pot.

The surface of this Jomon Pot reminds me of the linear texture and swirling movement of Starry Night by Van Gogh.


I show Middle Jomon Pottery forms to my hand-building classes because they have such interesting surfaces. They are clearly well-crafted for so many to have lasted so long. The coil patterned surfaces and deep textures are varied and interesting. The form of the rims and the surfaces look like contemporary art with their beautiful, expressive designs. Beginning hand-builders often get so caught up in shaping their forms and making them smooth that they are afraid to take risks, like attaching irregular coils. These pots are full of holes and negative spaces built into the rim but also onto the sides of these forms. (The lugs and loops on the sides of these pots look like places to attach rope for hanging or carrying, but I haven't checked my facts and my Ancient Japanese Art History class was more than a decade ago, so don't quote me.)

Late Jomon figurines (dogu) were also highly textured and visually interesting

Sunday at the workshop, I plan to show the students pictures of Jomon pottery, but also bring examples of coil-built forms that aren't specifically Jomon in inspiration or origin. We will focus on coil-building techniques in general and I will also bring some fun tools for creating textures in the wet clay. Jomon pottery will be the inspiration point for pressing materials (like rope) into wet clay and for building interesting surfaces out of coils and attached pieces of clay. I called yesterday to ask about enrollment. It appears the class will include kids age 7 and 12, as well as high schoolers and adults. Should be an interesting mix.

Sunday, May 25, 2014

Sketching and Cleaning

Over the last few weeks I've made some time to sketch. Last year I think I remember sketching in boring meetings but this year I haven't attended meetings with much downtime. I think that's probably a good thing.

This year--more accurately, this month--I've sketched a few times while listening to music with my daughter or playing a game. Her games often require me to be in the room but I'm not allowed to do anything because I usually do the wrong thing. As long as my sketching can be interrupted when she wants me to move the ponies into a new position or watch her performance, I am allowed to bring a sketchbook to her room.

I'm not sure a gear handle would be particularly comfortable

Sketching is an important part of the process, but it always makes me itchy to start working. I'd like to make a couple mugs with embedded gears before June Art Fest, but there's a bit of work to do before I have enough room in my studio to work. I don't actually think that the work will get done before June 14, so the mugs will probably have to wait.

I was using two colors because someone else required the purple pen part of the time

Today was a busy day and we spent a lot of time outside playing and enjoying the weather. When we came home for dinner, I started boiling water and began emptying the dishwasher, much to my daughter's chagrin. She demanded to know why I wasn't cooking, since she was hungry. I explained that I needed to clear a space on the counter by moving the dirty dishes from lunch into the dishwasher. My studio is more or less the same as my kitchen countertops, except that it's not dirty dishes from lunch that are blocking my way, it's empty boxes from April and bike parts from January and glaze bottles from November.

thinking more about balance this year--to avoid top-heavy sculptures

The upshot at dinner was that my daughter helped me fill the dishwasher so I could focus on cooking. Her assistance doesn't translate quite as easily to the studio chaos. She helped me dust a bit in the semi-exterior kiln/storage room this afternoon, but was frightened off by a spider before much actual dust was removed. Meanwhile, I was putting together a new shelf and fashioning a cat-guard to keep the cats from crawling under the door and peeing in the corner (of the semi-exterior room, not the studio).

really, greasy, parts. there's probably a better way to clean them

Now that the shelf is up, I can start moving some bike parts out of the main studio for storage. I hadn't moved them out beforehand because I wanted to avoid the problem of cat pee soaked cardboard boxes filled with greasy bike parts and spiders. I think I've addressed the cardboard and the cat pee. I spent some time this week cleaning the dirtiest, greasiest bike parts, but there's quite a bit of work still do to. I don't have a plan for preventing the spiders from taking up residence, but spiders are easier to manage without the cat pee and grease, I think.

semi-clean small round bike parts (we sort by shape and size here at chez-I-don't-know-the-names-of-these-parts)

Friday, January 3, 2014

Planning a Second Installation

Next week my show, Biomorph, opens at Esvelt Gallery at Columbia Basin College in Pasco, WA. We even got some press! The show opens January 6 and runs through February 6 with a reception January 14 at 1pm. The gallery, on Columbia Basin College's campus, is open M-Th 8am - 8:30pm and Friday 8-noon. My work will be sharing the gallery with paintings by Laura Ahola-Young. 

a similar wall installation for "From the Ground Up" at Larson Gallery in 2012
This Friday I install the show, but I don't have a lot of time to get the pieces set up. The free standing work shouldn't be an issue, but the two wall installations need more planning time and require more time to attach them to the wall. I laid out the bulb installation on paper before our winter vacation (New Hampshire and New York City were a wonderful, and much needed, interruption of my work time).

placing the work as it will hang on the wall

In the past when I have put up this type of installation, I have usually gone in to the gallery, laid out the work on the floor in front of the wall and started to arrange them to fit the space. Then I start to mark the position of the pieces, measure the space between the holes if the piece has more than one, and find a screw or nail that fits. This process works fine and allows me to adjust the installation to quirks in the space. For Yakima River Diaries in at Central Washington University's gallery, I put a piece with hair above an air vent so the hair would move in the air current. But planning and installing at the site tends to stretch out the day beyond the limits I believe I will have on Friday.

paper with sketches for placement of pieces, notes and marks for screw and nail placement

So this time I started planning at home. Like I said in my previous post, I don't actually have the space for laying out a whole installation in my home. I ended up putting away the leaf in the table, and moving chairs out of the way so I could fit a 4' x 7'  roll of paper on the floor of the dining room. Then I laid out the pieces on the paper, trying to stretch the work from a reasonable distance above where floor will be to close to the top of the wall. The wall is 4'4" wide and I'm planning for the installation to wrap around the wall with at least one piece on the top edge of the wall.

closer view of my planning diagram

After I placed the pieces, trying to anticipate how they will look when installed vertically in the gallery (as opposed to flat on the floor), I traced and sketched the position of the pieces in pencil.  For a few pieces, I labeled the sketches with colors because I will have help installing the work on Friday. I also put a Sharpie mark on the paper where I want the nail or screw to be placed. Some of the pieces have one hole in the back, others two or three. For the pieces with multiple holes, I carefully measured the distance between the holes and the angle I want them positioned.

old pieces with small holes (what was I thinking?)
I also measured the size of the opening. The most recent pieces have large holes in the back so they can accommodate a large screw head, but older pieces weren't planned as well and therefore have small holes that only will fit a nail or very narrow screw head.

new piece (from my sabbatical) with a large hole and slot for easier hanging

On December 31, I finished planning the front wall, but I kept out some pieces for the wrap around wall. I plan to place them on a second piece of paper while my daughter is distracted playing games with my husband. I also have a few last minute pieces to epoxy together before the show can be packed up and taken down to Tricities for installation.

extra pieces in a tight proximation of the second wall

Thursday, October 17, 2013

Another Piece in Progress

The last set of work I completed closely followed some sketches I had made. This doesn't always happen; I sketch a lot, but often the work changes considerably from the sketch while I am building. Sometimes I sketch, then when I begin to build I sketch a revised version based on what I am building. Anyway, a few weeks ago I looked back at a small sketchbook page with four sketches and I decided to make three of them. Two of them I already wrote about.


sketch with two arms and one gear
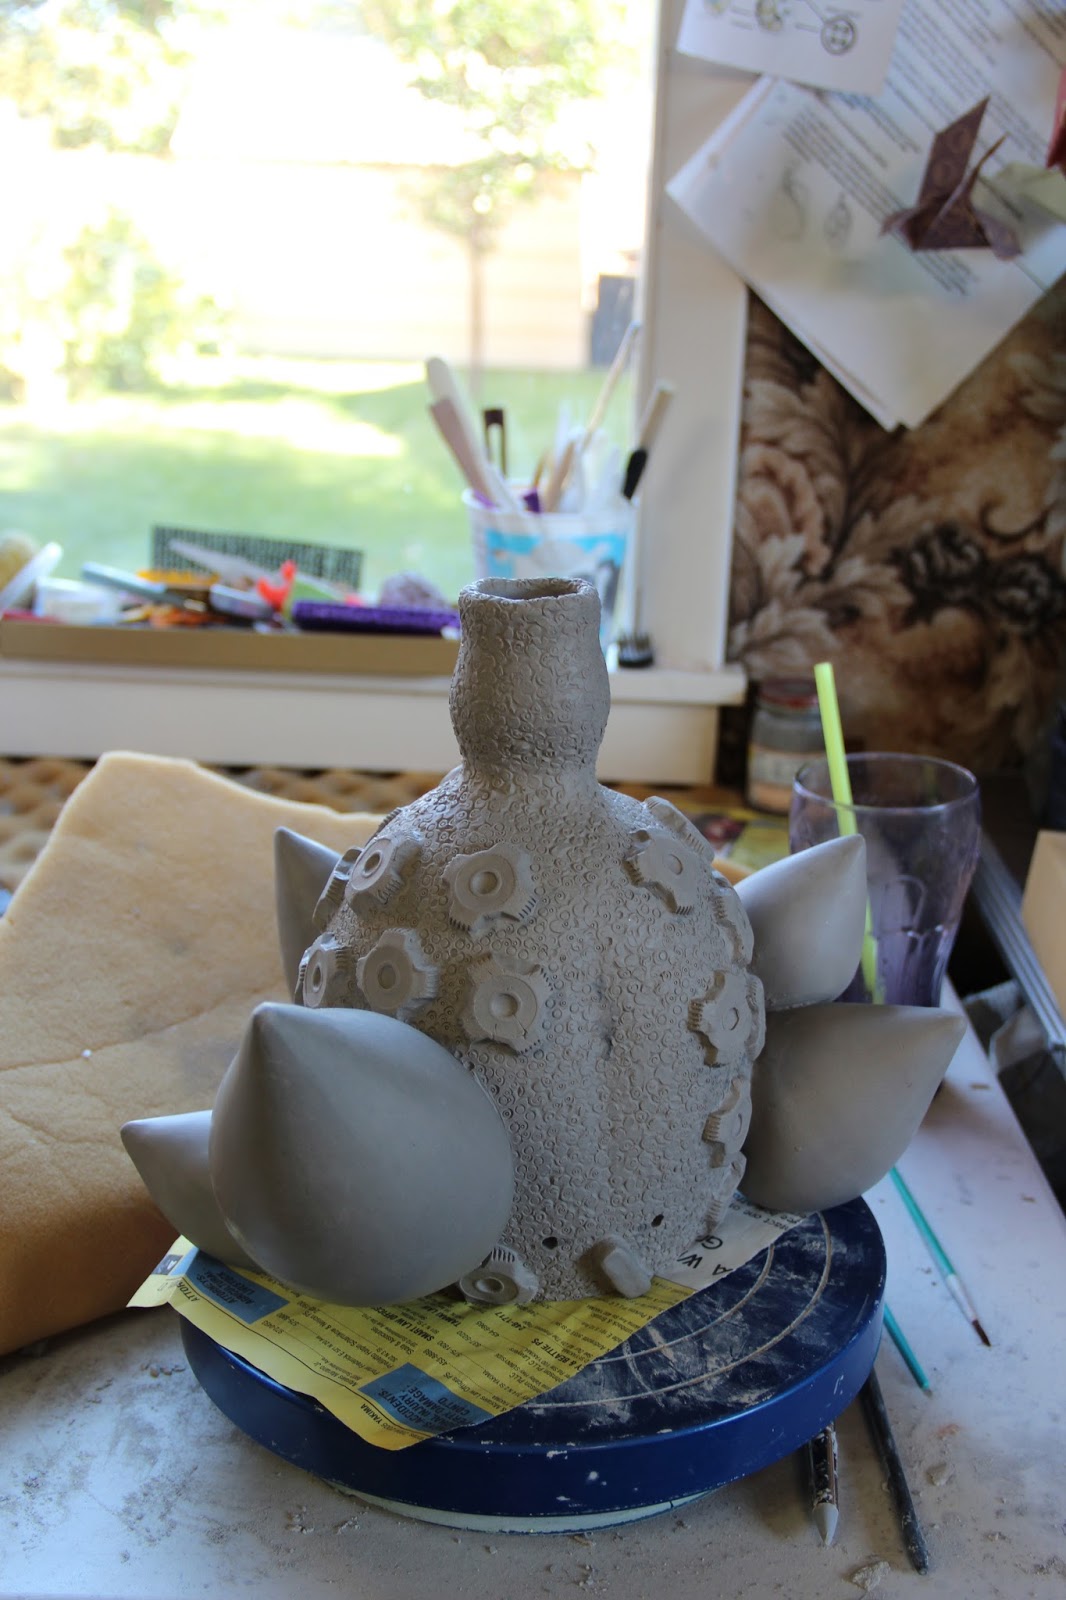
This third piece changed relatively little in form, though the surface of the base was altered to incorporate more mechanical parts after firing. I threw the base and the three long arms on the wheel. I also threw the bulbs at the top of each arm.


thrown elements for "arms"

arms drying


While building, I decided to use bike chains as the “tail” element coming out of the back of the base. The single gear “neck” of the form is now a three-level gear set and, instead of two “arms” coming out of the gear area, I made three. 


base with gear "neck" mechanical decoration 


This was one of the hardest pieces to plan and execute in wet clay because the long “arms” couldn't hold themselves up when wet. I built five small pieces that insert into the spaces of the gear set so I could plan for the weight of the arms to be supported by the gear set after firing. (The gear set is held onto the base with a clay insert the fits in the middle.)


gear set with clay pieces for positioning and weight distribution

I took the gear set and the small pieces off of the base and set it flat on a board where I could plan the position of the arms. I used foam pieces and other supports to hold the arms in place while I aligned them and then attached them to the small pieces inside the gear.

view of "arms" from below with placement pieces 

I removed the arms and little inserts from the gear and reinforced their attachments. When the arms had stiffened a bit, I balanced them upright in the gear again to be sure they fit. Since the pieces weren't completely dry, I could make some minor adjustments in angles and fit. Of course I also have to account for shrinkage during firing. The inserts will be smaller, meaning they will fit inside the gear more easily, but the space between two inserts on one base will also be smaller, so I need to leave extra space between them. 

checking fit and angle

While the pieces were wet, and even after they dried, I couldn't confidently balance them on top of the base at the angle they will eventually be attached--I would have to hold the pieces in place and I could cause damage if any pieces slipped or fell. I won't be able to put the whole group together until after firing, and even then I will need some support while they epoxy sets. 

the eventual angle of the arm


After bisque firing the work, I should be able to test the fit of the arms, but I won't epoxy them in place until after they have been glazed. I won’t be absolutely certain all the parts will stand up correctly until December. 


base and other pieces drying


Friday, September 13, 2013

Getting Started and Revising Plans

Last week I was working on a particular piece and feeling a little stuck and uninspired. I had a bike part I wanted to use. The part is a broken front fork that is relatively narrow and could serve as the intermediate element of a sculpture with a ceramic base and ceramic top.  I made the base and determined the fit, but started to feel like I was making a glorified planter for the base. I worked on it during the week and all day on Friday.

possible placement of a gear attachment on my boring planter base
I finally decided to just pause where I was. I stopped because it was time to go pick up my daughter from school, not because I had made much progress.

alternate placement of a gear attachment
It wasn't until I was driving home from picking up my daughter that something finally clicked and I was able to see a different solution to the problems of design I was experiencing. I hurried inside to sketch some more appropriate bases, and ended up turning the piece upside down and making some significant changes to the base and top. My sketches were for several different versions of the piece.


"duck feet" sketches
I had already built most of my single base, so I won't be able to use the "duck feet" on this fork piece, but I have three more forks with shock absorbers. These forks aren't broken so they will be a better fit for the "feet."
plans for the revised base I was working on Friday

It felt really good to change my approach to the project partway through building. Taking some time to think and sketch can be an interesting intermediate step in the process when things aren't moving along quite right. One of my impulses is to work hard and fast during the day so as not to waste any time. I was feeling frustrated on Friday afternoon, but by the time my daughter and I were back at the house, I was feeling great. Last week I was moving along making things, but this week I have felt like I have more ideas than time to complete them. I much prefer the state of too-many-ideas/too-little-time to the alternate state of not-enough-ideas.

Monday's additions to the base 
I completed last week's base on Monday, combining elements as I envisioned them on Thursday and early Friday and adding and changing elements that became clear in my sketching session (or car ride) on Friday afternoon.
with Friday's gear 
The top pieces really need to be fired before I can be sure about how they will function together. Because of the strength (or lack thereof) of wet clay, I didn't feel comfortable putting the three unfired top pieces together as I intend them to be after firing. I am only able to guess and estimate their eventual relationships on the fork at this point.

placing a "pitcher plant" on the bike fork to get a sense of proportion

I threw and formed each of the top "pitcher plant" pieces into the shape I wanted and then chose to add a kind of ring to the back of each one so that it will fit on the metal of of the bike fork. I checked the fit of the rings by forming the rings over the metal and then sliding the mostly finished piece back over the metal, but I held onto each piece for support as I didn't trust the rings to hold the weight of the clay before firing. Clay can be stressed when it is wet or during the drying process, or really anytime before it is fired. Since each piece has a joint that would take the brunt of the stress when holding up the clay, I thought it best not to push my luck and risk cracking that seam before firing. Sometimes stresses in the clay while it is wet don't show up as cracks until after firing (and after it is too late to fix them).

one of the pitcher plants, drying

The upshot is that I have to more or less imagine howe each of the rings will fit together after firing. I would have liked to make the attachments more organic, like the skinny bending bases of real pitcher plants, but after working on the forms for most of 2 weeks, I felt it was important to finish, fire, and eventually test my attachments. I have other pieces in mind to build and I can consider a different top attachment for a later piece. After these pieces are fired, I can check the connections and learn from any mistakes or weird relationships in the stronger fired pieces.

measuring for the ring attachment
Though I've planned to squeeze in quite a bit of work during my one-quarter sabbatical, technically the quarter hasn't started yet, so I feel I can afford a tiny bit of room to experiment before the pieces need to be perfect. Last week I was unsure what I would be working on for the next few weeks. This week I feel like I have plenty of work to make and lots of options to play with. Other artists* have said it (and if I could remember how it was most beautifully said, I might be able to look it up and attribute it to the right artist), but I repeat it for my students and now reinforce it for myself. Sometimes an artist just needs to start making work and the inspiration will come.

ring attachment after cleanup
After next week's firing, I'll post pictures of the new pieces on the broken fork. I'm off to sketch now before the weekend break.

Edit: Picasso said it, of course, "Inspiration does exist but it must find you working."