Wednesday, March 27, 2013

Inspired by Abaya and Beyond

This winter I brought my hand-builing clay class to Larson Gallery to see Dr. Yvonne Pepin-Wakefield's exhibition, "Abaya and Beyond." The final building assignment for the class was to be inspired by a work in the gallery. Larson Gallery director, David Lynx, introduced the students to the exhibition and showed them around the gallery, talking about the motivation for each work and about Dr. Pepin-Wakefield's experience teaching art in Kuwait.


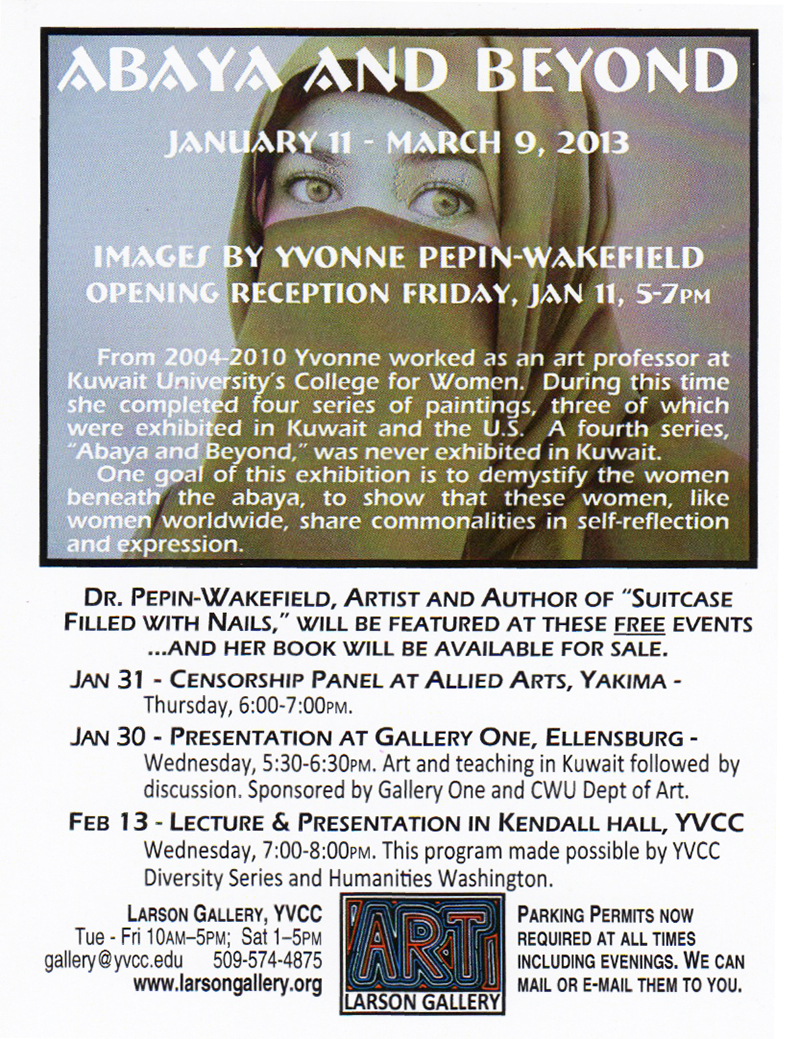
I gave the students a short assignment meant to get them thinking about the deeper meanings of the works and about connections to their own lives. I asked the students to sketch imagery from the gallery exhibition. They were also given catalogs featuring pictures of various works.

"My Student" by Dr. Yvonne Pepin-Wakefield

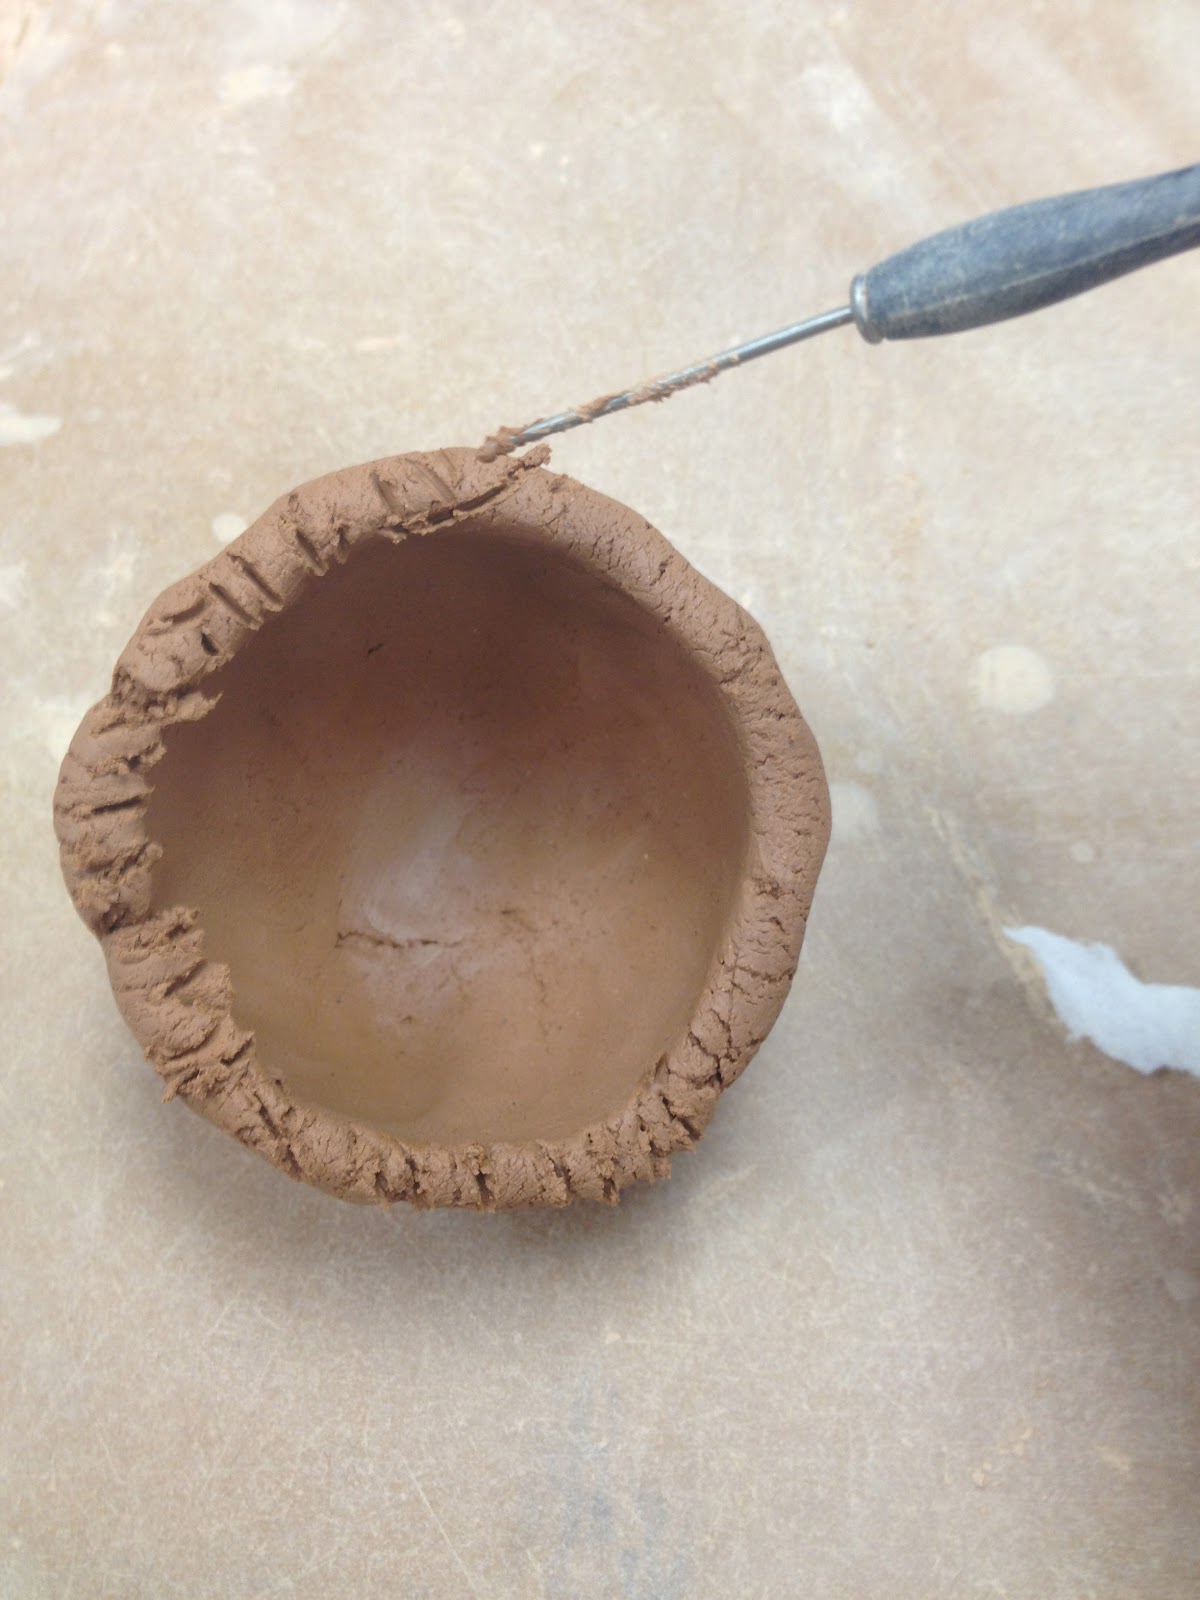
Back at the studio, the students were asked to start thinking about their plans for the project. They had about 2 weeks to build and last week most of the work came out of the glaze kiln. We were able to discuss their finished, glazed projects at the final critique. I was very pleased with the quality of works and the variety approaches they each took to the assignment. I was concerned that they might all approach the project literally, resulting in 16 women in abaya or 16 pomegranates. Instead their projects ranged from dishes to zombies to onions.

Student artwork inspired by this Abaya painting

Sadly, I did not have time to get pictures of all the work and a few have yet to be finished. However, I have pictures of several pieces and I wanted to share them. If you have seen the show, I hope you can see the connection to the works in the show. If you have not, I have included links to those works that I can find online. I would also recommend checking out Dr. Pepin-Wakefield's book, Suitcase Filled with Nails, the new edition of which should include pictures. You can also see some of her work at her website, http://www.yvonnepepinwakefield.com.

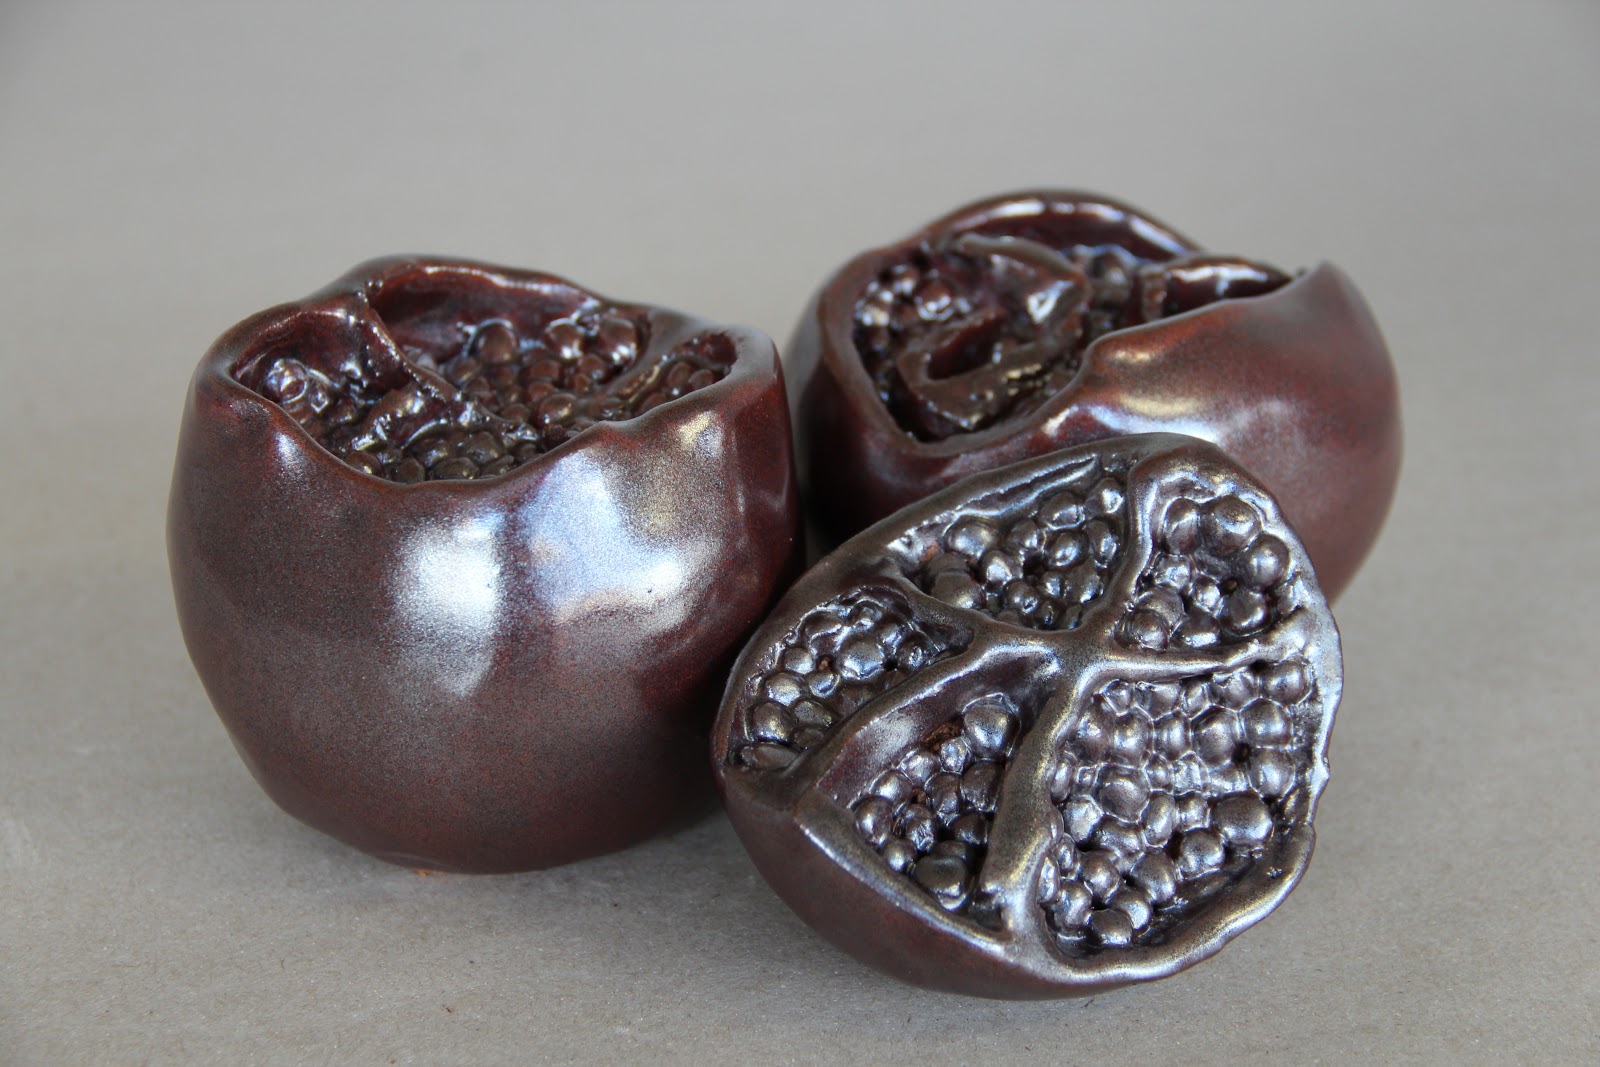
student artwork: pomegranates

Near the end of their project, David Lynx and Dr. Pepin-Wakefield were able to visit the studio and see the students working. I was very pleased by the conversations I overheard that day. I was helping students with something else in the studio, so I didn't hear every word, but later David and Yvonne expressed the same feelings. We were pleased to see the students jump right into conversations about their inspiration, intent and interpretation of the original works. The students weren't shy, they were energetic and quite capable of expressing themselves and their intent with the artist.

student artwork inspired by pomegranates and by the idea of women hiding themselves under abaya

A big challenge in a project like this, especially for a beginning level class, is to combine various parts of their learning into one project. The students had to transition imagery from 2-dimensional paintings, photographs and sketches to 3-dimensional sculptures. They had to choose both their inspiration and their techniques from a relatively wide array of options, and they then had to execute the building and the glazing to communicate their intended message.

student artwork: purse that opens and closes, inspired by "Bag Ladies" paintings

As I try to describe these works in a few short lines, I realize that the students do a much nicer job explaining their inspiration than I can do. In retrospect it would have been nice to ask the students to write a short paragraph about their intent so it could be shared with their work at the student exhibition in May.

student artwork inspired by women hidden under layers of abaya

Several students were inspired by the many pomegranates in the exhibition, making pomegranate sculptures or works that had surface textures derived from pomegranates. One piece seemed to be an inside out pomegranate, another seemed to be hiding pomegranates inside the vessel. There were other works that seemed less directly inspired by pomegranates but still had a connection to the fruit.

student artwork: inspired by the Niche paintings

Students were also struck by the ghostly, haunting look of the women in abaya and the sense of hidden identity or a contrast between the visible exterior and what lies beneath. There was one set of works that explored the evolution from one form to another, like what we see in the Pomegranate Evolution series, but with entirely different visual imagery and symbols.

student artwork: student was inspired by paintings of ghostly, abaya-clad women who reminded her of ninjas...and zombies, apparently
If you would like to see these works (and more) made by Yakima Valley Community College art students, plan to come to the Department of Visual Arts Student and faculty exhibition at Larson Gallery in May. Some of these students may also have their work at Oak Hollow for the upcoming Emerging Artists Exhibition or at my home for the Larson Gallery's Tour of Artist Homes and Studios on May 18.


*Students, I have not included your names in this post because I did not have your permission, If you let me know it is ok, I will happily add your names to your works.

Wednesday, March 20, 2013

Glaze Leaching Tests

The big clay class project this quarter was an extensive leaching test on all our functional glazes. In January I read an article about liner glazes and testing functional glazes. The article, written by Deanna Ranlett, was in November/December 2012 Pottery Making Illustrated. I believe you need a subscription to read it online.

Sets of glazed bowls after setting up the test

I had my intermediate, advanced and most of my independent study students read the article, then we met as a group to discuss how we might implement testing of our glazes. Most of the current studio glazes were used at YVCC before I was hired, though we've added a few more over the years. The glazes are supposed to be food safe, but we are basing this assumption on historical use or on what the glaze recipes suggested when we first started mixing them for studio use. To my knowledge, we have never actually tested them ourselves.

A reduction copper glaze that has been in the studio for at least 7 years.

After reading the article, the students discussed what needed to happen and I was pleased to find that I didn't need to direct them much, mostly the students were able to determine how to divide the project between themselves. Each student make six bowls or plates for the project and each student was responsible for glazing their two sets of three pieces using the same coordinated glazing approach.

glazed bowls and plates with detergent and lemon

The students also worked together to set deadlines for their throwing, firing and glazing. One set needed to be re-glazed and was finally out of the kiln on Thursday, so we set up the actual glaze testing that morning. Each glaze was applied to three bowls, marked "control," "lemon," and "detergent." The control was left empty, a lemon was squeezed into "lemon" and left to sit, and a small amount of powdered dish detergent was poured into the third, then wet with a small amount of water and mixed lightly.

our glaze testing station

We left the whole set of bowls out on the counter, labeled, over the weekend. When we came back, we cleaned out each bowl, to get rid of the sticky lemon and bits of mold and the crusty line of dried detergent. Then we compared our results for each set of bowls, looking for signs of leaching.

new studio glazes. I expected the glaze on the right to leach

Glaze leaching was supposed to be shown by changes in the color or surface qualities (shininess) of the glaze. I anticipated that most of our long-time studio glazes would show no changes, but I guessed that some of the new, untested glazes would show signs of leaching. I was actually hoping that at least one glaze would leach, since 18 sets of unchanged pottery wouldn't prove a very interesting test.

Blue Matte glaze with leaching effects shown in middle bowl

The obvious flaw in our plan was the timeline, since students were using these glazes during the planning and execution of our tests. Any pots with glazes that leached should not be used for eating, serving or cooking and any functional pottery students making work, would likely expect the pots to be used for these very tasks. The article recommended that we use what are called liner glazes, to line the interior of funtional works. These liner glazes should not leach and, since they are generally white glazes, are cheaper to make than colorful glazes with a variety of expensive oxides and colorants added.

discoloration in Blue Matte glaze
The results of our test were unfortunate for a few students, but good overall. In our testing, almost none of the glazes leached. The newest glaze, just starting to be added to the studio options this quarter, was the only one with obvious discoloration with the lemon juice test. This new "Blue Matte" glaze contains lithium and copper carbonate, is a beautiful color, but obviously shouldn't be used functionally--who wants copper and lithium in their Cheerios?

Mary's Special (on bottom) with signs of texture change (center)

One other glaze, "Mary's Special" also appeared to have a change in surface sheen after a weekend's contact with dish detergent. I would consider this test result worrisome but inconclusive and I plan to re-test another set of bowls using this glaze while also urging students not to use the glaze functionally.

Wednesday, March 13, 2013

Second Grade Clay

Last week I did a clay project with a group of second graders at a local elementary school. There were roughly 70 kids at nine tables. We were in a gym and unfortunately the acoustics of the room were not ideal for speaking over a multitude of kids. I had not requested a microphone. Before I got there, I wouldn't have considered that I needed one. Seventy is a lot of kids and though they were focused and well behaved, it was hard for them to be very quiet once they had started working and it was hard for me to speak loudly enough for them to hear me.

an airplane, some turtles and some other finished bells

The project was arranged by the school PTA and I was impressed by how well they coordinated everything. I emailed back and forth with my contact person maybe 30 times before the event. She was very clear about what they expected and why they were doing the project. The school doesn't have any art classes, which I find shocking, so the PTA has undertaken to encourage artists and educators from the community to do one-day projects with the kids to enrich their education. I am hopeful that McCleary decision may change this unfortunate situation in the coming years.


a kitty bell

In the meantime, I believe the PTA is still looking for artists to teach short lessons with the kids in a variety of media. I'd be happy to put local artists in touch with them. I found that the woman who contacted me was very thorough and easy to work with. She asked what we needed and got it all ahead of time so that all I brought to the school were a few example pieces. some clay stamps and a printed sheets of illustrated directions for the project. The teachers also had a handy clapping thing they did to get the students attention and turn down the volume in the gym.

The step-by-step directions I had on each table
The project seemed to go well, despite how difficult it was for the kids to hear. There were quite a few PTA parents and some teachers there to help. I'm guessing some of them had some clay experience, because some of the tables did their pinch pots before I got around to giving those directions. I also brought with me a couple of students from YVCC to help with the project. They worked with different tables helping kids do the project and making sure the kids had enough clay and attached their pieces well.

The flower/princess on the right has interesting eyes

The kids behaved very well and didn't seem to have much trouble making their bells. A few kids had pinch pots larger than their bases, but they were able to add more clay to make the base larger. A few kids squished their bells at some point during the process, but they seemed to have fun anyway and I think their bells should be able to be fired, even if they won't make much noise.


The most interesting thing by far was to see how the kids decorated their work. There seemed to be trends by table, so that one table had several turtles, another had several seahorses. One table had a bunch of very well crafted princesses and butterflies. The sea life table was impressive for how different their designs were from my examples. There were at least two seahorses and one arrangement of a seashell and other ocean stuff on top.

a seahorse

Another table that made me laugh was the one where several kids made turtles, like my example, but added top hats to the turtles' heads. A few kids added legs underneath their bell shapes. I didn't notice the legs until I picked up the pieces at the end of the day, but they were a neat effect. My turtle example's legs were stuck out to the side.

sea creatures, large turtles and a variety of patterns and textures on the tops

There was an energetic group of boys at the front table. Right after I was introduced and before I could give more directions than "pick up some clay" one of the boys already had a question for me. It turned out to be a good question (he was asking if they got to keep the stuff they made) but I was afraid it would set the tone for the whole day. Their table did end up requesting a lot of help but they also stayed on task and finished their work.

a princess/lady in amongst a variety of other bells

Unfortunately I didn't get particularly good pictures of the kids' work. I didn't take any during the event because I was so busy. One of the teachers did, but I don't know if I have permission to share the images that have the kids in them. I did take some pictures at the end of the event, after I went around and checked all the pieces to make sure they wouldn't explode in the kiln and to make sure they wouldn't fall apart when moved. Apparently I was tired, because the pictures aren't very clear.

a couple princess, something that now looks like a cat, and at least one turtle

I am hoping to get new pictures after the work comes out of the kiln. The work is being fired by a local high school art teacher, but it needs to dry, some of it quite a lot, before being fired. A few kids seemed to believe that taking a huge solid chunk of clay and sticking it on top of their hollow clay would be good. Usually I give students three rules for clay: 1) always score and slip to attach clay to clay, 2) always have an air escape for any air pockets and 3) never make any part of the clay thicker than your thumb. We didn't get around to the third rule for these kids.

a turtle with a top hat

There will be an art show open house at the school at the end of March. I am planning to go. It should be interesting to see what else the kids have been doing. I don't know if the kids will have their finished work by then, but I believe the PTA plans to have them paint the bells when they come out of the kiln.

the seashell still life, but this picture doesn't do it justice


Thanks to Anne Rojan and the Apple Valley PTA and teachers, Debbie Sundlee, Mike Hiler and Grace Keller for your help on this project. And thanks to the kids for making it fun.

Sunday, March 3, 2013

Second Grade Clay Rattle Project

This coming Thursday I have agreed to do a project with some second graders at a local school. My initial plans were altered as I started to think about the logistics of directing 60 or 70 kids in one project. I don't want the project to be so complicated that the students will get lost or frustrated. I won't be able to directly assist all the students or correct individual mistakes, so I need to make the project simple enough for the kids to follow and do with little assistance.

turtle "rattle" made as a test of the methods I plan to use

woman whose skirt is a rattle, also made as a test

I also need to make the project interesting enough to keep the students engaged and to provide a challenge for those students who finish the basic project early. A good kids clay project, in my opinion, is one that "works" for a kid who is able to do only the bare minimum, providing that kid with an object that they can be proud of. A good project also needs to be flexible enough to interest the kids who find the basic steps too easy. Kids need to be able to decorate, add to, or improve on the basic design.

start with a ball of clay (two, actually)

 I also need to be able to do this project with minimal equipment, tools and hand-skills.

flatten the first ball of clay

The project I have chosen to do with the second graders is a small bell or rattle. I have done at least 3 iterations of this project with students over my years of teaching. The only tool that is absolutely necessary is a toothpick or needle tool and the only other requirements are clay and slip (or water).

squish together any cracks or irregular edges so they are flat and round

It is also nice to have a scoring tool, a paintbrush, some stamps and some scraps of paper. Opportunities for additions and modifications are essentially endless, but the central form of the project is pretty simple to make.

create a pinch pot with a second ball of clay, squeezing the clay at the bottom first


The project requires students to roll out two balls of clay and flatten one. They need to create a pinch pot with the other, and this is the most complicated skill required of them. To create the pinch pot, they need to start with a round ball of soft clay, push their fingertips straight down into the clay and then gradually increase the size of the opening by squeezing and turning the ball of clay. The key is to start squeezing at the bottom and leave the top rim thick until the end. If kids don't listen or understand this step, they will make a pancake pinch pot with no space inside for the rattle.

score the edges of the base and the pinch pot

Students then score (or scratch little lines in) the edge of the pinch pot and the outer edge of the flat piece of clay. It's a good idea to punch a hole in the flat piece of clay now, though it can be done later too.

       
make balls of clay and (optional) wrap them in toilet paper


Students make little balls of clay (to be the rattling sound makers) and wrap them in paper. The little balls of clay don't need to be wrapped in paper, but it helps prevent them from sticking if kids get slip on the balls of clay. The rattles won't make any sound when they are wet. During firing the paper will burn off and the balls of clay will become hard. After firing, when someone shakes the rattle, the hard ceramic balls of clay will hit the hard ceramic interior walls and make noise.

poke a hole in the base (now or later)

The little rattling balls of clay are put in the middle of the flat piece of clay. Students need to slip the attachment by adding water or, preferably slip (watery clay) to the seam. I recommend the kids put slip on the edge of the pinch pot so that they aren't too messy with the slip. I also recommend slip rather than water because students (and teachers) can see the slip better and know that the whole piece of clay won't be getting soggy.

add slip (watered down clay) to scored edges

The pinch pot is pushed onto the flat base, trapping the little balls of clay inside. A little pressure will help keep the pinch pot attached to the base. A little slip may squeeze out the edges. It can be wiped away. Excess clay can also be trimmed away if the base is too wide. 


place the pinch pot on the base, lining up the scored edges and trapping the clay bits inside

As I was making a couple test pieces, I was concerned that the project might still be too difficult for such a large group of students. I don't have regular access to dozens of second graders, but I do have access to one preschooler, so I brought my daughter into the studio to try the project. I figured if one preschooler could do the project without help, then 70 second graders could do it with minimal help. Also, I hear second graders can read and follow multi-step directions, so I plan to bring pages for each table that show step by step illustrated directions of the process.

it's a good idea to work on paper 
score the edges using a needle too, toothpick or scoring tool
add slip with a brush, don't get slip on the clay balls or in the middle of the base
put the two pieces together. it doesn't have to look perfect so long as it sticks

My daughter was able to make the form. She had the most trouble with the pinch pot, but I didn't need to take it away or have her start over again. Of course my daughter couldn't resist decorating her rattle. She added a body and arms, decorated with a clay stamp and drew in a face. Her piece wasn't as round as mine, but she was able to make a passable pinch pot without my assistance and all her attachments were strong. Her piece will not explode during firing, since she put a hole in the base when she was almost done.

scratching in the face
The most important thing I will need to check, or have my clay student assistants check, is that each piece of clay is attached securely and that each rattle has a hole in the hollow area to allow the hot expanding air to escape during firing. It is also important that no solid clay pieces are thicker than about an inch.

adding the air hole
I always tell kids about the "wiggle test" and the "rule of thumb."  The "wiggle test" means that if I gently wiggle the clay now (when it is wet) and it comes off, it will fall off later. Usually students have forgotten to score and slip their attachments and they can do that now. The "rule of thumb" means that no piece of clay can be thicker than their thumb. If it is thick, it risks exploding in the kiln.

decorating with a clay stamp
The only other risk in this project is that students will be frustrated that they can't make the clay do exactly what they want. I plan to distract the students with clay stamps and other tools they can push into or stick onto their clay. The fun of new tools should help appease the frustrated perfectionists.