This coming Thursday I have agreed to do a project with some second graders at a local school. My
initial plans were altered as I started to think about the logistics of directing 60 or 70 kids in one project. I don't want the project to be so complicated that the students will get lost or frustrated. I won't be able to directly assist all the students or correct individual mistakes, so I need to make the project simple enough for the kids to follow and do with little assistance.
 |
| turtle "rattle" made as a test of the methods I plan to use |
 |
| woman whose skirt is a rattle, also made as a test |
I also need to make the project interesting enough to keep the students engaged and to provide a challenge for those students who finish the basic project early. A good kids clay project, in my opinion, is one that "works" for a kid who is able to do only the bare minimum, providing that kid with an object that they can be proud of. A good project also needs to be flexible enough to interest the kids who find the basic steps too easy. Kids need to be able to decorate, add to, or improve on the basic design.
 |
| start with a ball of clay (two, actually) |
I also need to be able to do this project with minimal equipment, tools and hand-skills.
 |
| flatten the first ball of clay |
The project I have chosen to do with the second graders is a small bell or rattle. I have done at least 3 iterations of this project with students over my years of teaching. The only tool that is absolutely necessary is a toothpick or needle tool and the only other requirements are clay and slip (or water).
squish together any cracks or irregular edges so they are flat and round
It is also nice to have a scoring tool, a paintbrush, some stamps and some scraps of paper. Opportunities for additions and modifications are essentially endless, but the central form of the project is pretty simple to make.
create a pinch pot with a second ball of clay, squeezing the clay at the bottom first
The project requires students to roll out two balls of clay and flatten one. They need to create a pinch pot with the other, and this is the most complicated skill required of them. To create the pinch pot, they need to start with a round ball of soft clay, push their fingertips straight down into the clay and then gradually increase the size of the opening by squeezing and turning the ball of clay. The key is to start squeezing at the bottom and leave the top rim thick until the end. If kids don't listen or understand this step, they will make a pancake pinch pot with no space inside for the rattle.
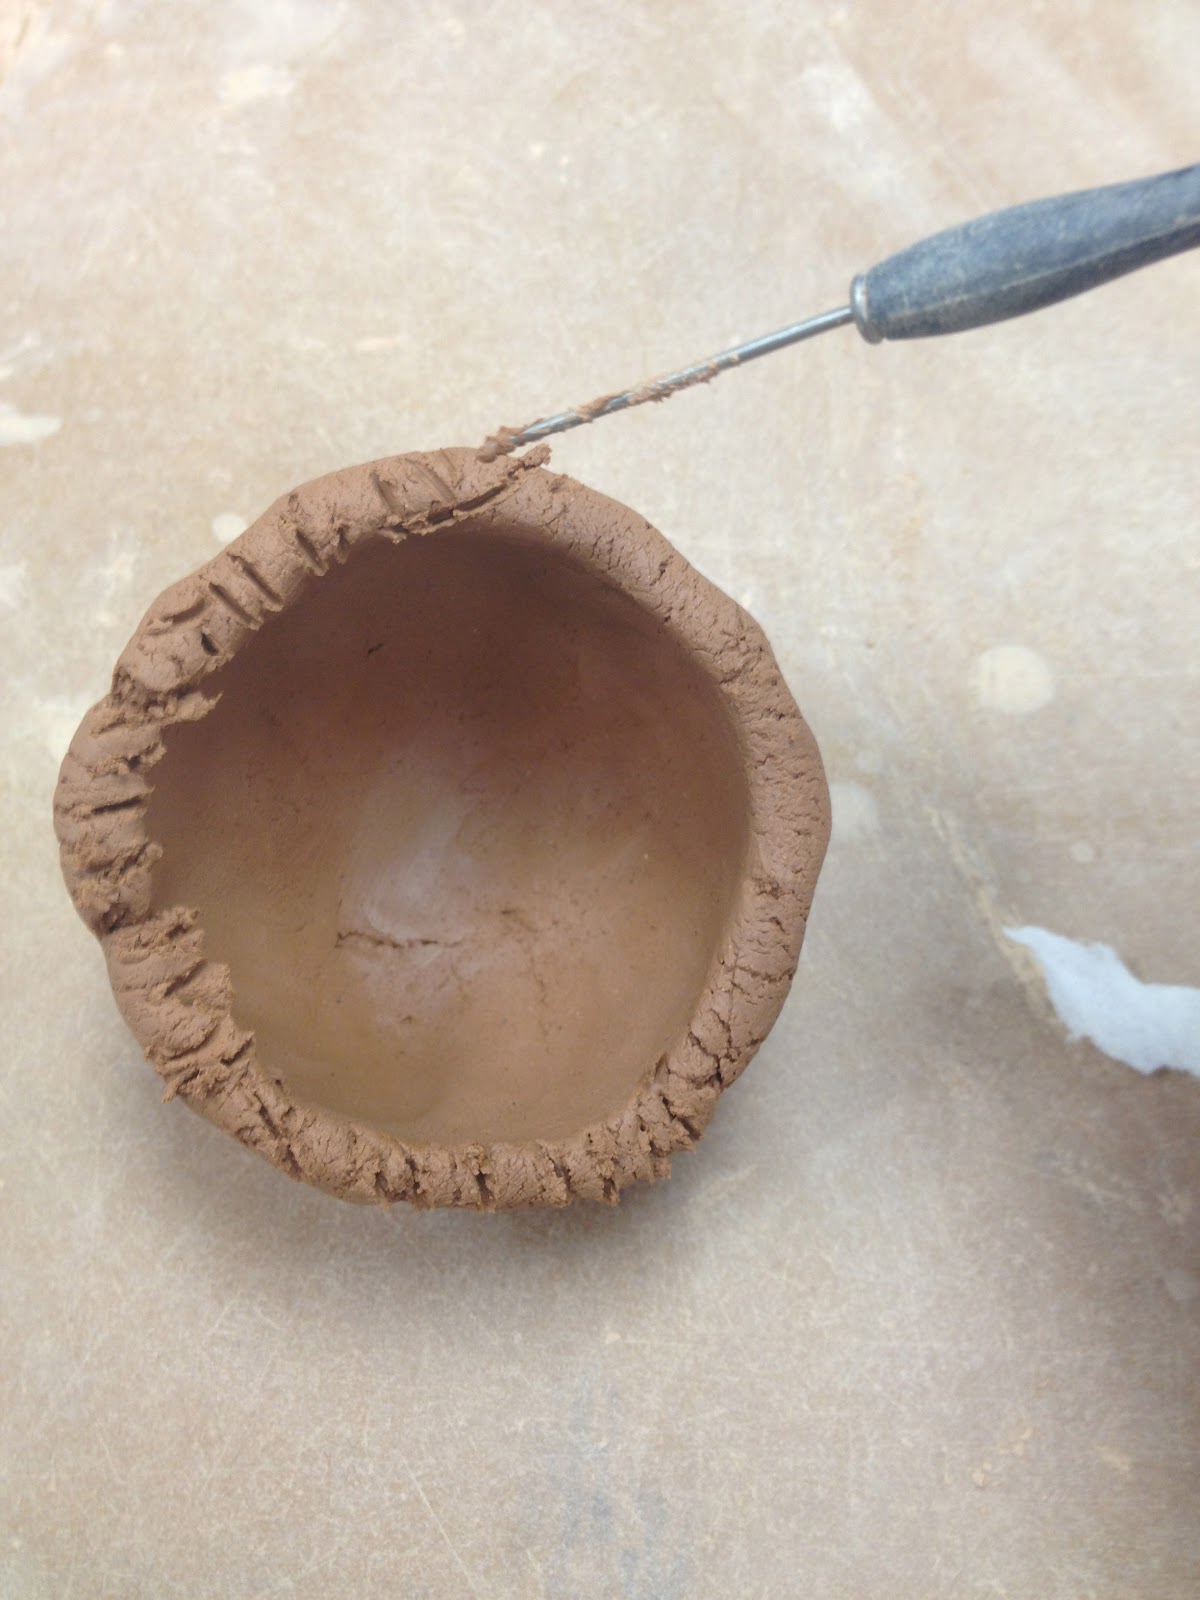
score the edges of the base and the pinch pot
Students then score (or scratch little lines in) the edge of the pinch pot and the outer edge of the flat piece of clay. It's a good idea to punch a hole in the flat piece of clay now, though it can be done later too.
make balls of clay and (optional) wrap them in toilet paper
Students make little balls of clay (to be the rattling sound makers) and wrap them in paper. The little balls of clay don't need to be wrapped in paper, but it helps prevent them from sticking if kids get slip on the balls of clay. The rattles won't make any sound when they are wet. During firing the paper will burn off and the balls of clay will become hard. After firing, when someone shakes the rattle, the hard ceramic balls of clay will hit the hard ceramic interior walls and make noise.
 |
| poke a hole in the base (now or later) |
The little rattling balls of clay are put in the middle of the flat piece of clay. Students need to slip the attachment by adding water or, preferably slip (watery clay) to the seam. I recommend the kids put slip on the edge of the pinch pot so that they aren't too messy with the slip. I also recommend slip rather than water because students (and teachers) can see the slip better and know that the whole piece of clay won't be getting soggy.
 |
| add slip (watered down clay) to scored edges |
The pinch pot is pushed onto the flat base, trapping the little balls of clay inside. A little pressure will help keep the pinch pot attached to the base. A little slip may squeeze out the edges. It can be wiped away. Excess clay can also be trimmed away if the base is too wide.
 |
| place the pinch pot on the base, lining up the scored edges and trapping the clay bits inside |
As I was making a couple test pieces, I was concerned that the project might still be too difficult for such a large group of students. I don't have regular access to dozens of second graders, but I do have access to one preschooler, so I brought my daughter into the studio to try the project. I figured if one preschooler could do the project without help, then 70 second graders could do it with minimal help. Also, I hear second graders can read and follow multi-step directions, so I plan to bring pages for each table that show step by step illustrated directions of the process.
 |
| it's a good idea to work on paper |
 |
| score the edges using a needle too, toothpick or scoring tool |
 |
| add slip with a brush, don't get slip on the clay balls or in the middle of the base |
 |
| put the two pieces together. it doesn't have to look perfect so long as it sticks |
My daughter was able to make the form. She had the most trouble with the pinch pot, but I didn't need to take it away or have her start over again. Of course my daughter couldn't resist decorating her rattle. She added a body and arms, decorated with a clay stamp and drew in a face. Her piece wasn't as round as mine, but she was able to make a passable pinch pot without my assistance and all her attachments were strong. Her piece will not explode during firing, since she put a hole in the base when she was almost done.
 |
| scratching in the face |
The most important thing I will need to check, or have my clay student assistants check, is that each piece of clay is attached securely and that each rattle has a hole in the hollow area to allow the hot expanding air to escape during firing. It is also important that no solid clay pieces are thicker than about an inch.
 |
| adding the air hole |
I always tell kids about the "wiggle test" and the "rule of thumb." The "wiggle test" means that if I gently wiggle the clay now (when it is wet) and it comes off, it will fall off later. Usually students have forgotten to score and slip their attachments and they can do that now. The "rule of thumb" means that no piece of clay can be thicker than their thumb. If it is thick, it risks exploding in the kiln.
 |
| decorating with a clay stamp |
The only other risk in this project is that students will be frustrated that they can't make the clay do exactly what they want. I plan to distract the students with clay stamps and other tools they can push into or stick onto their clay. The fun of new tools should help appease the frustrated perfectionists.


This is awesome, thanks so much. Will try tomorrow with my special needs high school kids.
ReplyDelete