Jane asked me to write about taking slides and marketing ceramic work. I feel the best way for me to do this is (as my students know) the long-winded way. I'm going to tell you about my experience and what I do and have done. Today I'll talk about taking slides; I will post on the marketing aspect later.
I welcome suggestions from other 3D (or 2D) artists who are experienced taking slides.
Taking Slides on Film (circa 2001)
I learned to take slides in 2001 or 2002. Way back then I used something call "35 mm film" in a camera that did not require batteries and couldn't be hooked up to a computer. Can anyone remember such a thing?
We had a room in the art building without exterior windows. The windows it did have were covered in dark paper so that no other light could get into the room. There were a couple backgrounds for us to use. There was a wall for the 2D artists to hang their work and grey or black fabric (or was it paper?) could be hung and pulled forward across a table for the 3D work.
 |
| Grey background under and behind a raku fired piece from my senior year. |


We used special tungsten film and set the camera's depth-of-field high. This meant the exposure would be long, so we needed to use a cord and plunger to depress the button and take the picture (the cord prevented the camera from shaking on the tripod while the shot was being taken).
After taking a roll or two of the best shots we could imagine, we'd send the film in for processing. I'd inevitably end up printing some slides that didn't work at all.

This slide was digitized using a slide recorder. The black space on the edges is a remnant of this process.
My senior show was in a quality gallery on campus. The white walls, white pedestals and lack of windows allowed me to take slides in the gallery while it was "closed." The slides I took in the gallery are probably the highest quality images I have from college.

The large space of the gallery also allowed me to capture the scale of this installation.
Reproducing Slides (circa 2003)
Around the time I was applying for graduate school there seemed to be a shift taking place. The world of graduate school admissions and exhibition or fair applications had relied on slides, packets of slides and slide carousels. Speakers were expected to bring a carousel of slides to show (whereas now I bring a Powerpoint presentation on a portable USB drive). I spent many hours labeling, sorting and reproducing slides.
 |
| This installation shot was first created as a slide. The slide got dirty before being scanned into a computer. The dirt on the surface of the slide was reproduced as noise or graininess in the digital image. |
 |
| The computer allows for manipulation of the image. |
Makeshift Studios in Basements, Spare Rooms and Gallery Spaces (2003-2006)
Around this time I didn't have regular access to a designated slide-taking space. At various points I set up makeshift studios in what spaces I could find. In my parent's basement I set up a studio with a piece of grey fabric. I think you can see the texture of that cloth in slides from this time.
I often worked with images in the computer both because various art shows and art fairs were asking for both digital and slide submissions and because digital files were cheaper and easy to duplicate. Digital files were also easy to manipulate to eliminate wrinkles in the background.
 |
| This fountain slide shows extra black space on the top and bottom. Slide reproduction called for specific dimensions not required in digital images. The black was added to an image that probably started as a horizontal image with extra grey space. I believe the cord for the fountain plug was obscured digitally after the image was taken. |
At graduate school I took slides in a tiny spare room that the clay graduate students set aside for slides. We blocked the windows, bought special grey paper from a photography store for our backdrop and set up clip lights on either side and hung a filter light. As a result of either our limited resources or our impressive ingenuity, our filter light was actually a regular light suspended in a cardboard box with a home furnace filter covering the light on the bottom. I don't think I would advise this method. Nor would I advise our method for dangling the light precariously above our work while we took slides.
 |
| An additional problem with taking slides in a clay studio was keeping the dust level down. The paper seemed to be a magnet for clay dust an kiln wash residue. |
We kept the camera on a tripod and positioned it as far from the work as would fit in a small room. We adjusted the lights to limit shadows and shine and took our images from a slightly overhead angle with a long depth-of-field and a long exposure time. We started using tungsten lights but once we started using a digital camera, trial and error (rather than any sound knowledge or instruction) seemed to indicate that the light type didn't matter for the quality of the slides taken with a digital camera.

 |
In graduate school I also had occasions to take slides in galleries and outdoors. The results in galleries were not always great. One installation exhibition was difficult to photograph because the works filled the space but also because the gallery was small and the light wasn't great.
 |
| hand-made paper and fiber installation |
 |
| Installation at Overture Center for the Arts in Madison, WI |
 |
| detail of an installation in Madison |
Right before my Master of Fine Arts (MFA) show, I upgraded my camera from an SLR film camera to a digital camera. The process for taking slides was similar but the results were much faster and less expensive. The biggest savings, as far as cost and effort, seemed to come from not printing (and paying to print) wasted images. I could simply delete them. I also saved time and money by not needing to get special film (or any film). By the time I was applying for teaching positions in 2006, almost all shows and schools were asking for digital application materials (or at the very least they offered this option) so I no longer needed to convert slides to digital and digital images to slides.
 |
| Digital image of a piece from my MFA installation |
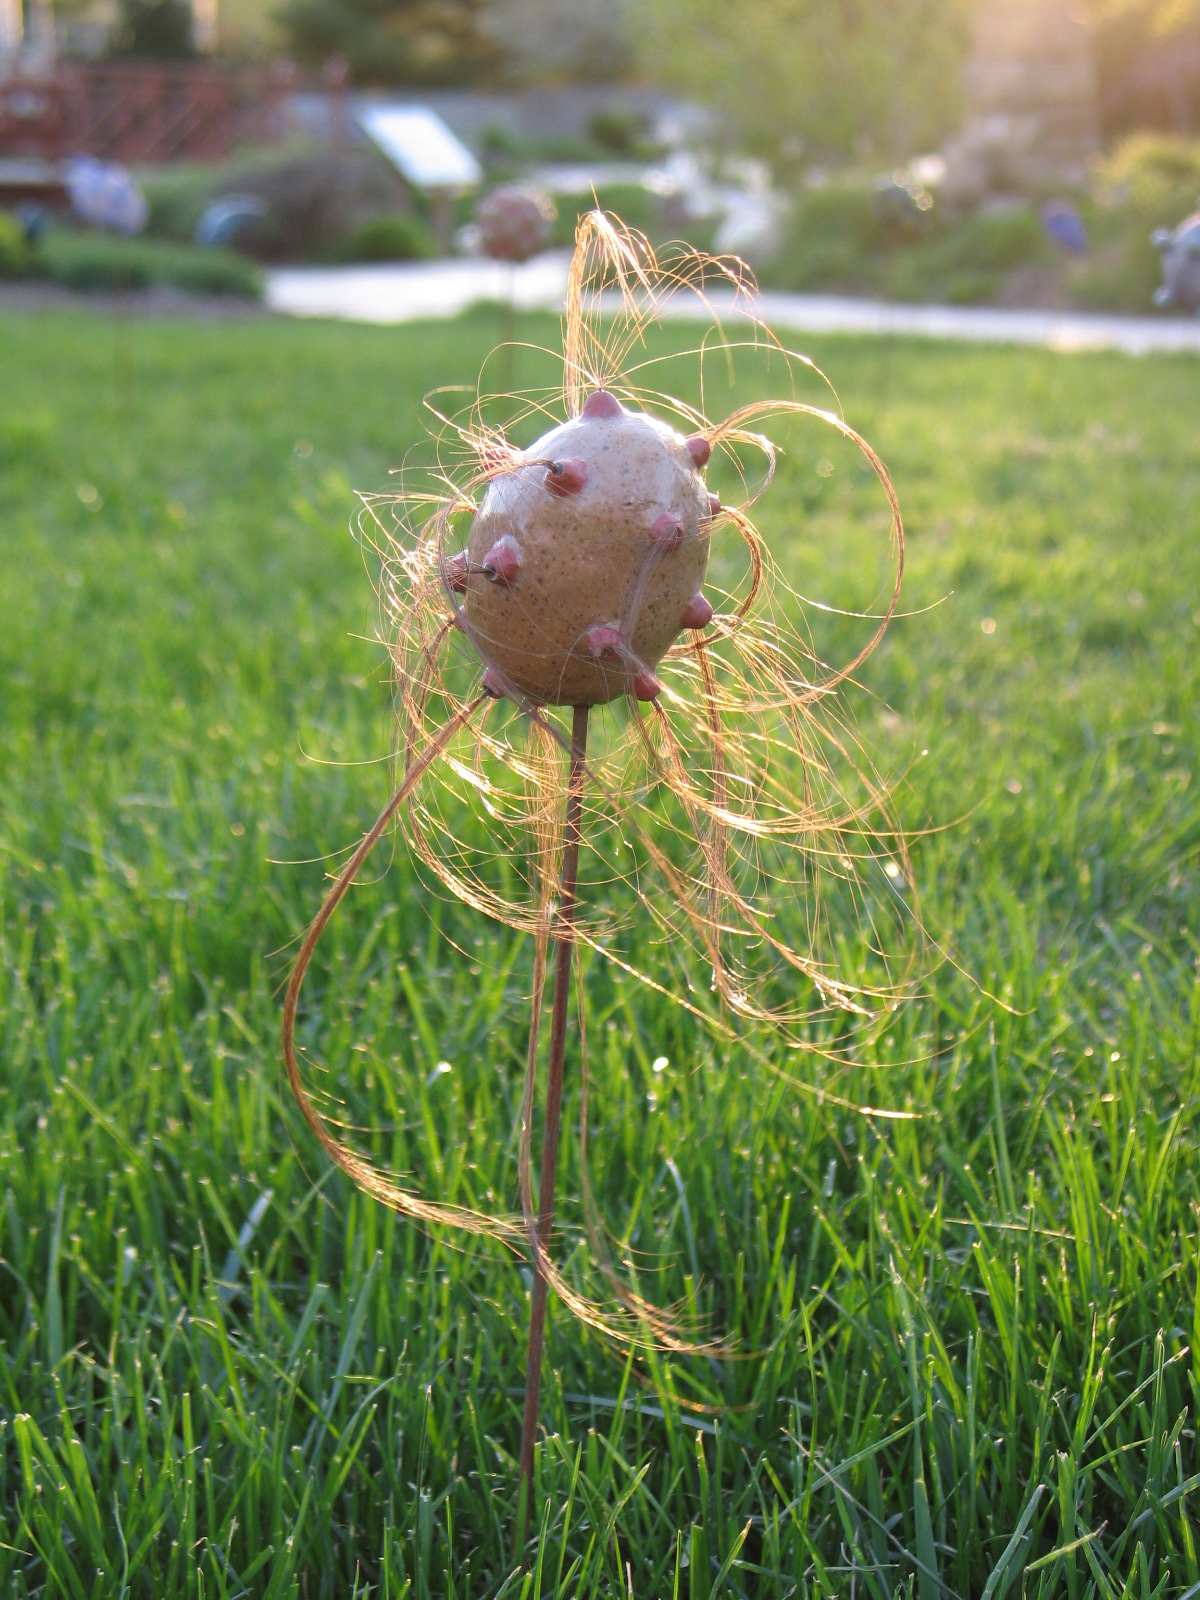
My MFA show at the end of graduate school was an outdoor installation in Allen Centennial Gardens on UW-Madison's campus. I took the advice of the gardener who suggested that the best time to take pictures of flowers was in the early morning or on a cloudy day when the light was soft and wouldn't create strong highlights and shadows.
 |
| small low fire sculpture under a daffodil plant |
 |
| wood fired sculpture in Allen Centennial Gardens |
 |
| Low-fire sculpture from MFA show |
 |
| Raku sculpture from MFA Exhibition. |
 |
| hanging object in MFA show (photo by Jim Escalante) |
 |
| hanging object in MFA show |
 |
| part of lawn installation in MFA show |

Digital Camera outside in the morning (2007-2011)
In Yakima I have been operating on my own and have had to put together my own methods for taking slides. Initially I ignored the problem (taking slides isn't fun or interesting) and ended up with really crummy shots of work that I no longer own. For a show I did at Allied Arts in Richland, I took slides in the gallery but not before I brought the work to the show. The lighting wasn't great and the set up was particularly bad. The gallery is a pretty gallery, but they didn't have good options for displaying 3D work. They put my pieces on glass shelves set across white pedestals. The show looked cluttered and cheap and my slides look unprofessional and the color in my images seems odd.
 |
| Gallery shot from Allied Arts show (October 2008) |
 |
| Image of work from Allied Arts show |
 |
| The glass shelves wouldn't be my first choice for display |
 |
| The glass slides didn't help me take slides (also notice the random planter in the background). |
After this experience I learned that I needed to plan time to take slides and since then I have built time to take slides into my summer work schedule before I ship or sell the work. I had originally intended to set aside a space in my home studio to block out the light, get lights and set up a slide taking room.
However, as I thought about where I could do this, I thought about how nice the images were from my MFA installation in the garden. I started wondering whether I could take advantage of natural light to take my slides. I tried it and I liked it and this is still how I take my slides.
My summer slide set-up involves a small table, grey paper I originally purchased in graduate school, several clamps and a tripod. I wake up early several mornings in August or September and set up the paper and the table in the backyard near my studio. I clamp one end of paper to a strange metal clothing rack that we discovered in our garage when we bought the house. I set a table in front of the rack and pull the paper down and across the table. I then set the work on the paper and set up the camera on a tripod in front of the work.
 |
| Digital image taken using outdoor natural light |
 |
| detail of same piece |
I usually take several shots of most pieces. I usually take an image of the whole piece, a detail and sometimes different views of the piece if it is unclear or highly irregular or asymmetrical.


Three images of the same work. I was testing out which angle would best capture the form of the sculpture.
I set up my camera on the tripod so that it is pointing down at about a 45 degree angle. I want it to be slightly higher than the piece being photographed. I try to capture as little of the grey background as I can and I usually allow a bit more background at the top of the image than at the bottom. Unless it is a detail shot, the piece needs to fit inside the frame of the picture with a little room to spare.
Centering and eliminating extra grey space/background is less important now that I use a digital camera. I can open the files in Photoshop or other photo editing software and I can crop or adjust the image to fit my needs. It is still wise not do do much fussing with the image after it is taken. I want the camera to capture as much detail the first time around. I also don't want it to be obvious that I altered the image--it might make someone wonder if the piece itself was altered.

There are still two things I don't like about the last round of slides and I have a couple strategies in mind to deal with these concerns. First, I am hoping to replace my ~6 year old camera with a new one this year. Having played with some of the more modern digital cameras (or cameras that are more recently in my price range) I think I can get more detail in my images and have more control with a new camera.
I also plan to replace my ancient photo paper. Photo paper is available in grey and black but there is also a type of photo paper that has a gradual change in tone from black to grey. Having seen other slides taken on this paper, I think the results look more professional and cleaner than my (admittedly dirty) grey paper.
My
- Take them before it is too late. Even a bad image helps you remember work you made in the past if you no longer own it.
- Use a quality camera & take high resolution pictures
- Control the light source (you want to eliminate dramatic shadows or glare on the piece or on the surface)
- Check that your image looks like the original piece. Increasing the depth-of-field on the camera and taking the shot from a 45 degree angle helps create an accurate sense of the dimensionality of the piece. Decreasing shadows and glare also help the piece "look right". Controling your light source can also help ensure accurate color
- Set aside a place for taking slides. I highly recommend putting the work on a grey or black background free from dust, wrinkles, or discoloration. The image becomes distracting if we can see molding, wallpaper, shelves or even a pattern or texture in the table or surface. Some people like to take slides on the beach or in the grass. If you do this, it needs to "make sense" for the work. Do you use your functional pitchers in the grass or at the beach? Will your background be a distraction from the work?
- Take your time. Allow time to check your results (preferrably on a computer or printed out) so you can fix them.
 |
| I took this photo with a flash on a wooden table--it isn't application quality, but at least it is a record of the piece. |
 |
| Someone else took this photo for me. The photo quality isn't high and the yellow wall is distracting. |
 |
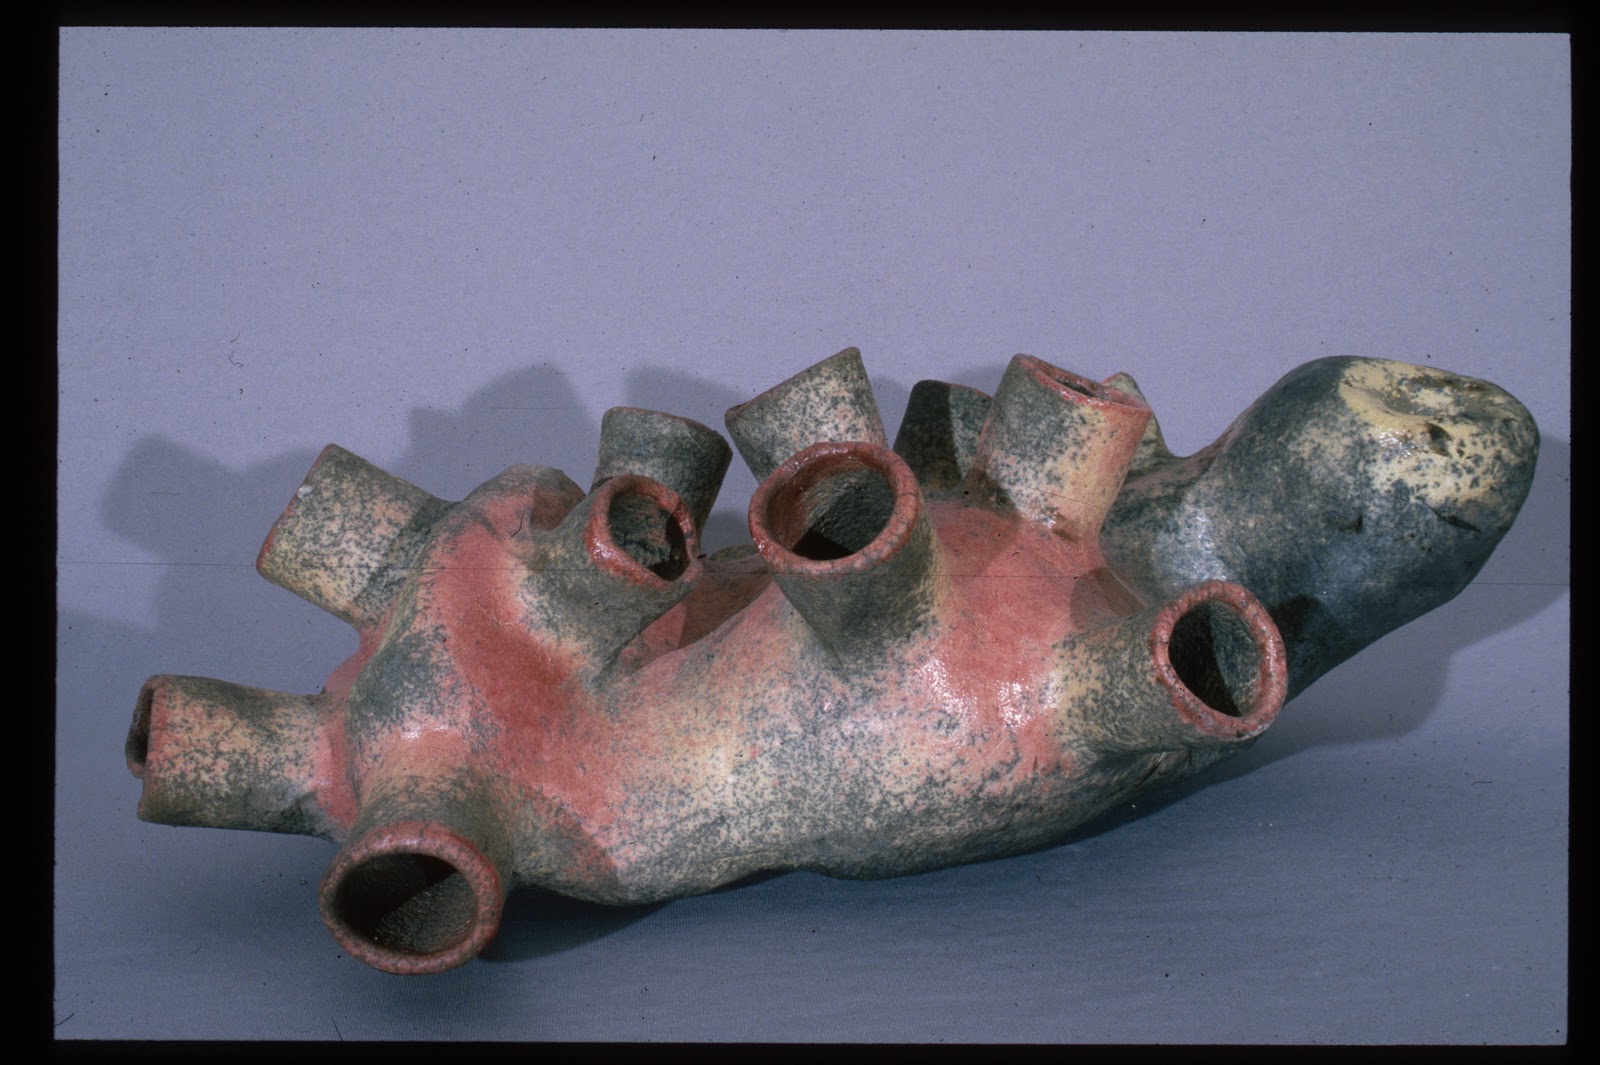
| The shine on the surface is distracting. |
 |
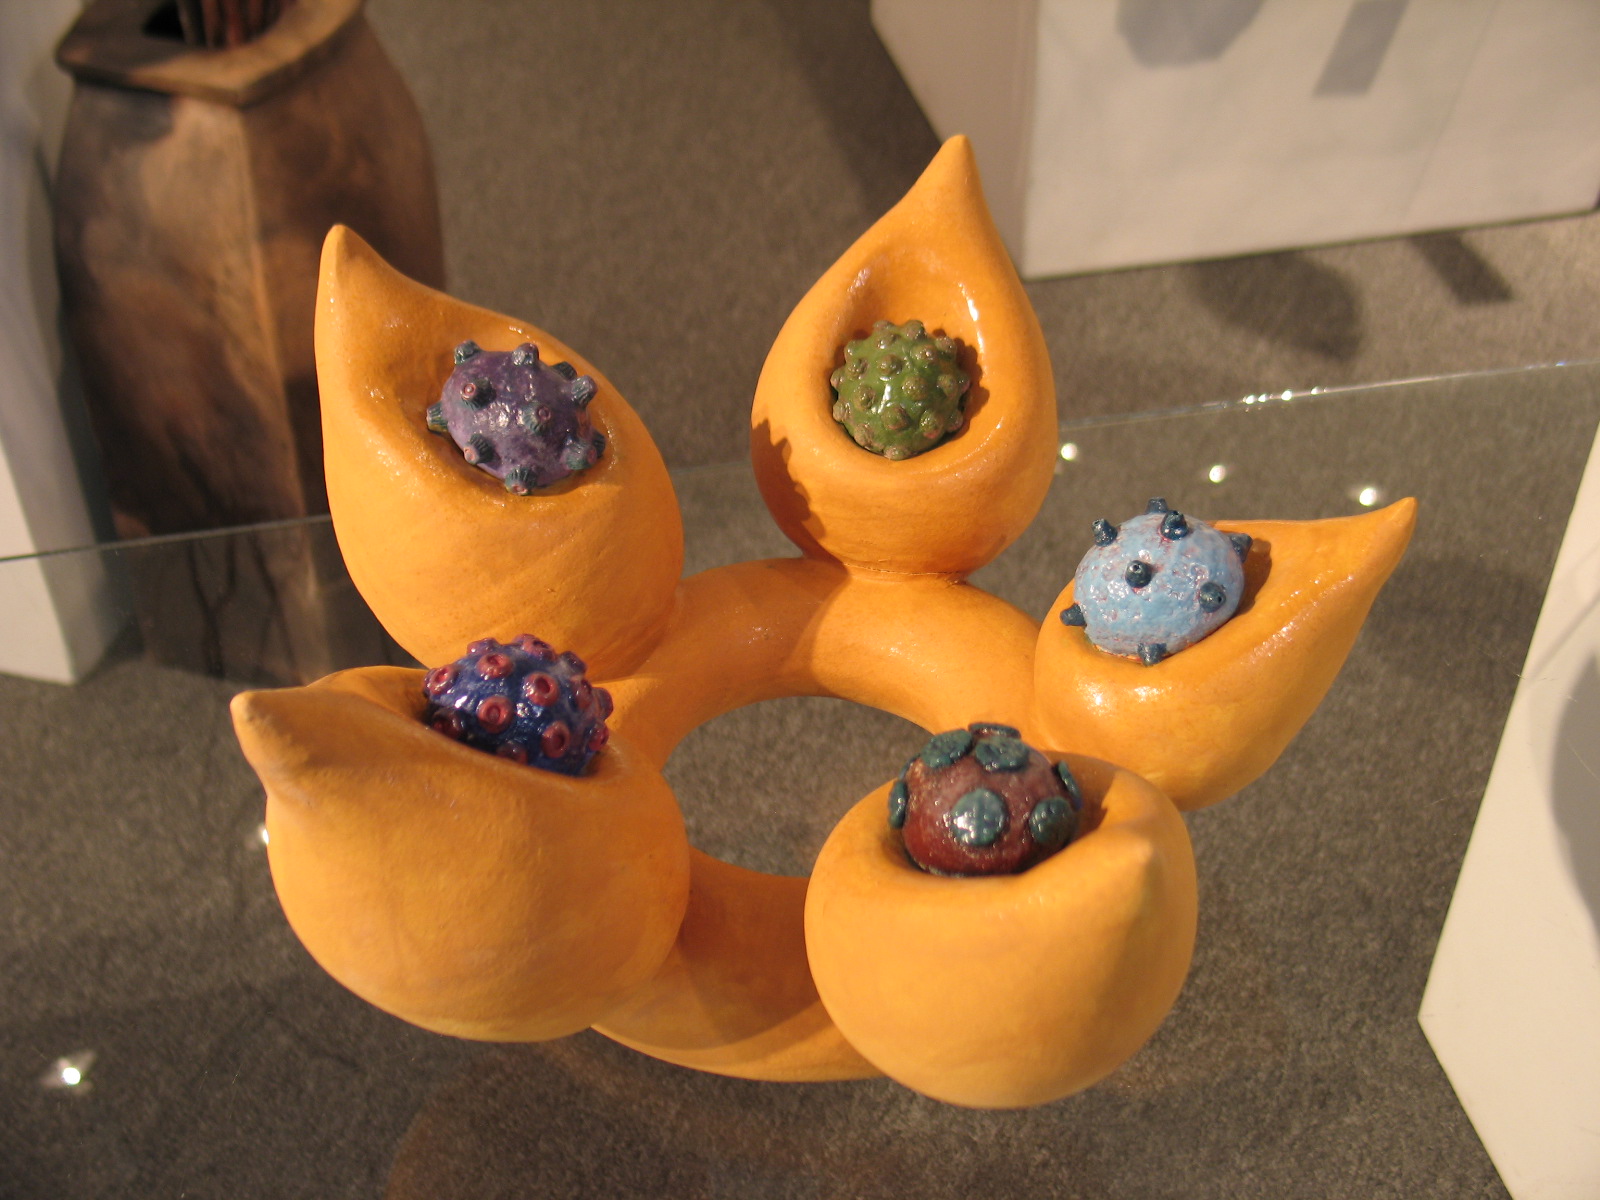
| The interior is bright red, the wall of the piece is light blue and the background is white--at least in real life. |
 |
| I'm sure that lady is happy her legs are in my picture. This picture was taken at an art fair. |
Rachel, thanks for posting this. I have found it to be quite informative. I am going to pull out the camera manual and figure out how I can do anything else other than "automatic" mode. I like the idea of a color paper with gradation. I have seen that technique in photos and it really looks good. Your work is incredible. Would like to see a short demo on some of your handbuilding techniques.
ReplyDelete-Jane
Jane,
ReplyDeleteI didn't talk much about my camera. I have a "manual" mode on the back of the camera--one of my requirements back when I originally got the camera. I can put the camera onto manual mode and from there I can adjust f-stop and exposure. I can also auto-focus if I need to. automatic often works okay outside in daylight as long as I take off the flash.
I updated the post (in red) because I completely forgot to mention how important it is to take high resolution images. This last round of slides I took mostly .jpgs because I forgot to change my camera settings from taking snapshots of my daughter.
ReplyDeleteNow I find myself in need of higher quality pictures (ones that can be enlarged without becoming pixellated) and I realize that, for my most recent work I don't have these images.
I normally take slides in Camera Raw setting and then convert the files to .tiffs (all at once on the computer) and .jpgs as needed. I keep the Raw and Tiff files in case I need higher quality images but most applications ask for .jpgs, especially if files are being e-mailed
I like the idea of a photo box or booth (where students can take photos of their work) better than having a glaze booth. Students don't all have the room to keep a black board, textured cloth, and a white box at our homes but a small corner in the art department would serve all students and improve our blogs and photos for sending out to contests, shows, and others.
ReplyDeleteThere was a plan for a "white photo box" for taking photos on the net a few months ago, I'll try to drum it up! (for info). I use a photographer friend's black/matt board a lot, but something at school would be more handy! I'd think the painter/drawers would also be interested!!