Today we had a raku firing in the clay studio on campus. This is about as late in the fall as I have fired the kiln (at least since grad school). It was pretty cold, but we still managed to get decent results and fire four loads. Yes, today was Sunday; we fire on the weekend ever since some from a weekday firing in 2006 (my first year) smoked out our VP's office.
 |
| horse hair pots smoking in the YVCC kiln yard |
Yesterday it snowed and today was just COLD. I had forgotten that the heat isn't on in campus buildings over the weekend. Unfortunately we didn't have a bisque or glaze kiln loaded. An indoor firing might have helped keep us warm in the studio. The raku kiln is outside and, though warm itself, it didn't radiate enough heat to warm the entire kiln yard. I wore two sweatshirts over my two T-shirts and was still cold, even though I was also wearing a hat and gloves inside.
 |
| students waiting in the cold for the kiln to be unloaded |
Six of my students came for the firing, 3 from beginning pottery and 3 independent students. We fired four times, starting just after 9am and ending a little before 1pm. We fired regular raku pieces in the raku kiln as well as some smoke fired work in the barrel kilns.
 |
| smoke firing in barrel kilns |
A couple of students experimented with horse hair (from the student's own horse) and sugar sprinkled on the surface post firing. The firing in these instances really just served to heat the work up so that the horsehair would burn on contact with the pot. They didn't use glaze.
 |
| hair recently attached to a horse |
 |
| horse hair and sugar pot (with paper reducing interior) |
Our Kiln
We fired using the studio's permanent top-hat raku kiln. It has a hard brick base with a soft insulating firebrick interior. We put a kaolin fiber lined top on the kiln for firing, but the top is stored under cover the rest of the year.
 |
| YVCC's top hat kiln and propane tank |
The kiln yard has a counterweighted frame that allows us to put up the top hat while we remove work from the kiln. This is an important feature as the top hat is too heavy for one person to lift up and over hot work.
 |
| kiln top being raised before first load |
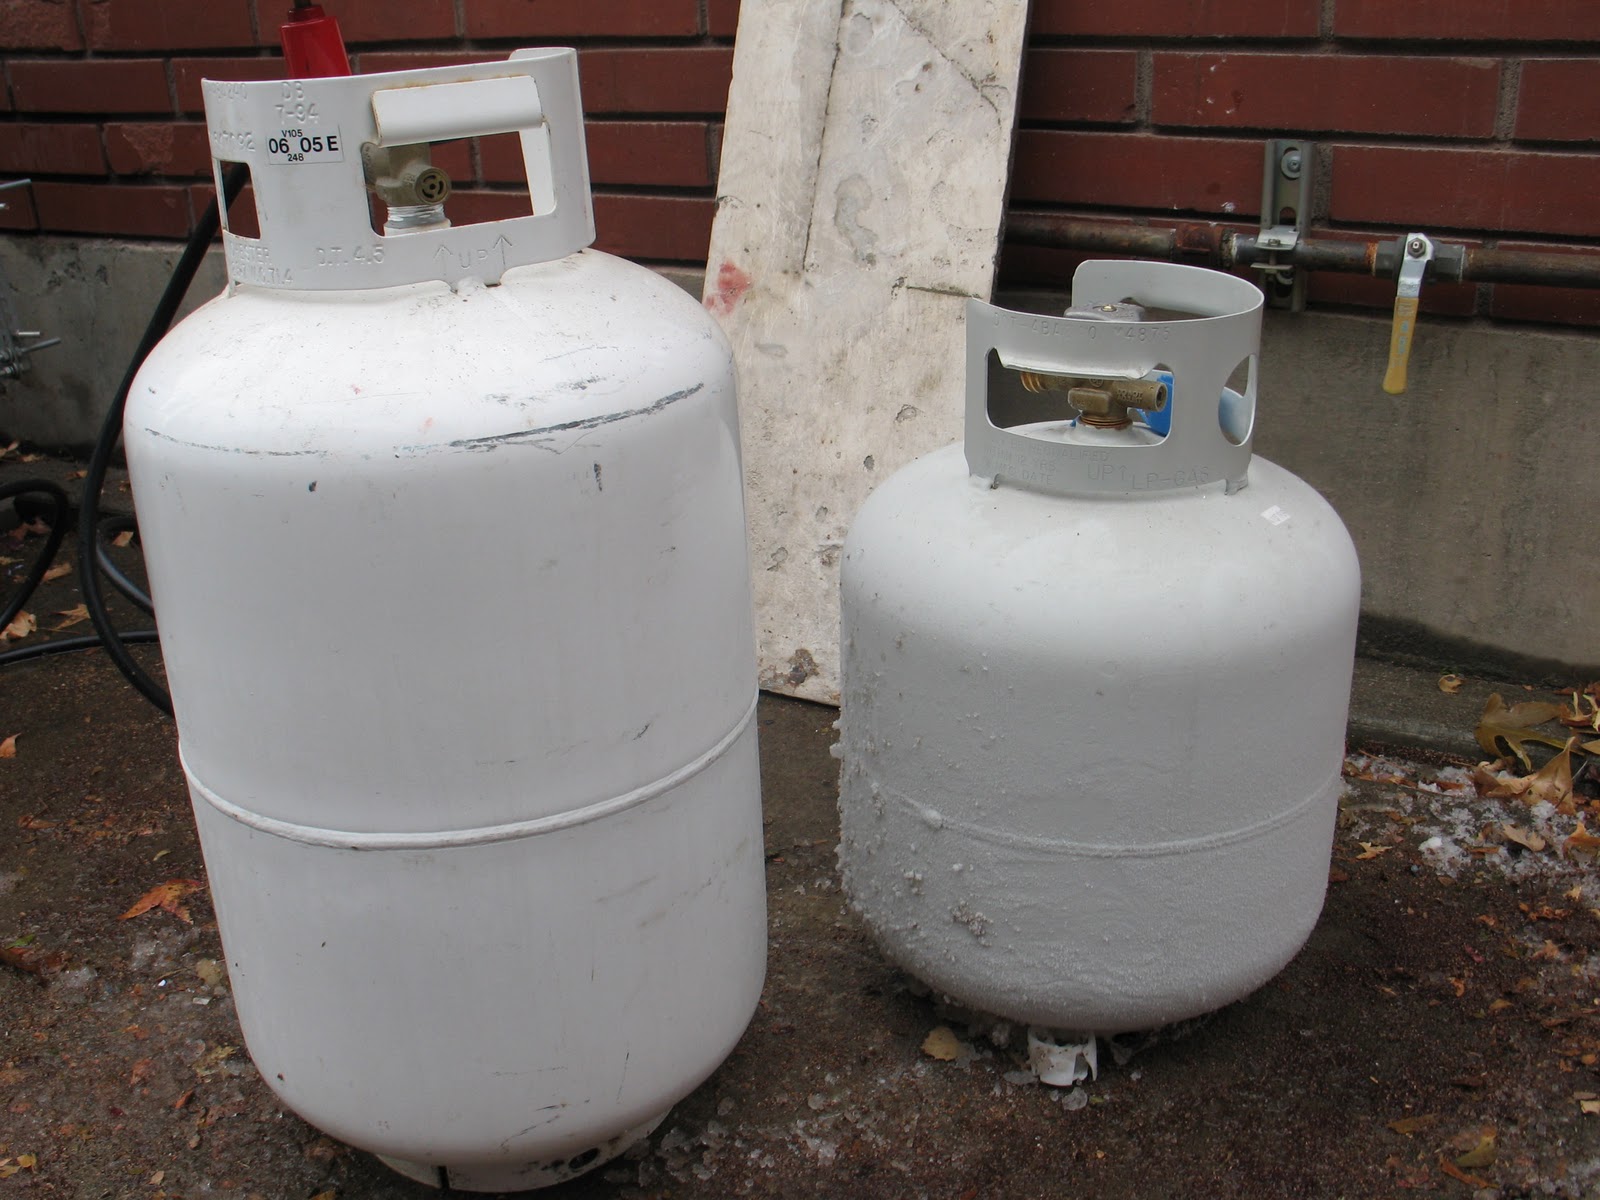
We fire using my own venturi burner and a couple tanks of propane gas. The kiln yard does have an outside gas line, but when I first tried the burner and natural gas line at the school, I wasn't able to get enough pressure for the heat we needed. I have been meaning to try it again; I remember from a few years ago that the gas line was in some way affected by tearing down and replacing Glenn and Anthon Halls. I can't remember now if I tested the natural gas line before or after the buildings were replaced.
But the venturi burner and propane works well for now.
 |
| venturi burner |
During our firing today we had to switch propane tanks because the one we started with froze up partway through the firing. This usually happens at some point. It doesn't mean the tank is empty, just that the liquid propane has frozen and needs to be thawed before it will go through the burner. Today's frost was more impressive since the entire area was semi-frozen.
 |
| frozen tank (on right) |
Preparation
When I first got to campus we needed to set up the kiln. Today's special task was that we also had to remove the snow from the kiln shelves that cover the kiln base and keep the rain (or snow) and leaves out. The kiln yard had accumulated leaves along the wall and snow on top of these leaves so we also had to remove them.
The kiln top is then carried over to the base and attached to the cables and the counterweight is attached. The burner is attached to the propane and the kiln is loaded. This morning a few pieces were ready that had been glazed during the week.
 |
| waiting to load kiln |
Other works that students glazed today were pre-heated in the bottom of an electric kiln so they wouldn't be wet when we loaded the second, third or fourth loads into the kiln. If the work is wet, especially if it is also thick, it can explode during the firing because the kiln is heated up so quickly. This time around we didn't have any work explode during the firing. No one dropped work either, as sometimes happens.
 |
| cracked rim (probably due to heat shock) |
Firing
Once the kiln is loaded, the burner is lit and the kiln can be heated. The first firing takes about an hour because we need to heat up the whole kiln. This time around I tried to go slowly because the kiln base had been covered in snow and I was concerned that some moisture had gotten into the bricks of the kiln itself.
Once the work has heated up to the appropriate temperature (about 1750 degrees Fahrenheit or roughly cone 08), we turn off the burner, pull open the kiln top and remove the work from the kiln.
 |
| kiln just opened (notice the bowl in back was knocked by the top of the kiln and has tipped over) |
 |
| still glowing hot, pieces are removed from kiln |
The work is red hot and needs to be removed with tongs. Then the work is placed in one of several post-firing reduction buckets. The hot pot lights the combustible materials (shredded paper or leaves, usually). Students can thrown more paper on top of the pot, then put the lid on and reduce or smoke the pot in the bucket.
 |
| hot pot being placed in a reduction bucket |
The post-firing reduction can affect the surface color of the clay or the glaze. Copper in a glaze can "flash" red or golden. If left out in the air, the color is more likely to be green or turquoise. Naked clay (clay without glaze) absorbs the smoke and turns black or grey. Clear glaze cracks and the smoke can be absorbed into the clay exposed by the glaze cracks. A typical raku glaze is usually a shiny or matte copper glaze with swirls or flashes of red, green and turquoise or a clear glaze that appears to have bold black cracks in the surface.
 |
| pieces cooling after reduction |
Once the first load of work has been removed from the kiln and reduced, the kiln is ready to be loaded again. If the kiln can be emptied and loaded quickly, it will stay hot. The burner is directed at a brick under the shelf in the kiln. This "target brick" retains the heat so that when the gas is turned back on it doesn't necessarily require a flame to light. The second firing takes less time, maybe 30 minutes to heat up the work.
 |
| placing hot pot in a reduction bucket |
 |
| reduction bucket flaming |
 |
| re-opening a bucket to add another hot piece |
Then the work is removed again and the process is repeated. Unless, that is, the propane tank freezes. In that case there is a short intermission while we try to screw the burner into a new tank valve.
 |
| moving burner from frozen tank |
Horse Hair
When we say "horse hair" we usually mean the surface treatment in which horse hair is used to create small areas or lines of reduction on the clay surface. The work is heated but not put in a post-firing reduction bucket. In our case, the work was not glazed either. The work is taken out of the kiln and horse hair (or steel wool, I've heard) is placed on the surface of the piece.
The hot pot burns the hair which leaves smoke residue on the surface of (or absorbed into) the clay. The coarse horse hair shrinks and twists as it burns, leaving an irregular bumpy line along the surface of the pot.
 |
| teetering tower topped by a hot pot |
 |
| yeah, let's put that hot pot closer to the ground |
 |
| paper inside the pot (to blacken the interior) |
 |
| throwing a pencil at your pot brings good luck |
 |
| holding horse hair against hot pot |
 |
| the pot on the right was coated in underglaze before firing |
The horse hair reduction line is very dark against the white (or pink) surface of the clay. Both students today reduced their interiors with other combustible materials. Here the hot pots are still smoking and the horse hair is visible hanging over the rim of the white pot. One of the students was, at first, hesitant to hold the burning horse hair against the pot. Eventually they both discovered that the horse hair burns slowly and can be adjusted for location on the pot. One student also threw some sugar on the surface of the pot. The effect is subtle and didn't show up well in my images.
 |
| interior of copper glazed pot (with burnt paper scraps) |
 |
| various copper glazed raku fired pieces |


Great overview of the "Raku Day" firing. I plan to do a post on "smoke Firing" and will try to notify you when I do?
ReplyDeleteThis is a good outline of Raku for beginner students who don't quite understand the process. I would think of all our posts, this one has potential for a wider audience.
I'd think you'd get bukko hits on this post, it really is great. I'll try to do a raku on my site before schools starts. I washed my raku cup about 30 times and then tried drinking t in it, but it (surprisingly) tasted bitter (more than the non-raku earthenware cup I made). does this mean I need to quench it in something like blackberry leaves? I know, I know, get a REAL cup!/mh
ReplyDelete