Showing posts with label raku. Show all posts

Sunday, March 11, 2018

Art Club Juried Show & End of Quarter Firing

Art Club Juried Show

Escapism Juried Show

Last week the YVC Art Club installed their juried show, Escapism, in the hallway gallery of Palmer Martin Hall. The show runs through April 23 and is open whenever the building is open.

Escapism 3D work, featuring lamp by Les Delzer, bust by Emily George, dinner set by Sara Lawrence, fox by Chelsea Blodgett

The show features work by high school and college students in and around Yakima. Some of the work was completed during classes and some was done on the students' own time. This show is not the same as the annual Department of Visual Arts Student Exhibition at Larson Gallery in May.
  
Escapism Juried Show, 2d work on display

This show was organized by Art Club students. This was the first year and we had over 50 entires including painting, drawing, photography, and ceramics.


fox and bunny by Chelsea Blodgett

 The four ceramic items in the show are all made by students in my clay classes this quarter, though only two were actually made this quarter. The fox, by Chelsea Blodgett, was build for the second project in my flipped hand-building class and was taken out of the kiln within an hour or two of when it was put into the display case for this show.

Frog vase and dinner set by Sara Lawrence

One of my intermediate wheel students, Sara Lawrence, created this frog themed dinner set during the winter quarter, too. Her frog vase and dishes feature a glaze recipe she tested this quarter during class. Her work was out of the kiln at least a day before the show was installed.


Last Firings of the Winter Quarter 

Reduction fired work in the gas kiln (before unloading)

Today is Sunday, but I went in to unload and load kilns both today and yesterday. My students were told that the last day to glaze cone 10 reduction work in the gas kiln was Thursday by 3pm and the last day to glaze cone 10 or cone 04 work in the electric kilns was Friday 3pm. I also warned students that I would be loading the kilns during the day on Thursday and Friday and once they were full, they were full.

Batman, by Humberto Urrutia-Jr (before unloading)

My students and I finished loading the gas kiln on Thursday about 3:10. There were a handful of pieces that wouldn't fit in the kiln at that point, based on how and what we had to load. Moments later, an intermediate student walked in with her 10" tall piece ready to load. She was unhappy when I told her she could load it in the "oxidation" firing in the electric kiln. 

Sculpture with copper red glaze in reduction by Jordan Miller

Some of our glazes look different when fired in a reduction atmosphere vs the neutral atmosphere of an electric kiln. Copper Red and Shino glazes are particularly impacted. Reds in reduction will look green and transparent in the electric kiln.

3D printed turtle pencil holder by Chelsea Blodgett

An extra firing in the electric kiln is relatively easy to add, because the kiln is smaller and the kiln can be programmed to fire to temperature. The gas kiln is larger and requires hourly adjustments to the gas, air, and damper during much of the firing process. I did not offer to unload that kiln on Saturday and reload it with one piece in it to fire all day on Sunday.

Lady with flowers by Autumn Nugent (picture taken from inside the kiln before unloading)

I did, however, end up loading and unloading more than expect on the weekend. Next week is finals week Wednesday through Friday, but I am presenting at NCECA in Pittsburg on Wednesday and Thursday, so I will not be here for finals week. The upshot is that I have adjusted our finals due dates and, by extension, our firing schedule.

3D Printed vase in high temp oxidation firing by Humberto Urrutia-Jr

At the start of the week I had anticipated firing one of each type of kiln (cone 10 reduction, cone 10 "oxidation", and low fire), but by midweek it was clear we had more work than that, so I loaded an extra cone 10 firing in the smaller electric kiln.

cone 10 oxidation fired vase by Humberto Urrutia-Jr

This small electric kiln was too hot to unload on Friday when we were loading the second cone 10 in our larger electric kiln. I knew that I would be coming in to unload it and reload it with low fire work on Saturday, but the kiln was small and the load/unload would be relatively quick. 

oxidation fired crab (before unloading) by Cigdem Collins

I had just finished loading and had started the second cone 10 in the electric kiln on Friday morning, when a student came to me with a problem. For context, most students had finished glazing already and I only had about 5 students finishing work during class that morning. I had already checked in with every single student about what they were glazing. They all assured me their cone 10 work was done and they were glazing only low fire work.

Coil build low fire vase by Margarita Cruz

The student who came to me with the problem had spent a couple of days very carefully applying underglaze to her sculpture. She had already assured me, twice, that the 24" tall sculpture would be going in the low temperature firing. I just had to figure out how to fit it and some of its larger friends. 

low fire stuffed elephant sculpture by Margarita Cruz

The high temp kiln was at a little over 200 degrees when this student came out of the glaze room and explained to me that she had glazed her work with the high temperature clear, instead of the low temperature clear over the underglaze. She couldn't wash off the glaze because it would wash off the underglaze she had spent so much time on. She couldn't fire the work to a low temperature because the glaze wouldn't melt and become clear. I happen to know, from other students being confusing about firing temperatures, that this high temperature clear glaze looks rough and white when fired at low temperature.

student coil vase, low fired

So, of course, I ended up coming in on Saturday to unload the small high fire kiln and load and fire the low fire work. The large low temp kiln I had loaded on Friday was too hot to unload. I came in Sunday morning to unload the low temperature work (both kilns were cool, but the smaller kiln was easier to unload alone) and load one last high fire with just this tall piece and one small friend who had appeared Friday afternoon. 

too much glaze on a thrown piece in the large high fire electric kiln


 Raku Firing

3D printed vase (which didn't survive the firing well) with horse-hair decoration

Last week we also ran two class raku firing days. On Tuesday, students in wheel classes were able to fire their work, but somehow I didn't get any pictures of it. On Wednesday hand-builders fired. The students really seem to enjoy using horse hair on their work. 

Horse-hair 3D printed and hand-built bunny by Nadene Orlando-Urlacher

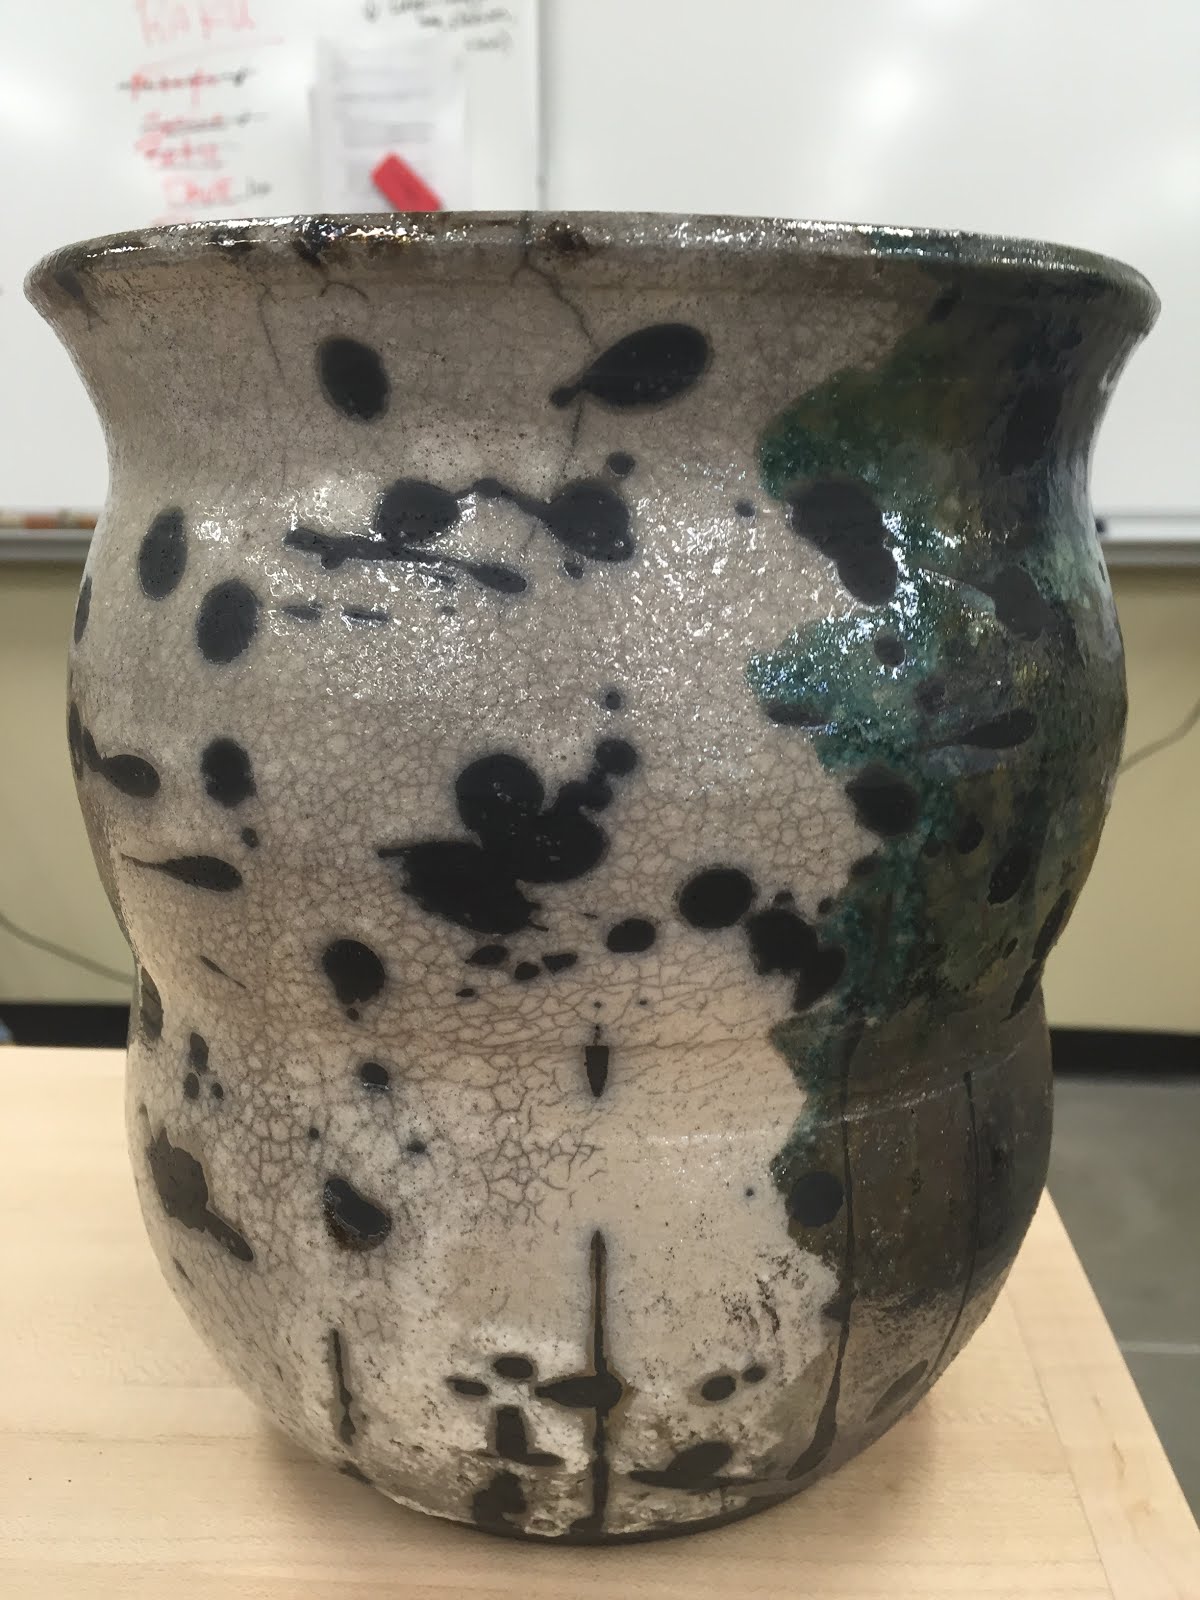
A few students also took advantage of the raku glazes and one that was particularly nice was a vase by Chelsea Blodgett. She used wax resist for the black areas and white crackle glaze for the rest. Her coil-built vase was modeled on Ancient Greek vases, I believe.

Vase and cat mug by Chelsea Blodgett

Sunday, March 12, 2017

Raku Firing in the New Space

hot pots being moved with tongs into or out of the post firing reduction bucket (old building)

Last week YVC clay classes had raku firings all day on Thursday and Friday. In the new building, we are able to fire during during class time every quarter. We have a kiln yard on the south side of the studio that we can access through the kiln room. This space is a bit small, but it is away from air-intake, and its walls are tall so that the smoke is either inside the kiln yard or up and away from pedestrians.

new building kiln yard after the last firing

In the old building, we had to fire on the weekend, because the smoke from our firing bothered people in the nearby administration building. The old kiln yard had a lot of space, which was nice for hanging out and made it easier to be away from the smoke but still observing the firing. The new studio has a small space, but a few people can observe through the windows or can stand outside the exterior doors of the kiln yard to see without being right in the action. 

a view of the raku process in the old kiln yard

Firing raku during the week makes it easier for all the students to be involved if they so choose and I prefer not to spend an entire weekend day firing after spending five days at school during the week. The firing doesn't fit well into a two hour class, so students from my morning class had to start early or end late if they wanted to raku. The afternoon class is longer, so some of them were able to fire during class. Even if they aren't firing their own work, all the students can see the process during class and those who are firing work can get involved.

fired sculpture from this quarter's class


This year I had quite a few students choose to participate on both days. We got an early start and were able to fire several loads in the morning on Thursday before it rained and before the rain got heavier. We ended earlier than planned to get ourselves and the kiln out of the rain. Yakima rain usually isn't quite as serious as Wisconsin rain, so being out in the rain wasn't too bad most of the morning. Rain isn't great for the kiln, but we need to replace the top anyway. 

red hot pots after the kiln was opened (from the old studio)

The kiln in the new space is basically a revamped version of the same kiln from the old space. The old kiln had a base made of soft and hard fire bricks. The new one has the same arrangement for the base, but with fresh bricks. The top is still the same (and needs its fiber replaced), but the counterweight system from the old building has been replaced with a motorized lift. 

the new kiln base with the old kiln top

Most of the student work came through the firing safely, but I didn't get pictures. One large piece cracked and broke near the top, probably because it was large and made with porcelain clay. Another piece lost its bottom in the reduction bucket because it hadn't been attached well at the start. One more piece was dropped or pinched too tightly with the tongs so it cracked and broke into more than ten pieces.

student work with horse hair from this year's firing

We had three students do horse hair raku (where you put horse hair onto a hot, unglazed pot so it will burn and leave black lines of smoke permanently on the clay surface) this quarter. The results are a little hard to see on small work, but the plate shows the effect fairly well. 

Thursday, May 26, 2016

Raku Firing During Class in the New Building

Today was our second class raku firing in our new building. We have a new counter lift system to lift the top-hat off the kiln base. The kiln base is all new bricks this year, though we haven't yet replaced the insulation in the top hat itself.

Wax on the bottoms of cool pieces loaded into a hot kiln starts to burn before the kiln is relit. (image by Dave R.)

Students in my functional pottery, intermediate and advanced wheel and independent study classes met starting today at 9am for the firing. We set up the kiln top on the new winch lift system and put in some glazed pieces.
A spot next to the top hat on the kiln helps dry a pot that was glazed after the deadline.

Our kiln runs on propane tanks and a Venturi burner. We heat the work up to about 1800 degrees in an hour or so. Then when the glaze is molten, the pots are lifted out of the kiln with tongs and placed in buckets of combustibles.
Hot pots coming out of the kiln look black on the outside because the matte glaze doesn't melt. 

Our new space is fairly small, but well protected from the wind and isolated from the main classroom by two sets of doors that help keep the smoke smell contained. We fired, maybe five or six loads of work today, including a few pieces that were refired after less nice results.

Hot pots put into the buckets instantly ignite the combustible materials inside. Students are ready to add more paper on top for even reduction.

We also had a few students try horse-hair raku, where the horse hair is applied to the unglazed surface of a hot pot. The horse hair burns black lines in place on the pot. I think next time we raku, I will prepare the students a little more clearly on how the horse hair process works before they are staring at a hot pot.

Applying horsehair to a small bowl like this takes precision and planning.

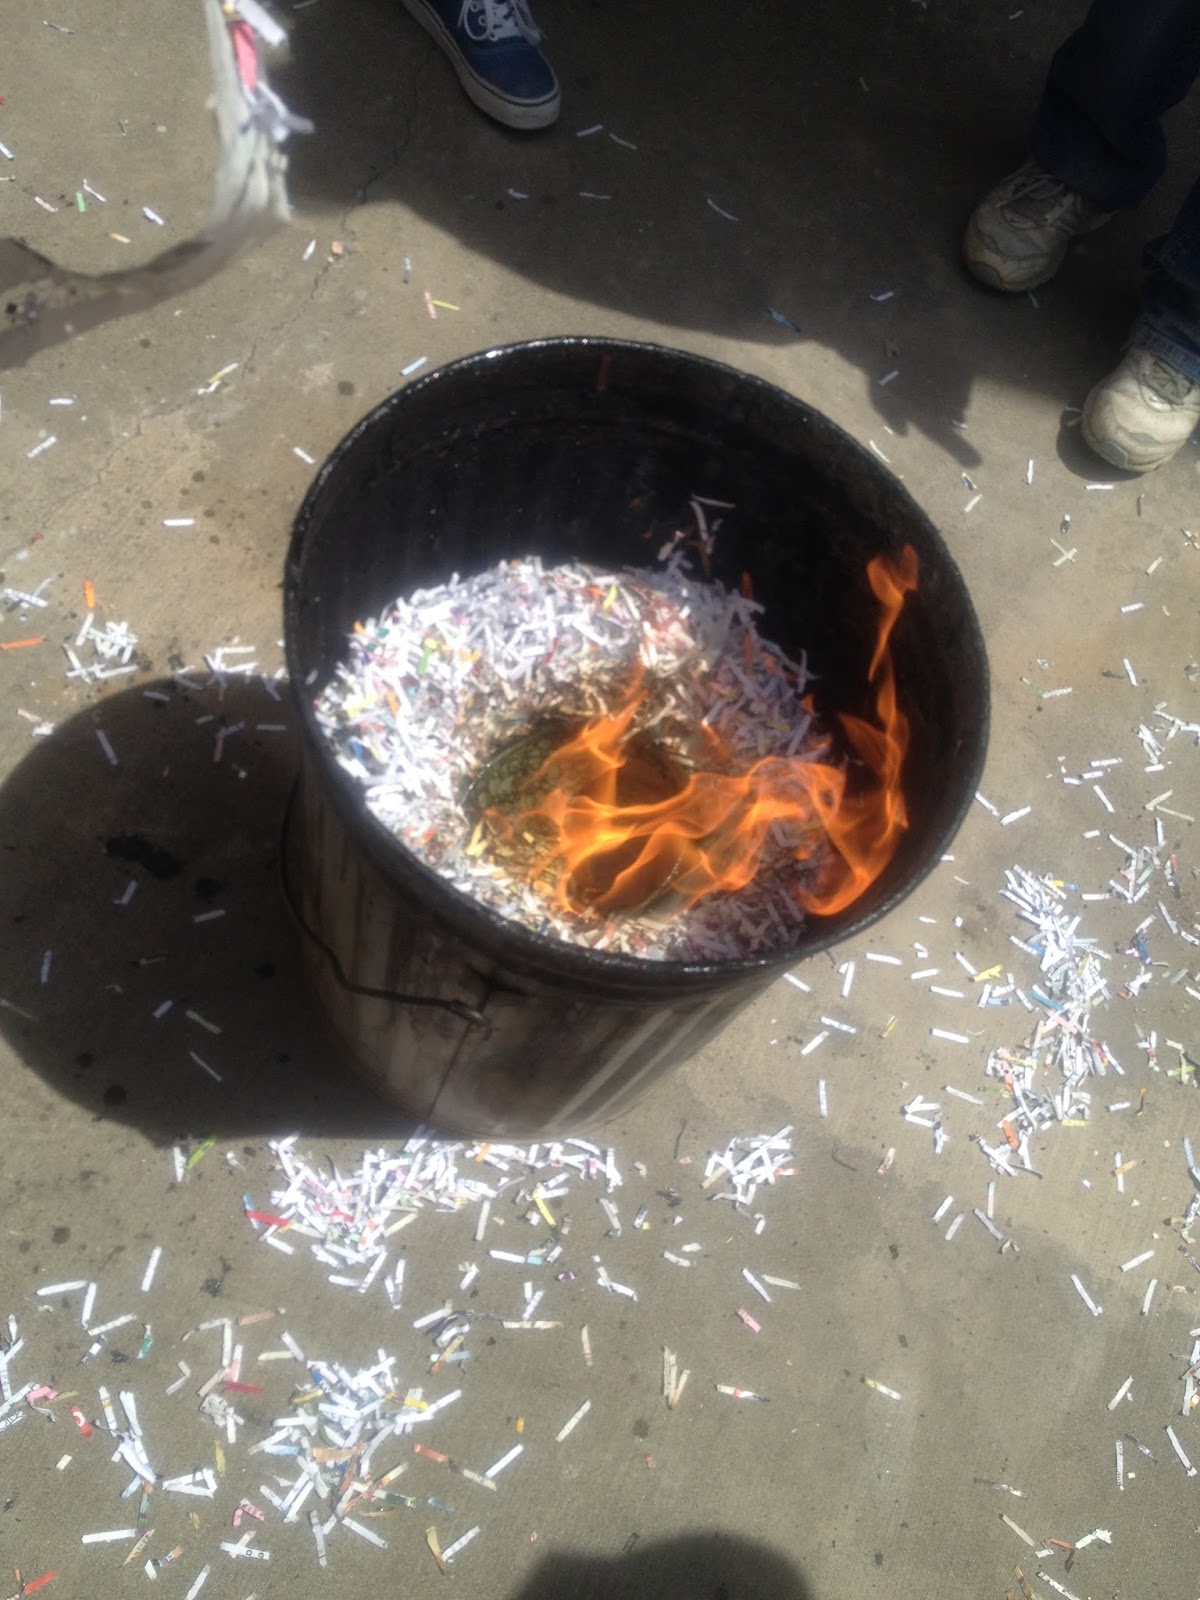
As for the glazed, pieces, after the pieces are placed into the reduction buckets filled with shredded paper or leaves, we place a lid on top and let the pieces cool and smoke. The lack of oxygen and the heavy smoke affects the surface of the glaze and the unglazed surfaces of the pots.

Reduction buckets are left to smoke and cool in between firings.

This time we used maple leaves and shredded paper for most pieces. The largest piece was so hot that we had trouble keeping the flames contained inside our reduction bucket. 

Pulling a fired pot out of a bucket sometimes causes the paper to relight.

The reduction atmosphere inside the kiln and in the reduction bucket gave us some pretty good results with at least one of our matte copper glazes. These glazes can look like they have oil spills or flamelike colors on their surfaces.

Our classroom's "Hawaiian Copper Blue"

The matte copper glazes can also be combined with clear gloss glazes to add some shine to the surface. 
This piece has been fired about four different time with glaze added at least twice.

Students who used wax resist to keep glaze from some surfaces of their pots ended up with deep black areas where the smoke was absorbed into the bare clay. 

The white side is a White Crackle Raku glaze with wax resist dots, the green is our classroom's "Texas Twister" copper glaze.

Our most unusual results came from a fairly thick coat of a glossy copper glaze with maple leaves heavily packed on top. 

This glaze benefited from heavy reduction with leaves. The underside is a brighter blue green color.

Sunday, May 31, 2015

Last Raku at Palmer Hall

Yesterday was officially the last raku firings at our "old" building. The art program is moving to the new Palmer-Martin building over the summer and all our classes will be on the south side of the street next year. 

raku pieces cooling off after firing

There will be a ribbon cutting ceremony and open house this coming Tuesday at YVCC.  I will not be able to attend, since it is scheduled during one of my class critiques, but I believe the studios will be open. I hope to get over there later in the day or later in the week.

hot pieces being removed from the raku kiln

My students and I fired the kiln for about five hours yesterday and got through at least five rounds of work in the super heat. The morning was actually fairly nice, but the heat, sun, and smoke started to be exhausting by the middle of the day. One thing I'm looking forward to in the new space is air conditioning in the building that actually cools the building.

 
spraying water on a piece before dropping it in the reduction bucket

It might not be fair to blame the air conditioner, since our gas kiln was cooling down from about 600-700 degrees in the morning, but the studio has been unbearable most of the last two weeks. In the new building, kilns will be in a separate room from the rest of the studio, so hopefully we can keep cool in the warmer months.

taking work from the hot kiln

Yesterday's firing went well, we only lost two pieces, one was dropped, the other was too fragile to raku safely. The glaze results were pretty good all around and we had a lot of variety. We horse-haired a few things and several students tried resist techniques and layered glazes in new and innovative ways.

cooling work with resist, layered glazes, and burnt paper

The day was pretty warm in general. The high according to the NWS was only 90, but I think the forecast was higher than that. I know we felt warm because of the heat inside the building and because we were adding to the heat in our space with heat from the kiln. The smoke from the reduction buckets made it unpleasant to be outside in the shade much of the time.

a hot pot with horse hair burnt onto the surface (the shelf is on top to contain the smoke inside the pot)


Sunday, December 7, 2014

Raku Firing & Kiln Trouble

This was a busy firing week at school. We fired two and a half cone ten glaze firings in the gas kiln during the week and spent Saturday raku firing outside. We also fired several bisque and low temperature glaze firings in the electric kilns. Monday is the final critique for my beginning classes, so we are obviously getting as much work finished as possible.

Our school raku kiln shortly after we started firing on Saturday.

Now normally we don't fire half a glaze firing, but this was my first experience with a thermocouple that failed during the firing and caused the kiln to automatically shut off. The kiln went from 1949 degrees Fahrenheit at 4:20pm to 2400 degrees at 4:40 and the kiln shut itself off. I wasn't worried that it had actually gone up 450 degrees in twenty minutes, since the kiln has fired in a predictable way for dozens of firings and the pyrometric cones in the kiln weren't even soft. However, when I tried to restart it, the kiln kept automatically shutting off and I eventually gave up and let the kiln cool down.

Loading the barrel smoke firing.

Later I learned that the thermocouple is designed to read the highest possible temperature when it breaks, thus triggering the automatic shutoff. I also learned how to bypass the broken thermocouple for future firings. That night, however, I didn't feel comfortable taking the wiring apart during the firing. We let the kiln cool, added a few more cone packs to help us gauge temperature and refired on Saturday.

An independent student instructing a beginning student on how to load the barrel.

The raku firing this weekend went fairly well as far as weather and the pieces were concerned. We finished a bit early with all the pieces fired and my students helped clean up the leaves and paper in the kiln yard. The day was sunny and relatively warm by the early afternoon.

Adding shredded paper to the barrel before lighting it.


Our first propane tank froze up after the third firing.


Red/orange heat in the raku kiln top during firing.

After the firing I encouraged the students to move some of the detritus of the studio, including extra shelves, bricks and kiln posts to a different part of the kiln yard.

Pulling work from the reduction bucket after raku firing.

I think the students who fired were generally pleased with their work. The day included more students studying than most raku firings. We had intended to fire in November, but the weather prevented the firing. This firing was about as last-minute as it could have been as classes ended Friday and finals begin Monday.

A raku glazed piece cooling after post-firing reduction.