Showing posts with label reduction. Show all posts

Sunday, May 5, 2019

Clay Sale and Glazes from Winter 2019

April & May Art Events

The end of April and beginning of May are busy times. It seems like we have a two- or three-week span during which events are pretty much non-stop. Saturday, April 27 was International Sculpture Day, with events in Yakima and Tieton. Tuesday, April 30 was the opening reception for the DoVA Student and Faculty Exhibition at Larson Gallery (exhibit continues through May 25). And next Thursday, May 9 is the Spring Clay Sale at YVC.
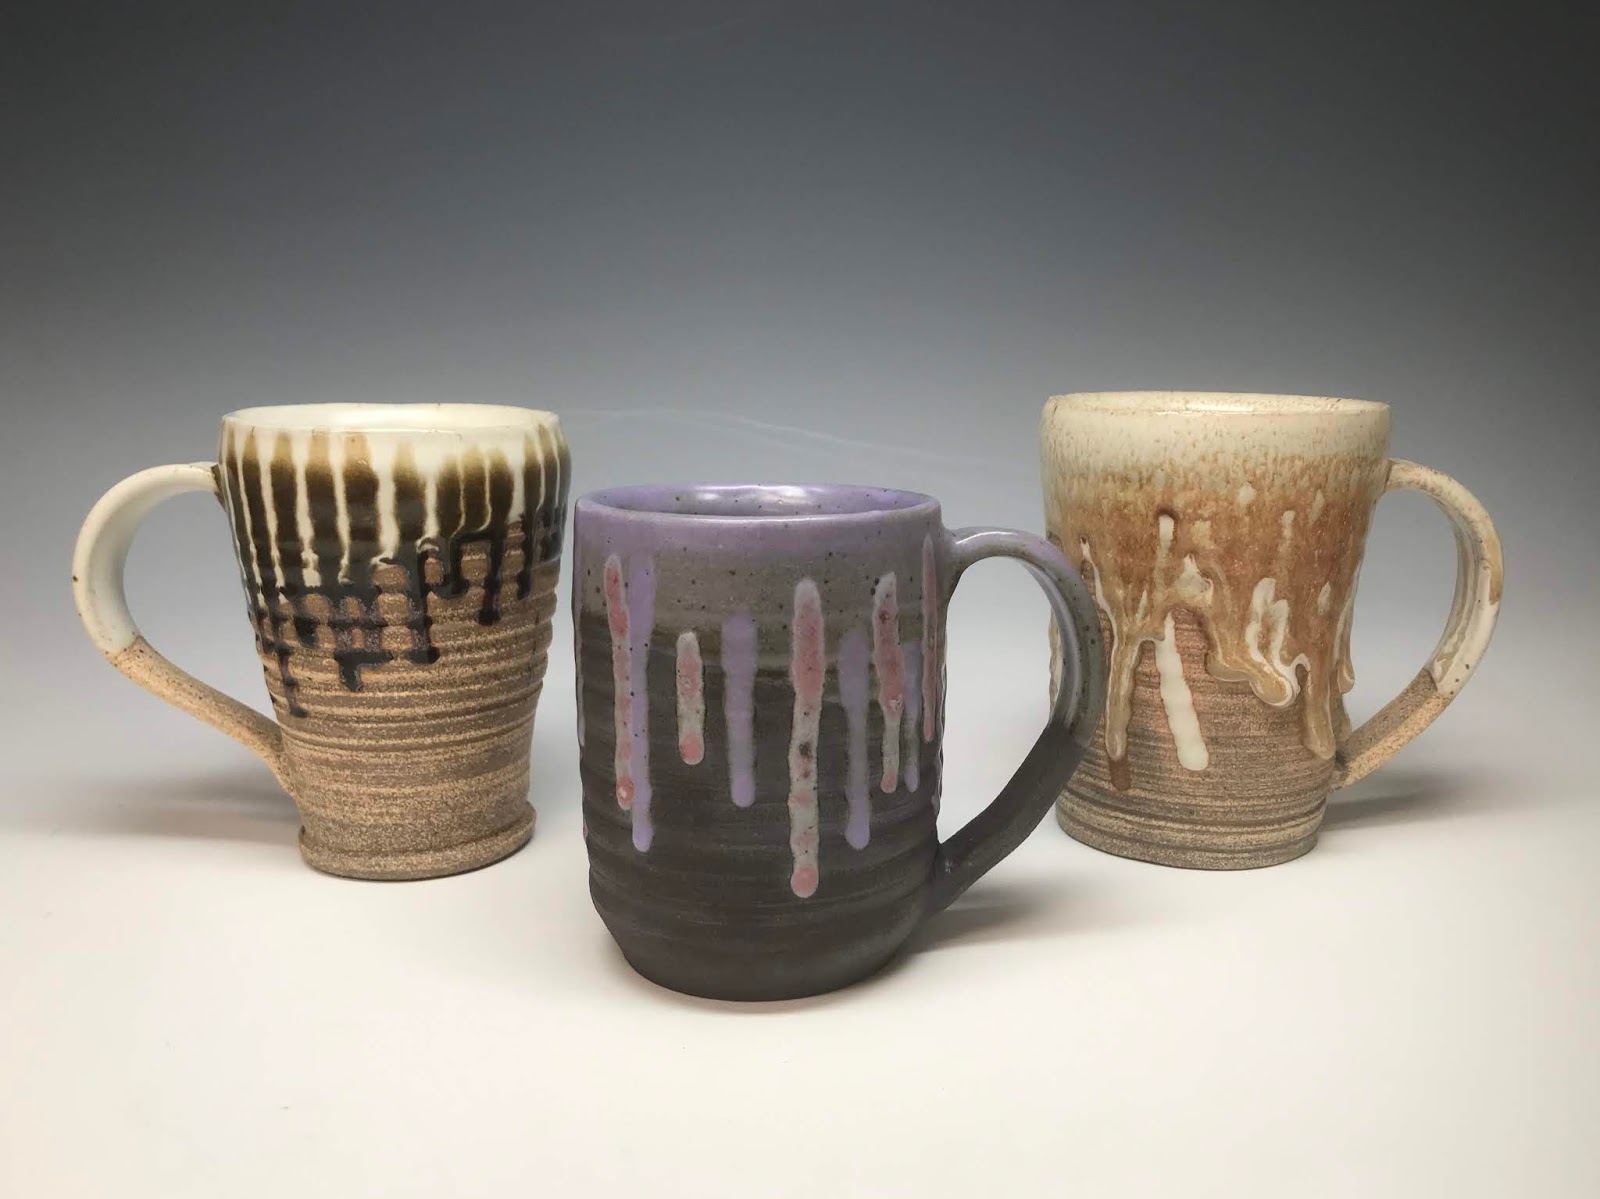
Mugs with glaze drips by Beau Filbert

Clay Sale: Thursday, May 9, 11-7, Palmer Martin Hall (YVC Campus)

The clay sale features functional pottery and sculpture made by current and former YVC clay students and faculty for sale at low, low prices! The sale runs Thursday from 11am-7pm in Palmer Martin Building (building 20) on the south side of the Yakima Valley College campus. We take cash, checks, and credit cards. Many pieces are priced below $10 and even $5 dollars. YVC clay T-shirts, as well as prints from the Winter 2019 printmaking class (not clay) will also be on sale.

Standing spoon rest with underglaze decoration, by Amber Ryan 
This quarter, my students (and even employees, when they have time) have been working hard to throw, trim, glaze and fire new work for the sale. In fact, though it is only week 5, we've already fired one load of glazed work and are getting ready to fire another kiln full on Tuesday so that the work can be ready for Thursday's sale.

Oxidation copper vase by Amber Ryan

We usually fire our first reduction glaze firing around week 5 or so. This load usually consists mainly of beginning student work. I required beginning students to glaze some of their early work around mid-quarter so they can see what the glazes look like. This quarter we ended up firing an even earlier oxidation firing that consisted mostly of intermediate and community student work. This quarter I have an unusually large group of 6 intermediate students, as well as some prolific community worker/students who have been making mostly clay sale work for the past few weeks.

Reduction copper vase by Amber Ryan

Firing Atmospheres

Both reduction and oxidation firings in our studio reach the same temperature (cone 10 or roughly 2300 degrees Fahrenheit) and can be fired in the same kiln. We used the same glazes for both firings, but we adjust the gas and air in the kiln to create different atmospheres. An oxidizing atmosphere is one in which there is plenty of oxygen for the fire. For a reduction atmosphere, we reduce the amount of oxygen available in the kiln so that the fire must pull oxygen out of the glaze chemicals or the clay itself. This process turns the Iron Oxide in the clay body into metallic specs of iron when the oxygen is used to react in the firing process.

oxidation copper bowl with glaze drip by Austin Peart

Similarly, the oxygen in copper carbonate (CuCO3) reacts with the fire and changes the look of the copper in the glaze. In an oxidation atmosphere (seen above in Amber and Austin's greenish pieces) there is plenty of oxygen inside the kiln, so the copper remains this greenish color. My comparison for students is the statue of liberty. The copper on this statue is out in open with plenty of air and thus as a greenish appearance.

Reduction vase with bent rim by Austin Peart

In a reduction atmosphere, on the other hand, the copper reacts to the removal of oxygen by turning red. My comparison for students is a copper penny kept in a pocket and not exposed to the air. The result in our firing is that copper in a reduction atmosphere turns red. The red copper glaze in Amber and Austin's pieces above and Leticia and Beau's pieces below has turned a vivid red and has become fairly opaque in the glaze.

reduction copper glaze with incised decoration by Leticia Ortiz

The firings can also be loaded a bit differently. We have found that if we load the bottom of the kiln tight, with pieces close together, and run out of work (or have irregularly shaped work) at the top for the kiln, so that the pieces have lots of space around them, the kiln will not be able to maintain a reduction atmosphere. The extra space around work tends to cause those loosely loaded areas of the kiln to have more oxidized look, especially with copper glazes.

bowl with glaze drips (upside down) by Beau Filbert

In the red and green examples above, Amber, Austin, Leticia, and Beau have used the copper glaze in combination with other glazes. Beau used some Ninja Junior crawl on  his rim, Leticia and Austin have layered a different white glaze over or under their red copper glaze near the top. I believe Amber's copper glaze is over the same white in both instances and I believe Leticia's white is over the copper, but I'm not 100% sure anymore.

bowls with glaze drips by Beau Filbert

Austin also has a drip of some other glaze running down the oxidized copper into the middle of his bowl. Our copper glaze has a lot of "flow" meaning it melts relatively early and keeps melting and moving during the firing. This movement can lead to the drips we see on Austin's piece (his are intentional, but sometimes students underestimate the movement and end up with their glaze stuck to the shelf). This movement can also cause other glazes on top of the copper glaze to move a lot too. This is what is happening with Austin's bowl and probably what is happening with the white glaze in Leticia's vase.

oxidation mug with mountain design by Leticia Ortiz

The copper glaze I've been discussing isn't our only glaze with copper. We have another glaze, seen in Leticia's mug above and Austin, Kim, and Ruby's pieces below, that contains both copper carbonate and cobalt oxide. The cobalt itself doesn't change much based on the firing, but the copper does. The combination of the blue cobalt and the transparent greenish of the copper in oxidation results in a blue glaze like we see in Leticia's mug. 

reduction mug by Austin Peart

The same glaze in reduction looks purple because of the combination of red copper and blue cobalt. This glaze tends to vary more than others due to variations in thickness or atmosphere, so we get a range of different red/purple/blue colors in the one application of glaze. In Austin's mug above, the thinner layer at the bottom looks different from the thicker area at the top/middle. The interior of this mug has a different cobalt blue glaze.

shaped vase by Kim Hansen

Students can create further color variations by layering glazes over one another. The order in which two glazes are applied can result in different colors and textures as the glazes react and combine. A high-flow glaze underneath will pull the top glaze with it, while a high flow glaze over a fairly stable glaze won't cause the first layer to move as much. In Kim's vase above she has layered three glazes together, making it difficult to distinguish the transition between the copper/cobalt glaze and the dark glaze at the bottom. 

glazed mug set by advanced student Ruby Mayo
Copper and iron aren't the only materials that react differently in one firing compared to another, but their effects are the most dramatically different (of our studio glazes) and I have the best examples of these color changes today. In Ruby's mugs above, we see the copper/cobalt glaze reduction purple over a different lavender glaze (the front most mug). In the taller mugs in the back, we see an iron based red glaze, probably fired in oxidation. The iron red and the Shino underneath it (on the left) both react to atmosphere changes as well.
glaze vase by advanced student Lauren Coffey

Writing as Discovery

One of the fun things about writing a blog is that I don't always know where I'm going when I start. I began this post about a month ago (or more) when I simply wanted to show the great stuff my Winter 2019 throwing class had made. At that point I had just added the images. When I sat down to write today, I thought I might write about the upcoming clay sale (this coming Thursday, 11-7 in Palmer Martin's lobby), then as I started to write the post turned into a discussion of chemical reactions in firing oxidation and reduction. Surprise!
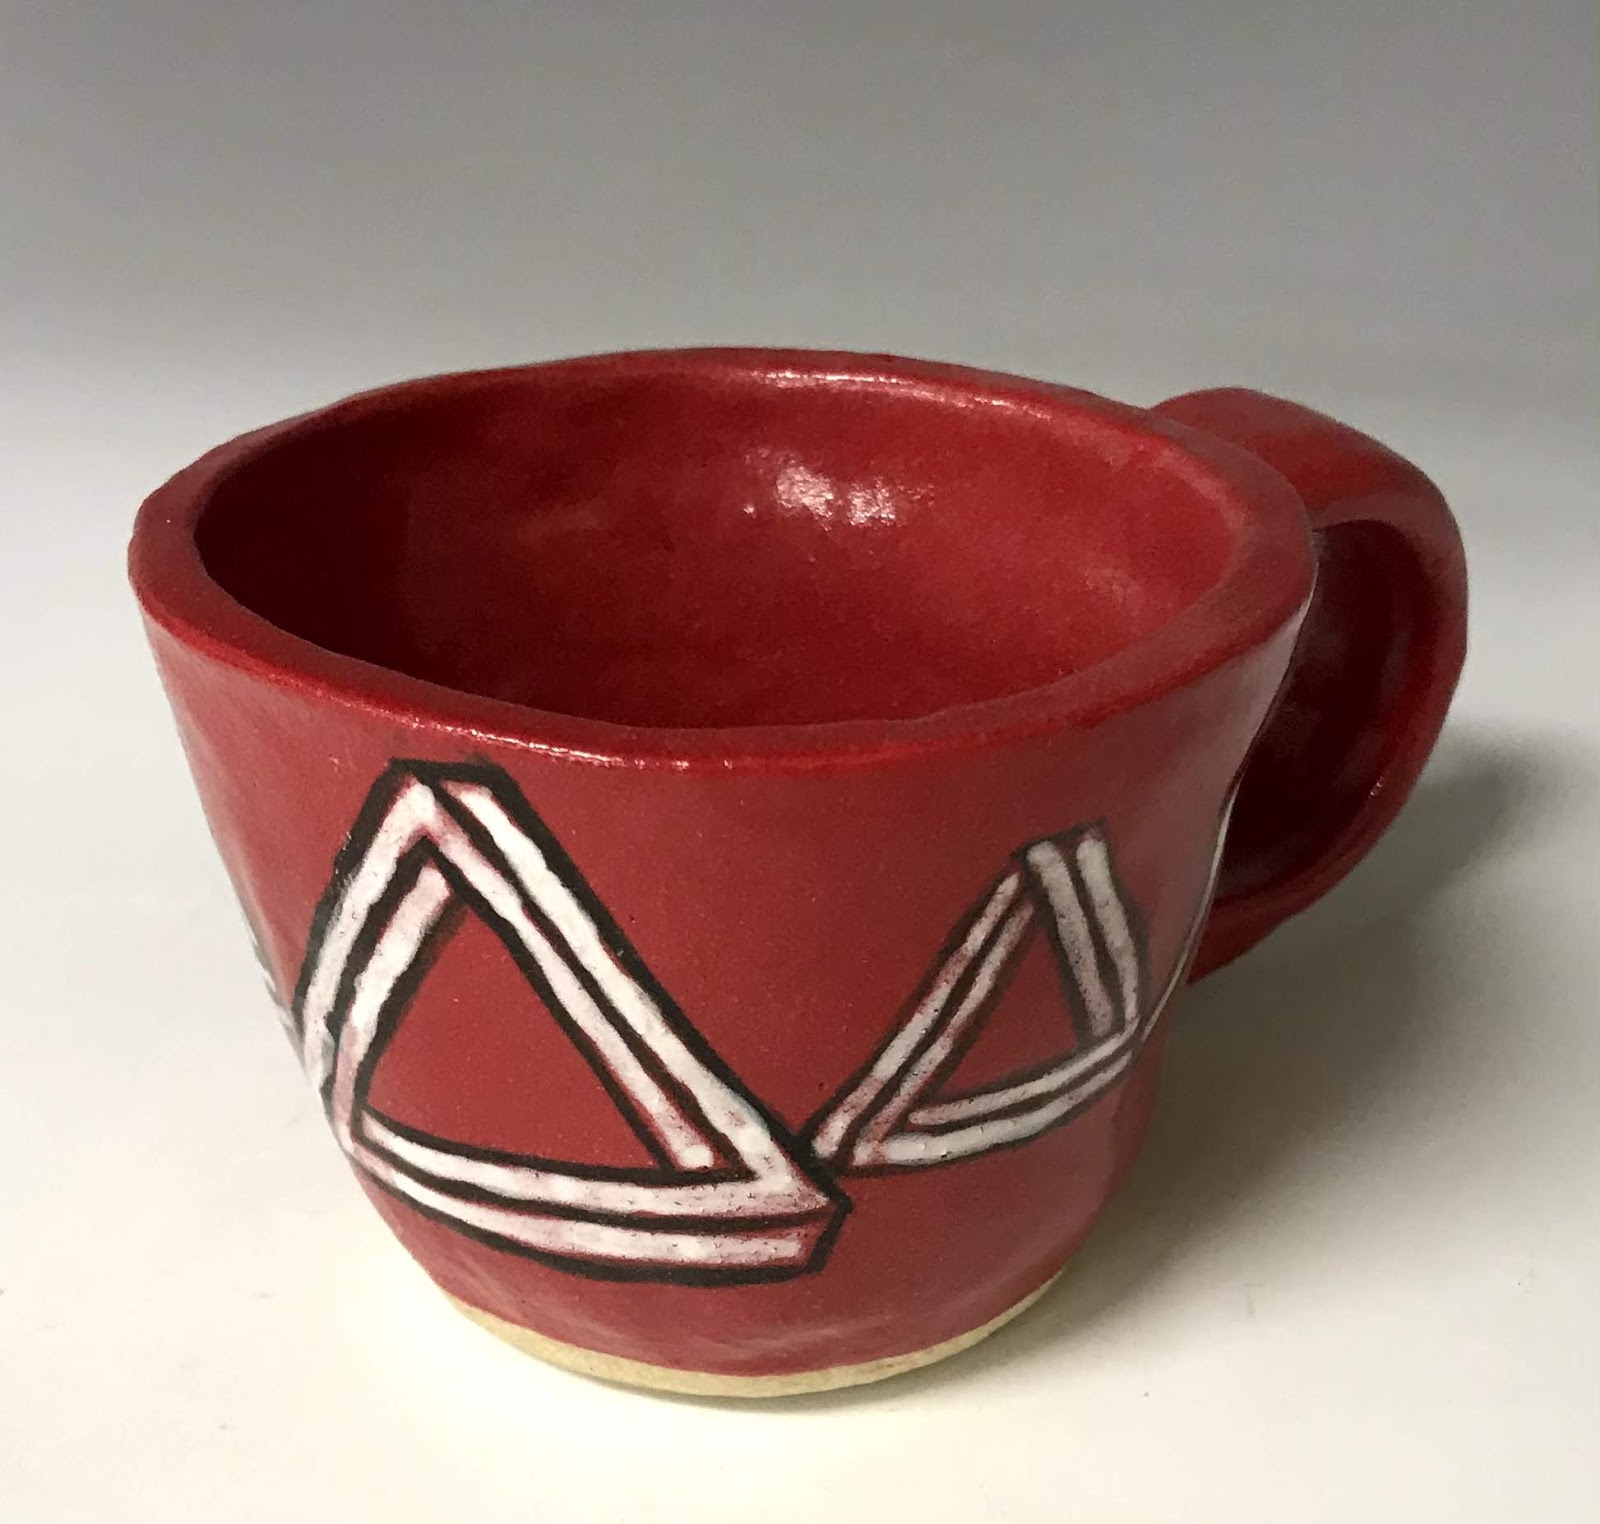
graphic mug with underglaze decoration by Autumn Wilson

Though these last few pieces by Lauren and Autumn don't exhibit the dramatic changes in glaze color that we see in the copper glazes, I can still fairly confidently recognize the firing. I can guess, based on subtle variations, that Lauren and Autumn fired the vase and the red mug in oxidation (the red is an underglaze, not a copper based glaze). The middle of Lauren's vase has a subtle tinge of green that makes me thing she layered the copper glaze over the white. Underglaze colors tend to become more dull in reduction firings so I would have advised her to fire oxidation (plus, I think she and Lauren were finishing these after we loaded the last reduction kiln). 

blue and white mugs by Autumn Wilson

The blue and white mugs, however, were probably fired in two different kilns. The two on the right exhibit little specks of iron in the white glaze. These specks are the iron oxide from the clay body reacting to the lack of oxygen in a reduction firing. The iron loses its oxide and turns into metallic iron bits that we can see through the glaze. The mug on the left does not have these specks, which means either it was fired in an oxidizing atmosphere, or the student used a porcelain clay for this piece (and stoneware for the others). Porcelain clay does not contain iron oxide, and thus stays (or turns into) a pure white color in a reduction atmosphere.

Bowl with gold luster decoration by advanced student Ruby Mayo

Well, that's today's chemistry lesson. Maybe next time I'll talk about gold luster and mother of pearl overglaze decoration (like in Ruby's bowl above). 

Artwork and Photo Credits

All the artworks in this post were created by Winter 2019 Functional Pottery students (except for the advanced work, marked as such in the caption). All photos were taken by the artists who made the work (using the YVC clay photo setup). 

DoVA Exhibition

You can see some of their work now at the DoVA Student Exhibit at Larson Gallery through May 25. Location: Larson Gallery on the YVC campus (corner of 16th Ave & Nob Hill Blvd, across from Taco Time).
Hours: Tuesday-Friday 10-5, Saturday 1-5 (admission is always free, open to the public)
Dates: April 30-May 25, 2019

YVC Clay Sale

You can also purchase some work (though probably not what is posted here) at the YVC Clay Sale this coming Thursday.
Location: Palmer Martin (building 20) Lobby
Hours: 11-7pm, Thursday only
Date: Thursday, May 9, 2019

Sunday, March 17, 2019

Loading Lots of Kilns for Class (and Back Pain)

Egyptian inspired sarcophagus and coil vase by Isabella Johnson, before glaze firing.

I have three strong clay classes this quarter. The hand-builders I've written about once this quarter, and when I get my act together, I share some more of their work from this quarter. The wheel class is unusual in that the class started full and ended full. Most quarters, a few students drop after the first day or two, once they realize what the class is about. I'm not sure if they go away because they find it too difficult, their schedule changes, or they don't want to get dirty, or maybe there's something I'm doing that they dislike. I usually lose these students so early that I try not to take it personally.

Wheel thrown mug by Beau Filbert, the pink glaze was misbehaving that day.


This quarter I have 16 throwers total in the beginning level functional pottery and the advanced wheel classes, which meet at the same time. The students laughed at me the first time I said we would need to hurry through critique because the class was so large. They're used to thinking of 35 students as a large class, not 16. (I enjoy working at a college where a large class is 35, not 100) With 16 student wheels, that's the most I can fit in a class without some kind of wheel rotation schedule (I like the pun, I'm leaving it in).

One of four full carts of finished work this week. This batch was unloaded from the cone 10 reduction firing.

Last week was the last week of classes, with three days of finals next week. The last week is often crunch time for firing and finishing work, but the crunch gets worse (or better) with more students, especially when those students have more work. Since all three classes this quarter are composed mainly of hard-working, motivated students that just means there's more work to fire. 

a look into one of the oxidation firings as I was unloading it. Just one real drippy piece.

Monday was meant to be our last bisque firing, but with both bisque kilns completely stuffed, we ended up needing to fire again once those were unloaded. In fact, we ended up firing two more loads. On Wednesday we unloaded the super last final (really, I mean it) load and then later that day the super uper duper last (now I really mean it) bisque loads. Because so much wasn't bisque fired on schedule, we didn't have a chance to fire our gas kiln (cone 10 reduction) twice last week and only fired it on Thursday. 

This little bird on above the handle really caught my eye as I was unloading. I'm not sure whose work it is.

I had started having some back pain the week before, but I figured I just overdid it at boot camp or maybe had been sitting at a desk too much. My usual response is to walk or stretch or exercise it away. I also haven't really had back paint before. But by the end of the day Wednesday my back was really hurting and though I'm still not sure about the initial injury, I think the kiln loading exacerbated the pain. It probably didn't help that I was unloading hot kilns and that the one kiln is very deep.

I might have hurt my back trying to lift this big girl.

Because of the late bisques and late gas firing, after the "super last" bisque loads were done on Thursday, we needed to load the equivalent of more than a full gas kiln load in the electric kilns. The hand-builder critique is on Monday morning, so I knew I needed to get their work into the kiln last week. I mostly unloaded and loaded both kilns (all four loads) myself because students were glazing, one of my studio assistants was ill, and the other had to leave early. I usually load with more help, so that I might lift out the heavy shelves from the large kiln, but then hand them over to someone else. 

Isabella's Sarcophagus and vase after firing. Some thrown work and a woman's head are also visible.

I loaded these kilns carefully, since the hand-builders' work tended to be fairly large. In the large kiln, I put in the tall work at the bottom, but there were a couple of pieces that weren't ready when I loaded the bottom of that kiln. I saved room at the top of the smaller kiln and loaded the remaining large pieces as soon as the student finished glazing. Since throwers don't critique until Wednesday afternoon, I figured I could load and fire the remaining cone 10 work on Monday/Tuesday.

Here's something unusual that we found when unloading one of the last bisque loads. This foot had popped off an inside was some crumbly white material that felt a bit like styrofoam. If you look closely, you can see the shape of the foreign object that got lost in the clay.

My back was starting to hurt pretty bad, so I was relieved not to have to unload and load again without help. (On Monday I should have plenty of support from students and work studies and assistants.) Then, I walked out of the kiln room and looked on one of the work tables. There were two hand-builder sculptures glazed, ready to be loaded, but not on the glazed work shelf. I could tell they were meant to be loaded, and one of them was very tall. It wouldn't fit in either kiln without unloading a serious amount of work. 

We think that a silicon end of a "rubber tip" blending tool fell off, got lost in the recycled clay, then turned up in the middle of the student's clay slab. Since it was small, she didn't notice it until it caused problems with the fired ceramic piece.

So, that is the story of how I ended up coming in on Saturday (with a sore back) to unload two full electric kiln loads and then reload two full electric kiln loads so that all the work could be ready by Monday's critique. (I neglected to mention that I also needed to fire a low fire kiln load with hand-builder work, but there were only about 6 items so that load was pretty small and easy to load--once I had unloaded the cone 10 stuff). I anticipate a fun, interesting critique tomorrow. And no more kiln loading for me until next quarter.

Monday, April 8, 2013

Kiln Atmosphere


Last quarter I offered the students more options than usual for firing temperature and atmosphere. Each quarters we fire our work in a bisque kiln to prepare it for glazing. Most work is then glazed for cone 10 reduction and fired in the gas kiln. A handful of pieces might be raku fired or smoke fired during our one quarterly raku/smoke firing day.

a student's horse hair raku pice fired in the fall
On the occasions when I have a hand-building class, I generally allow those students to fire glazed work to a low temperature. Since their sculpture is not meant to be food safe or water-tight it does not require a mature clay body and the glaze does not need to be food safe. The low-fire work can be glazed with underglazes, stains, slips and low temperature glazes. The work is then fired in the same electric kilns that are used for the bisque firings.

unfired work loaded into an electric kiln for bisque firing

Last quarter I tried to offer a high-fire oxidation firing in addition the the usual high-fire reduction firing. I say "tried," because despite my best efforts, the "oxidation firing" produced some very reduced results. Reduction or oxidation refers to the amount of oxygen and fuel available inside the kiln. Electric kilns generally produce oxidation (or neutral) atmospheres because no fuel is added and plenty of oxygen is available inside the kiln. Gas kilns can be manipulated to produce oxidation or reduction atmospheres by either introducing more air or gas in the burner or by allowing or preventing air from entering the kiln from other openings.

the studio gas kiln about to be unloaded

The most efficient firing is a neutral atmosphere, though I believe many potters tend to blur the line between neutral and oxidizing atmospheres, referring to both as oxidizing because the glaze results and clay body color are similar. As with most areas of life, there isn't a pure distinction between oxidizing, neutral and reducing. Instead there is a gradual shift from one end of the spectrum to another so that a kiln can be very reduced or only slightly reduced, etc. Reduction levels can also vary over the course of the firing.

clay bodies (without glaze) containing iron turn darker or speckled in reduction; porcelain turns white

Some functional glazes call for a reduction atmosphere in the kiln in order to create the desired color or texture on the work. In a reduction firing, the kiln has more fuel than air, causing the fuel to look for any available oxygen with which to react. In a reduction firing the fuel can react with the iron oxide in the clay, causing the clay body to turn brownish or speckled. The fuel can also react with oxides in the glazes, such as copper oxide, pulling out the oxide and leaving the metal. This process causes green copper oxide to turn into red copper in a reduction fired glaze.

copper glaze reduced in what I thought would be an oxidation firing

Until recently most of what I knew about atmospheres and glaze reactions came from what I was taught in school and what I had read, particularly as pertained to glaze recipes and specific effects. However, this weekend I read Nils Lou's "The Art of Firing," which explains this process much more thoroughly. The book also talked about when during the firing process atmosphere affects the materials in clay and glazes. I knew that the clay body reduction happens earlier than glaze reduction, but this weekend was the first I'd ever heard that copper reduction happens during cool down.

Copper reds don't flash until they are cooling!
Copper reduction happens during cool down. This one short line at the bottom of the page blew my mind. For those of my readers not amazed by this bit of missing chemistry information, this means the copper oxide in the glaze is not affected by the lack of oxygen during the firing. Instead, the copper reacts after the firing, during the cool down time. 

Usually when I finish firing, I close the damper and the other kiln openings up tight to prevent the work from cooling too rapidly. Though I am not adding any fuel, I am also not allowing any air into the kiln. According to the Lou, the oxygen deprivation around 1500 to 1100 degrees is what causes my reduced copper glazes. This bit of information blew my mind because it suddenly solved a mystery for me from last quarter. When I tried to run an oxidation firing for my students, I tried to allow more air during the firing but closed the kiln up normally at the end of the firing. Students were disappointed in the resulting bright red coppers, since I had promised them greens. At the time I thought this was an error in my firing, now I suspect it was an error in my cooling.

Now I wish I had finished reading Lou's book years ago when I started. I stopped because I found the writing dry and the information too simple and too specific. The first chapter deals with kiln construction and the second with the basics of atmosphere. I'm not building a kiln, I want to improve my firing. I understand the basic concepts, I wanted some insight into how I might adjust my firing protocol on a good kiln to create better results.


When I started reading again, I was still frustrated because the book's initial solution to recognizing kiln atmospheres is to use an oxyprobe. That's great if you've got one, but we don't. (On a side note, I plan to order one ASAP.) An oxyprobe is a much more accurate way of gauging the reduction happening in the firing. The other methods are watching the flame color and how big the flame is in the chimney or coming out the spy hole. I was hoping the book would give some more subtle suggestions, but besides the oxyprobe it was stuff I already knew.

reducing flame after I opened the spy hole

I learned to fire a variety of kilns in college and graduate school, but I hadn't fired high temperature gas firings all that often. My most extensive practice has been in the YVCC studio. When I first came to YVCC the kiln was an old updraft kiln, which means it had an opening at the top for air to exit. The air inside the kiln could be controlled with a damper across the top opening. The damper consisted of a couple of shelves with handles to push them across the center opening. In my experience this kiln was difficult to reduce, which may have been a result of the kiln's age or the kiln's structure. The opening at the top and the cracks at various places allowed air out. I rarely got bright reds in that kiln and the clay body was generally pretty light. Knowing what I do now, I would guess that the kiln was hard to close up after the firing, resulting in plenty of air in the kiln and therefore oxidized (green) copper glazes.

oxidized copper on the interior of a raku fired piece

In any kiln, one can adjust the mix of air and gas at the burner or one can also adjust some of the openings in the kiln, mainly the damper in the chimney or at the exit of the kiln. These adjustments can cause the atmosphere during any stage of firing (or cooling) to be oxidizing or reducing. On the current YVCC gas kiln we have a chimney which opens into the kiln near the floor. The air exit at the bottom makes our kiln a downdraft. It also tends to make for a more reducing and more even firing. In the old updraft kiln there was a significant temperature difference from the top to the bottom. The new kiln fires pretty evenly as long as the firing is controlled well.

Though I have fired the kiln many times and can comfortably get repeatable results with little variation caused by weather or the type of work in the kiln, the oxidation firing results shook my confidence and made me want to figure out what was wrong. It is easy to get into a comfortable habit of firing and a bit intimidating to try something else in case it doesn't work as well. Last quarter a bisque firing for tall work (too tall for our electric kilns) didn't work out perfectly and that also bothered me. There may have been some thickness issues in the work, but what I have now read makes me wonder if the kiln was reducing during the cool down, resulting in some of the cracks that showed up in the work.

tall bisqued work in the gas kiln

Though I thought it was helpful, I was also bothered by the tone of "The Art of Firing." The book sorta hinted that anyone who was firing kilns and didn't know this stuff wasn't using common sense. On the other hand, the book was written--for whom? Having learned firing basics in college and then bits and pieces of kiln loading and firing from at least ten different people, I am surprised that this was the first I had heard of things like copper flashing in cool down. There were other parts of the reading that were more of a reminder. In that way it was like talking with someone who knows about firing. In my current position I am the clay, firing and glaze expert so there are few people nearby with whom I can discuss firing adjustments and errors. Reaching out to an expert or colleague in another town seems like asking for a solution rather than engaging in a discussion or brainstorming to come up with an adjustment.

reduction fired load ready to come out of the kiln

"The Art of Firing" had some useful information, as I said, but I was surprised that some of the information contradicts the hand-me-down knowledge I had hitherto learned in graduate school. This quarter I hope to find time to test some of Lou's recommendations. I threw some plates bowls and mugs last week after classes in hopes that I can fill most of a kiln with my work for a second test oxidation firing.