Showing posts with label atmosphere. Show all posts

Sunday, December 18, 2022

Firings, Faults and Just Fun

 Raku Firing

broken biscuit in the raku kiln between firings

The most entertaining firing process we used in the YVC clay studio is the raku firing. Around the 1970s this firing process became popular in the United States. Theoretically the process derives from Japanese Raku, but when the process was brought to the US and UK, Western artists kept the part they liked and changed the rest. In Japan, Raku is a name for a process and ware done only by one particular family of artists. The work is removed from a hot wood fired kiln and doused in water. My understanding is that the glaze is black and the firing and cooling process causes cracking in the glaze. 

we had just removed the pots from the kiln and I liked the look of the red hot kiln interior

What we call raku is basically any firing process where the work is removed from a hot kiln and fire ensues. In they YVC studio, we have several glazes and slips that can be used for raku firings and we also have some horse hair (and sometimes feathers) that can be used for "horsehair raku".  In both cases, we fire the work in a propane fired outdoor top hat kiln. The work reaches a fairly low temperature of around 1800 degrees Fahrenheit (this is low compared to our glaze firing of around 2300 degrees F). 

Jazlyn Alexander three raku pieces

Once the glaze starts to melt, the propane is shut off and we lift up the top hat of the kiln (an insulated cylinder of expanded metal). In the old studiowe had a counterweight to lift the top hat, but in the new Palmer Martin building, we have a mechanical winch that lifts for us. 

students adding horsehair to their hot pots

We use tongs (and gloves) to remove the work for the kiln and either put it in a bucket of shredded paper and/or dry leaves or set it on a shelf for the horsehair process. In the bucket, the combustible material lights on fire and is absorbed into any unglazed areas of ceramic, turning them black or gray.

Horse Hair vases by Liliana Morales

For horsehair, students hold pieces of horse hair (or feathers, or sometimes human hair or leaves) on the hot, unglazed pot. The hot ceramic causes the horsehair to burn, crinkling up as it does so and the smoke is absorbed into the area of the ceramic closest to the fire.  Horsehair looks particularly nice, in my opinion, when the student has first burnished the pottery to make it smooth and slightly shiny, but most students just want to play with fire.

Yarelli Sanchez's extruded sculpture cracked and was partly dropped on its way out of the raku kiln

Both processes are risky, often resulting in breakage, especially when students insist on firing porcelain clay or large pieces. However, as someone who did mostly raku in undergrad and fired pieces larger than my students' work, I am hardly in a position to tell them not to risk it. I tell them the risks and we give it a try.

Derek Arneecher's Winifred after raku horse hair firing


This quarter, we did have some breakage. One student tried horsehair on maybe 5 mugs, all in porcelain, and all of which cracked as they were cooling. Yarelli's complicated extruded chain piece made it out of the kiln safely the first time (when Yarelli was not available), but our two-person tong work didn't hold up the second time and it slipped and cracked before she began to apply the horsehair.

Winifred after painting (he decided he didn't like the horse hair effect)

Derek's large Winifred portrait had a fine crack after the raku firing, which got worse when it was fired a third time. Derek didn't like the horsehair look, so he decided apply underglaze and low fire clear glaze and fire the work again. I think it was a good revision, but unfortunately the crack is more noticeable after the second firing.

Bisque Firing fun


I justed love this kiln load with Medusa and Charlie facing off

Loading a bisque firing in the studio is usually just a step in the process, but depending on the contents of the kiln, placement can be entertaining. This year I really enjoyed the kiln load that consisted of Valeria Alvarez's Medusa facing off with Amy Matson's Charlie from Heartstopper. During the firing, Medusa's gaze turned him to stone-ware (lol).

Derek's hexagonal printed forms fit into the decagonal bisque kiln in a pleasing way  

I also enjoyed loading Derek's hexagonal 3D printed forms in the bottom of another kiln load. We filled each one with mugs and small work from the throwing class (but I forgot to take a picture). I just like the look of the geometric forms inside another geometric form.

Bisque Firing Trouble

Though the bisque firings can generally be unexceptional and uneventful when all the work is well constructed and fully dry, in a shared studio with beginning students, some breakage is typical every quarter. The reasons are almost always the same and this quarter was no different. Handles, hands, or other features fall off because they weren't originally scored well, or because they dried unevenly.

Jordan Golob's 3D printed Lego minifig lost it's hands in the bisque firing

Work that was too thick or too wet may crack or explode during the firing. We try to avoid firing wet, thick, or obvoiusly damanged work, but it's sometimes difficult to know ahead of time. I'm also more lenient with handbuilders, who spend a lot of time on one piece than with throwers who make a lot of individual pieces in the same time. My studio employees tell me that I was more lenient (aka "too nice") this quarter and let more work go through the firing than I used to. Did I forget because of the long break, or did the cancer change me?

Jordan Golob's Dwight lost the back of its head during bisque firing


The other reason work can explode in the kiln is if there is a contained air pocket with no escape. We call this, as well as any too-thick work, a "kiln bomb" and I always tell students to pop a hole with a needle tool into any contained air pockets in a sculpture. This is easy, visually unobstrusive and always solves the problem. It is fascinating to me, then, that the idea of a contained air pocket blowing up in the kiln is controversial among potters and ceramic artists. 

Manuel Delgado's castle lost its roof during the bisque


Serioustly, if you'd like to start an online battle amongst clay folks, tell them that an air pocket will explode in the kiln. Immediately some of these folks will that you that it does not--and call you stupid in the mix. The argument, in essence, is that the air doesn't cause the contained air pocket to explode; it is the moisture in the air pocket. They will claim that any pieces that explode haven't been dried long enough. While it is true that sometimes air pockets don't blow up, they often do.

the castle with its roof back in place

As an undergrad, firing a load of sculpture in a raku clay body, I realized too late that my sculpture had no air hole and was surprised that it came out of the kiln just fine. I was told the groggy, low shrinkage clay body and thin walls allowed it to fire just fine. Since then my students and I, sometimes on purpose and sometimes by accident have tested it many, many times. Most of the time (but not always), the work explodes, while other work by the same builder, with the same clay, same thickness, and dried for the same amount of time does not.


An air pocket blew up Derek Arneecher's extruded sculpture during firing, and took a few other pieces out with it

This quarter we had two perfect natural experiments (though the student artists may not agree). I hope they don't mind me talking about their situations, because they are so instructive and the artists only had one tiny mistake that led to big trouble. Derek had made a large, impressive and well-constructed sculpture from extruded forms. His joints were scored and slipped well and reinforced. He let the work dry slowly and completely, then we loaded it in the kiln and fired the kiln slowly with a long candle (preheat to force out any remaining moisture from the clay). 

When it was time to unload the kiln, we discovered that his piece had exploded violently in the kiln, taking out some neighboring pieces as well. The only problem we could identify was that he had a hollow section in the middle with no hole--the walls of the form were consistent throughout, the whole piece had dried evenly, and the whole piece had been inside the kiln for the same long candle. The legs and top were intact and the explosion, though violent, clearly was focused in that middle hollow section.

Derek's extruded robot after repairs


That day, during critique, I kept reminding students to pop a hole in their sculptures so that what happened to Derek wouldn't happen to them. Another student, Manuel, explained, during critique, that he had not popped a hole in the towers of his castle, but that he would do so before they were fired. Though he did pop a hole in both towers, he forgot that there was a separate contained air pocket inside the roof, which was separated from the top of the tower. Though his work was also fully dry and in a kiln with a long candle, the roof blew off during firing, again illustrating that hollow pockets explode. 

Derek's scupture after painting


The very next day, I read a long post by a well-known ceramic artist on Istagram listing myths about ceramics. One of his myths, and one that got a lot of attention by commentors, was that contained air pockets don't explode during firing. I'm not sure if the argument is semantic (i.e. the air doesn't expand; it's the moisture in the air expanding), but I find it kind of mind-blowing that people will insist that something that happens regularly does not, in fact happen. 


Low Firing & Underglazes


low fire glaze kiln, first load

In the clay studio, we regularly have 5-7 distinct firing types. We have the bisque firing, which is the first firing that turns the clay into ceramic and makes it stronger and easier for students to glaze. Hand-builders are also allowed to paint their work at this stage if they like. Most students glaze their work to cone ten in either an oxidation or reduction atmosphere. Students may choose to raku fire their work or do a pit or smoke firing (which no one requested this year). Intermediate students have the opportunity to use overlglaze lusters or decals, and hand-builders may low fire their work, using underglaze and a low fire clear glaze.

Oops, underglaze, which doesn't flux (melt) in a low firing can flux enough to stick to the biscuit in the high fire kiln

Underglazes are basically commercial colored slips, meaning they are made of clay, water, and color. The color in underglazes has been produced commercially so that it is fairly stable and looks pretty similar in the jar, on the freshly covered clay or ceramic object, and in the firing. Homemade slips may have color, but that color may change in the firing.

carved and underglaze decorated bowl by Liliana Morales


Underglazes are designed to be fired to a low temperature, meaning that those bright colors look best at that low temperature and in a neutral atmosphere, the kind we have an an electric kiln fired just a tiny bit hotter than our bisque kiln. Underglazes can be great. I use them extensively in my own work because they are bright, easy to use, and because I can layer them in my sculpture. Students like them because of the bright colors and because they stay put and don't run in the kiln like some glazes do.

sgraffito vases by Liliana Morales

Underglazes can also be fired to higher temperatures, which we do in our studio, but not all the colors can handle the higher temperatures (or the reduction atmosphere). Though I try to be clear with students about the risks, students are sometimes surprised that their underglaze colors disappear at the higher temperatures. Additionally, because underglaze colors can melt at the higher temperatures, some undergalzes can stick to the shelf or kiln wash in the high temperature kilns (something they do not do at low temperatures because they are not glazes).


High Fire Surprises


The interior of Yarelli's printed chicken pitcher had far too much glaze

The main glaze temperature for our YVC studio is cone 10, around 2350 degrees Fahrenheit (I always say around because clay and glaze firings are measured in cones that measure the heat work of tempeature and time. If we fire faster, we might reach a higher temperature than if we fire slower, but both are cone 10.) 

Searra Rodriguez, pitcher, Something went wrong with this particular Shino in the oxidation firing this quarter

Our main studio clay bodies are designed to "mature" or "vitrify" at cone 10. That means the ceramic is no longer porous at that temperature. What this means is that we fire functional work to cone 10 so that it will hold water and be strong. The mature ceramic can be washed in the dishwasher, microwaved, and put in the oven. The glaze is there to make it look pretty and easy to clean. 

oops, this spoon jumped off its stilt and onto the baffle brick during the firing (yes, we need a new baffle brick) 

Low fired ceramic with glaze, while also looking pretty and being easy to clean, is not vitrified and thus can absorb water. This makes it less than ideal for functional use. Immature glazed ceramics can get very hot in the microwave and can get downright stinky in the dishwasher. It is also more fragile. In our studio, besdies raku, which is mostly just for fun, functional work needs to be fired to cone ten, while the low firings are reserved for sculpture and purely decorative items.

Functional pottery and Carlos Garcia Alcantar's extruded hand, before firing

We have two types of cone 10 glaze firings in our YVC studio.  Kiln amosphere refers to how much oxygen is available in the kiln compared to fuel or fire. In a gas fired kiln, we can control how much fuel and how much air enter the kiln. When the mix is even the firing is efficient and the kiln heats up fairly quickly. If we artificially reduce how much air is available in the kiln, the fuel will pull oxygen from materials in the ceramic and the glaze.

Yarelli Sanchez's dog, Carlos' hand, and other work after firing


Both the clay and the glazes can look different in a reduction versus oxidation or neutral atmosphere firing. We usually start the quarter with reduction, then fire at least one or two more firings of each. In our studio, the stoneware clay gets brownish and a bit speckly in the reduction kiln. We have a copper glaze that turns oxblood red in reduction an another glaze that turns purple in reduction.

Carmen Nelson teapot (detail)

The copper red turns a transparent green/turqoise in the oxidation atmosphere, while the purple looks light blue in oxidation. In Carmen Nelson's teapot above, it appears that the thin application of the copper glaze in the reduction kiln didn't allow it to turn red except where it was thicker or where it interactive with another glaze (to increase the thickness). The sometimes surprising or unexpected ways in which the glazes interact and react in the kiln can be one of the most rewarding and most frustrating parts of the ceramic firing process.

Overglaze Enamels and Decals

I don't always have intermediate students in my class, but when I do, I like to offer them the opportunity to try some overglaze decoration options. Overglaze is a low fire process (or processes) where a decal is applied or an overglaze is painted onto the surface of a piece that has already been fired to a higher temperature. The decorated piece is then fired to a much lower temperature that makes the decal permanent or changes the overglaze.

Jazlyn Alexander, decals

In our studio this quarter, I had some colored decals, as well as mother of pearl and gold luster enamel overglaze. My intermediate student, Jazlyn used some of each. Another student, Liliana, provided her own lusters and we fired quite a lot of work with the gold luster.

Liliana Morales, gold luster vase set


The gold luster doesn't look like much before firing. Because of the cost, the jars it comes in are laughably tiny, and the luster does not look gold when it goes on. The firing changes it so that it comes out of the kiln metallic and shiny. It is highly noticeable in person, where the light can reflect off of the luster and draw one's attention to the work.

Jazlyn Alexander, mushroom with gold


Gold luster is usually used minimally on functional or decorative work, both because of the cost and because the low temperature makes the overglaze a bit less stable for functional pottery. Commercial work with overglazes often recommends hand-washing and avoiding the microwave. I've used the dishwasher for pieces with gold luster decals and they seem fine, but I'm more lazy than careful about using my own work.

Jazlyn Alexander set with mother of pearl

The mother of pearl overlgaze is very subtle and has to catch the light just right to even be seen. In the set above, Jazlyn's plate has a bit of mother of pearl on the top edge, but I cannot see the mother of pearl in the indents of the mugs (though I believe it was visible in person).

Sunday, May 5, 2019

Clay Sale and Glazes from Winter 2019

April & May Art Events

The end of April and beginning of May are busy times. It seems like we have a two- or three-week span during which events are pretty much non-stop. Saturday, April 27 was International Sculpture Day, with events in Yakima and Tieton. Tuesday, April 30 was the opening reception for the DoVA Student and Faculty Exhibition at Larson Gallery (exhibit continues through May 25). And next Thursday, May 9 is the Spring Clay Sale at YVC.

Mugs with glaze drips by Beau Filbert

Clay Sale: Thursday, May 9, 11-7, Palmer Martin Hall (YVC Campus)

The clay sale features functional pottery and sculpture made by current and former YVC clay students and faculty for sale at low, low prices! The sale runs Thursday from 11am-7pm in Palmer Martin Building (building 20) on the south side of the Yakima Valley College campus. We take cash, checks, and credit cards. Many pieces are priced below $10 and even $5 dollars. YVC clay T-shirts, as well as prints from the Winter 2019 printmaking class (not clay) will also be on sale.

Standing spoon rest with underglaze decoration, by Amber Ryan 
This quarter, my students (and even employees, when they have time) have been working hard to throw, trim, glaze and fire new work for the sale. In fact, though it is only week 5, we've already fired one load of glazed work and are getting ready to fire another kiln full on Tuesday so that the work can be ready for Thursday's sale.

Oxidation copper vase by Amber Ryan

We usually fire our first reduction glaze firing around week 5 or so. This load usually consists mainly of beginning student work. I required beginning students to glaze some of their early work around mid-quarter so they can see what the glazes look like. This quarter we ended up firing an even earlier oxidation firing that consisted mostly of intermediate and community student work. This quarter I have an unusually large group of 6 intermediate students, as well as some prolific community worker/students who have been making mostly clay sale work for the past few weeks.

Reduction copper vase by Amber Ryan

Firing Atmospheres

Both reduction and oxidation firings in our studio reach the same temperature (cone 10 or roughly 2300 degrees Fahrenheit) and can be fired in the same kiln. We used the same glazes for both firings, but we adjust the gas and air in the kiln to create different atmospheres. An oxidizing atmosphere is one in which there is plenty of oxygen for the fire. For a reduction atmosphere, we reduce the amount of oxygen available in the kiln so that the fire must pull oxygen out of the glaze chemicals or the clay itself. This process turns the Iron Oxide in the clay body into metallic specs of iron when the oxygen is used to react in the firing process.

oxidation copper bowl with glaze drip by Austin Peart

Similarly, the oxygen in copper carbonate (CuCO3) reacts with the fire and changes the look of the copper in the glaze. In an oxidation atmosphere (seen above in Amber and Austin's greenish pieces) there is plenty of oxygen inside the kiln, so the copper remains this greenish color. My comparison for students is the statue of liberty. The copper on this statue is out in open with plenty of air and thus as a greenish appearance.

Reduction vase with bent rim by Austin Peart

In a reduction atmosphere, on the other hand, the copper reacts to the removal of oxygen by turning red. My comparison for students is a copper penny kept in a pocket and not exposed to the air. The result in our firing is that copper in a reduction atmosphere turns red. The red copper glaze in Amber and Austin's pieces above and Leticia and Beau's pieces below has turned a vivid red and has become fairly opaque in the glaze.

reduction copper glaze with incised decoration by Leticia Ortiz

The firings can also be loaded a bit differently. We have found that if we load the bottom of the kiln tight, with pieces close together, and run out of work (or have irregularly shaped work) at the top for the kiln, so that the pieces have lots of space around them, the kiln will not be able to maintain a reduction atmosphere. The extra space around work tends to cause those loosely loaded areas of the kiln to have more oxidized look, especially with copper glazes.

bowl with glaze drips (upside down) by Beau Filbert

In the red and green examples above, Amber, Austin, Leticia, and Beau have used the copper glaze in combination with other glazes. Beau used some Ninja Junior crawl on  his rim, Leticia and Austin have layered a different white glaze over or under their red copper glaze near the top. I believe Amber's copper glaze is over the same white in both instances and I believe Leticia's white is over the copper, but I'm not 100% sure anymore.

bowls with glaze drips by Beau Filbert

Austin also has a drip of some other glaze running down the oxidized copper into the middle of his bowl. Our copper glaze has a lot of "flow" meaning it melts relatively early and keeps melting and moving during the firing. This movement can lead to the drips we see on Austin's piece (his are intentional, but sometimes students underestimate the movement and end up with their glaze stuck to the shelf). This movement can also cause other glazes on top of the copper glaze to move a lot too. This is what is happening with Austin's bowl and probably what is happening with the white glaze in Leticia's vase.

oxidation mug with mountain design by Leticia Ortiz

The copper glaze I've been discussing isn't our only glaze with copper. We have another glaze, seen in Leticia's mug above and Austin, Kim, and Ruby's pieces below, that contains both copper carbonate and cobalt oxide. The cobalt itself doesn't change much based on the firing, but the copper does. The combination of the blue cobalt and the transparent greenish of the copper in oxidation results in a blue glaze like we see in Leticia's mug. 

reduction mug by Austin Peart

The same glaze in reduction looks purple because of the combination of red copper and blue cobalt. This glaze tends to vary more than others due to variations in thickness or atmosphere, so we get a range of different red/purple/blue colors in the one application of glaze. In Austin's mug above, the thinner layer at the bottom looks different from the thicker area at the top/middle. The interior of this mug has a different cobalt blue glaze.

shaped vase by Kim Hansen

Students can create further color variations by layering glazes over one another. The order in which two glazes are applied can result in different colors and textures as the glazes react and combine. A high-flow glaze underneath will pull the top glaze with it, while a high flow glaze over a fairly stable glaze won't cause the first layer to move as much. In Kim's vase above she has layered three glazes together, making it difficult to distinguish the transition between the copper/cobalt glaze and the dark glaze at the bottom. 

glazed mug set by advanced student Ruby Mayo
Copper and iron aren't the only materials that react differently in one firing compared to another, but their effects are the most dramatically different (of our studio glazes) and I have the best examples of these color changes today. In Ruby's mugs above, we see the copper/cobalt glaze reduction purple over a different lavender glaze (the front most mug). In the taller mugs in the back, we see an iron based red glaze, probably fired in oxidation. The iron red and the Shino underneath it (on the left) both react to atmosphere changes as well.
glaze vase by advanced student Lauren Coffey

Writing as Discovery

One of the fun things about writing a blog is that I don't always know where I'm going when I start. I began this post about a month ago (or more) when I simply wanted to show the great stuff my Winter 2019 throwing class had made. At that point I had just added the images. When I sat down to write today, I thought I might write about the upcoming clay sale (this coming Thursday, 11-7 in Palmer Martin's lobby), then as I started to write the post turned into a discussion of chemical reactions in firing oxidation and reduction. Surprise!

graphic mug with underglaze decoration by Autumn Wilson

Though these last few pieces by Lauren and Autumn don't exhibit the dramatic changes in glaze color that we see in the copper glazes, I can still fairly confidently recognize the firing. I can guess, based on subtle variations, that Lauren and Autumn fired the vase and the red mug in oxidation (the red is an underglaze, not a copper based glaze). The middle of Lauren's vase has a subtle tinge of green that makes me thing she layered the copper glaze over the white. Underglaze colors tend to become more dull in reduction firings so I would have advised her to fire oxidation (plus, I think she and Lauren were finishing these after we loaded the last reduction kiln). 

blue and white mugs by Autumn Wilson

The blue and white mugs, however, were probably fired in two different kilns. The two on the right exhibit little specks of iron in the white glaze. These specks are the iron oxide from the clay body reacting to the lack of oxygen in a reduction firing. The iron loses its oxide and turns into metallic iron bits that we can see through the glaze. The mug on the left does not have these specks, which means either it was fired in an oxidizing atmosphere, or the student used a porcelain clay for this piece (and stoneware for the others). Porcelain clay does not contain iron oxide, and thus stays (or turns into) a pure white color in a reduction atmosphere.

Bowl with gold luster decoration by advanced student Ruby Mayo

Well, that's today's chemistry lesson. Maybe next time I'll talk about gold luster and mother of pearl overglaze decoration (like in Ruby's bowl above). 

Artwork and Photo Credits

All the artworks in this post were created by Winter 2019 Functional Pottery students (except for the advanced work, marked as such in the caption). All photos were taken by the artists who made the work (using the YVC clay photo setup). 

DoVA Exhibition

You can see some of their work now at the DoVA Student Exhibit at Larson Gallery through May 25. Location: Larson Gallery on the YVC campus (corner of 16th Ave & Nob Hill Blvd, across from Taco Time).
Hours: Tuesday-Friday 10-5, Saturday 1-5 (admission is always free, open to the public)
Dates: April 30-May 25, 2019

YVC Clay Sale

You can also purchase some work (though probably not what is posted here) at the YVC Clay Sale this coming Thursday.
Location: Palmer Martin (building 20) Lobby
Hours: 11-7pm, Thursday only
Date: Thursday, May 9, 2019

Monday, April 8, 2013

Kiln Atmosphere


Last quarter I offered the students more options than usual for firing temperature and atmosphere. Each quarters we fire our work in a bisque kiln to prepare it for glazing. Most work is then glazed for cone 10 reduction and fired in the gas kiln. A handful of pieces might be raku fired or smoke fired during our one quarterly raku/smoke firing day.

a student's horse hair raku pice fired in the fall
On the occasions when I have a hand-building class, I generally allow those students to fire glazed work to a low temperature. Since their sculpture is not meant to be food safe or water-tight it does not require a mature clay body and the glaze does not need to be food safe. The low-fire work can be glazed with underglazes, stains, slips and low temperature glazes. The work is then fired in the same electric kilns that are used for the bisque firings.

unfired work loaded into an electric kiln for bisque firing

Last quarter I tried to offer a high-fire oxidation firing in addition the the usual high-fire reduction firing. I say "tried," because despite my best efforts, the "oxidation firing" produced some very reduced results. Reduction or oxidation refers to the amount of oxygen and fuel available inside the kiln. Electric kilns generally produce oxidation (or neutral) atmospheres because no fuel is added and plenty of oxygen is available inside the kiln. Gas kilns can be manipulated to produce oxidation or reduction atmospheres by either introducing more air or gas in the burner or by allowing or preventing air from entering the kiln from other openings.

the studio gas kiln about to be unloaded

The most efficient firing is a neutral atmosphere, though I believe many potters tend to blur the line between neutral and oxidizing atmospheres, referring to both as oxidizing because the glaze results and clay body color are similar. As with most areas of life, there isn't a pure distinction between oxidizing, neutral and reducing. Instead there is a gradual shift from one end of the spectrum to another so that a kiln can be very reduced or only slightly reduced, etc. Reduction levels can also vary over the course of the firing.

clay bodies (without glaze) containing iron turn darker or speckled in reduction; porcelain turns white

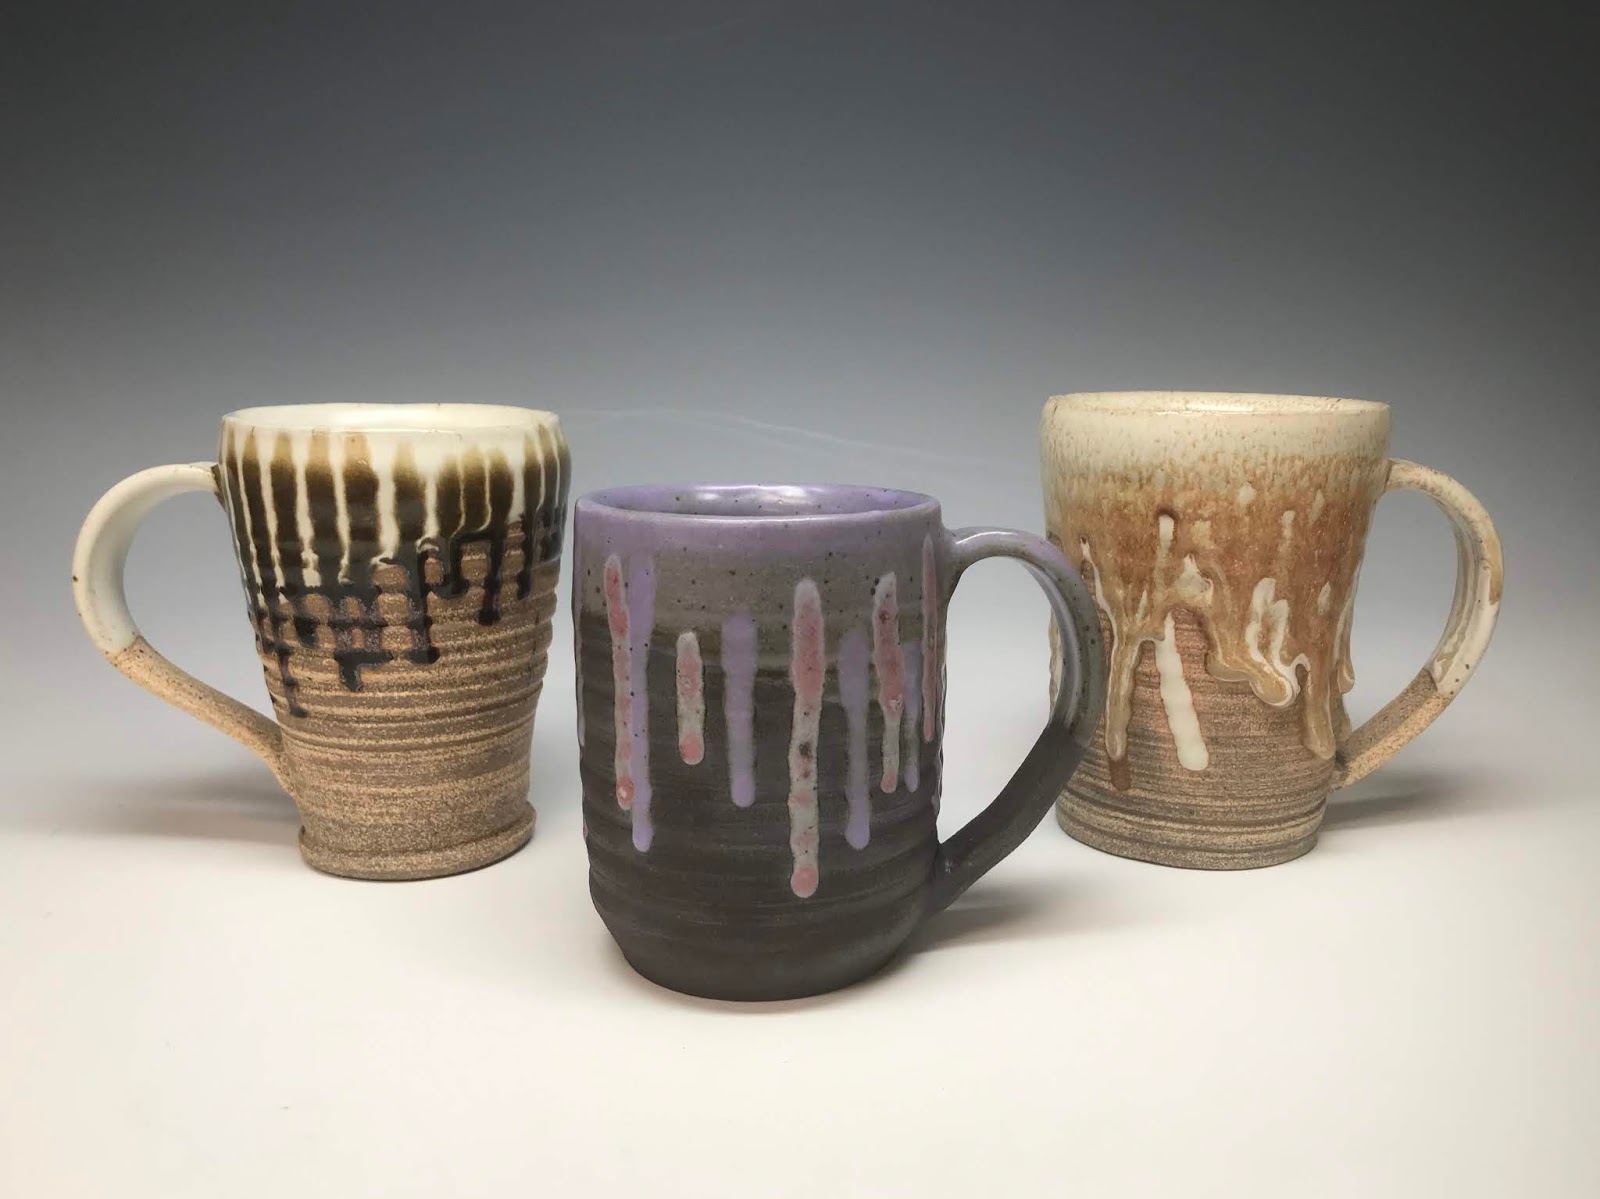
Some functional glazes call for a reduction atmosphere in the kiln in order to create the desired color or texture on the work. In a reduction firing, the kiln has more fuel than air, causing the fuel to look for any available oxygen with which to react. In a reduction firing the fuel can react with the iron oxide in the clay, causing the clay body to turn brownish or speckled. The fuel can also react with oxides in the glazes, such as copper oxide, pulling out the oxide and leaving the metal. This process causes green copper oxide to turn into red copper in a reduction fired glaze.

copper glaze reduced in what I thought would be an oxidation firing

Until recently most of what I knew about atmospheres and glaze reactions came from what I was taught in school and what I had read, particularly as pertained to glaze recipes and specific effects. However, this weekend I read Nils Lou's "The Art of Firing," which explains this process much more thoroughly. The book also talked about when during the firing process atmosphere affects the materials in clay and glazes. I knew that the clay body reduction happens earlier than glaze reduction, but this weekend was the first I'd ever heard that copper reduction happens during cool down.

Copper reds don't flash until they are cooling!
Copper reduction happens during cool down. This one short line at the bottom of the page blew my mind. For those of my readers not amazed by this bit of missing chemistry information, this means the copper oxide in the glaze is not affected by the lack of oxygen during the firing. Instead, the copper reacts after the firing, during the cool down time. 

Usually when I finish firing, I close the damper and the other kiln openings up tight to prevent the work from cooling too rapidly. Though I am not adding any fuel, I am also not allowing any air into the kiln. According to the Lou, the oxygen deprivation around 1500 to 1100 degrees is what causes my reduced copper glazes. This bit of information blew my mind because it suddenly solved a mystery for me from last quarter. When I tried to run an oxidation firing for my students, I tried to allow more air during the firing but closed the kiln up normally at the end of the firing. Students were disappointed in the resulting bright red coppers, since I had promised them greens. At the time I thought this was an error in my firing, now I suspect it was an error in my cooling.

Now I wish I had finished reading Lou's book years ago when I started. I stopped because I found the writing dry and the information too simple and too specific. The first chapter deals with kiln construction and the second with the basics of atmosphere. I'm not building a kiln, I want to improve my firing. I understand the basic concepts, I wanted some insight into how I might adjust my firing protocol on a good kiln to create better results.


When I started reading again, I was still frustrated because the book's initial solution to recognizing kiln atmospheres is to use an oxyprobe. That's great if you've got one, but we don't. (On a side note, I plan to order one ASAP.) An oxyprobe is a much more accurate way of gauging the reduction happening in the firing. The other methods are watching the flame color and how big the flame is in the chimney or coming out the spy hole. I was hoping the book would give some more subtle suggestions, but besides the oxyprobe it was stuff I already knew.

reducing flame after I opened the spy hole

I learned to fire a variety of kilns in college and graduate school, but I hadn't fired high temperature gas firings all that often. My most extensive practice has been in the YVCC studio. When I first came to YVCC the kiln was an old updraft kiln, which means it had an opening at the top for air to exit. The air inside the kiln could be controlled with a damper across the top opening. The damper consisted of a couple of shelves with handles to push them across the center opening. In my experience this kiln was difficult to reduce, which may have been a result of the kiln's age or the kiln's structure. The opening at the top and the cracks at various places allowed air out. I rarely got bright reds in that kiln and the clay body was generally pretty light. Knowing what I do now, I would guess that the kiln was hard to close up after the firing, resulting in plenty of air in the kiln and therefore oxidized (green) copper glazes.

oxidized copper on the interior of a raku fired piece

In any kiln, one can adjust the mix of air and gas at the burner or one can also adjust some of the openings in the kiln, mainly the damper in the chimney or at the exit of the kiln. These adjustments can cause the atmosphere during any stage of firing (or cooling) to be oxidizing or reducing. On the current YVCC gas kiln we have a chimney which opens into the kiln near the floor. The air exit at the bottom makes our kiln a downdraft. It also tends to make for a more reducing and more even firing. In the old updraft kiln there was a significant temperature difference from the top to the bottom. The new kiln fires pretty evenly as long as the firing is controlled well.

Though I have fired the kiln many times and can comfortably get repeatable results with little variation caused by weather or the type of work in the kiln, the oxidation firing results shook my confidence and made me want to figure out what was wrong. It is easy to get into a comfortable habit of firing and a bit intimidating to try something else in case it doesn't work as well. Last quarter a bisque firing for tall work (too tall for our electric kilns) didn't work out perfectly and that also bothered me. There may have been some thickness issues in the work, but what I have now read makes me wonder if the kiln was reducing during the cool down, resulting in some of the cracks that showed up in the work.

tall bisqued work in the gas kiln

Though I thought it was helpful, I was also bothered by the tone of "The Art of Firing." The book sorta hinted that anyone who was firing kilns and didn't know this stuff wasn't using common sense. On the other hand, the book was written--for whom? Having learned firing basics in college and then bits and pieces of kiln loading and firing from at least ten different people, I am surprised that this was the first I had heard of things like copper flashing in cool down. There were other parts of the reading that were more of a reminder. In that way it was like talking with someone who knows about firing. In my current position I am the clay, firing and glaze expert so there are few people nearby with whom I can discuss firing adjustments and errors. Reaching out to an expert or colleague in another town seems like asking for a solution rather than engaging in a discussion or brainstorming to come up with an adjustment.

reduction fired load ready to come out of the kiln

"The Art of Firing" had some useful information, as I said, but I was surprised that some of the information contradicts the hand-me-down knowledge I had hitherto learned in graduate school. This quarter I hope to find time to test some of Lou's recommendations. I threw some plates bowls and mugs last week after classes in hopes that I can fill most of a kiln with my work for a second test oxidation firing.