Saturday, February 29, 2020

Studio Move-In Finished


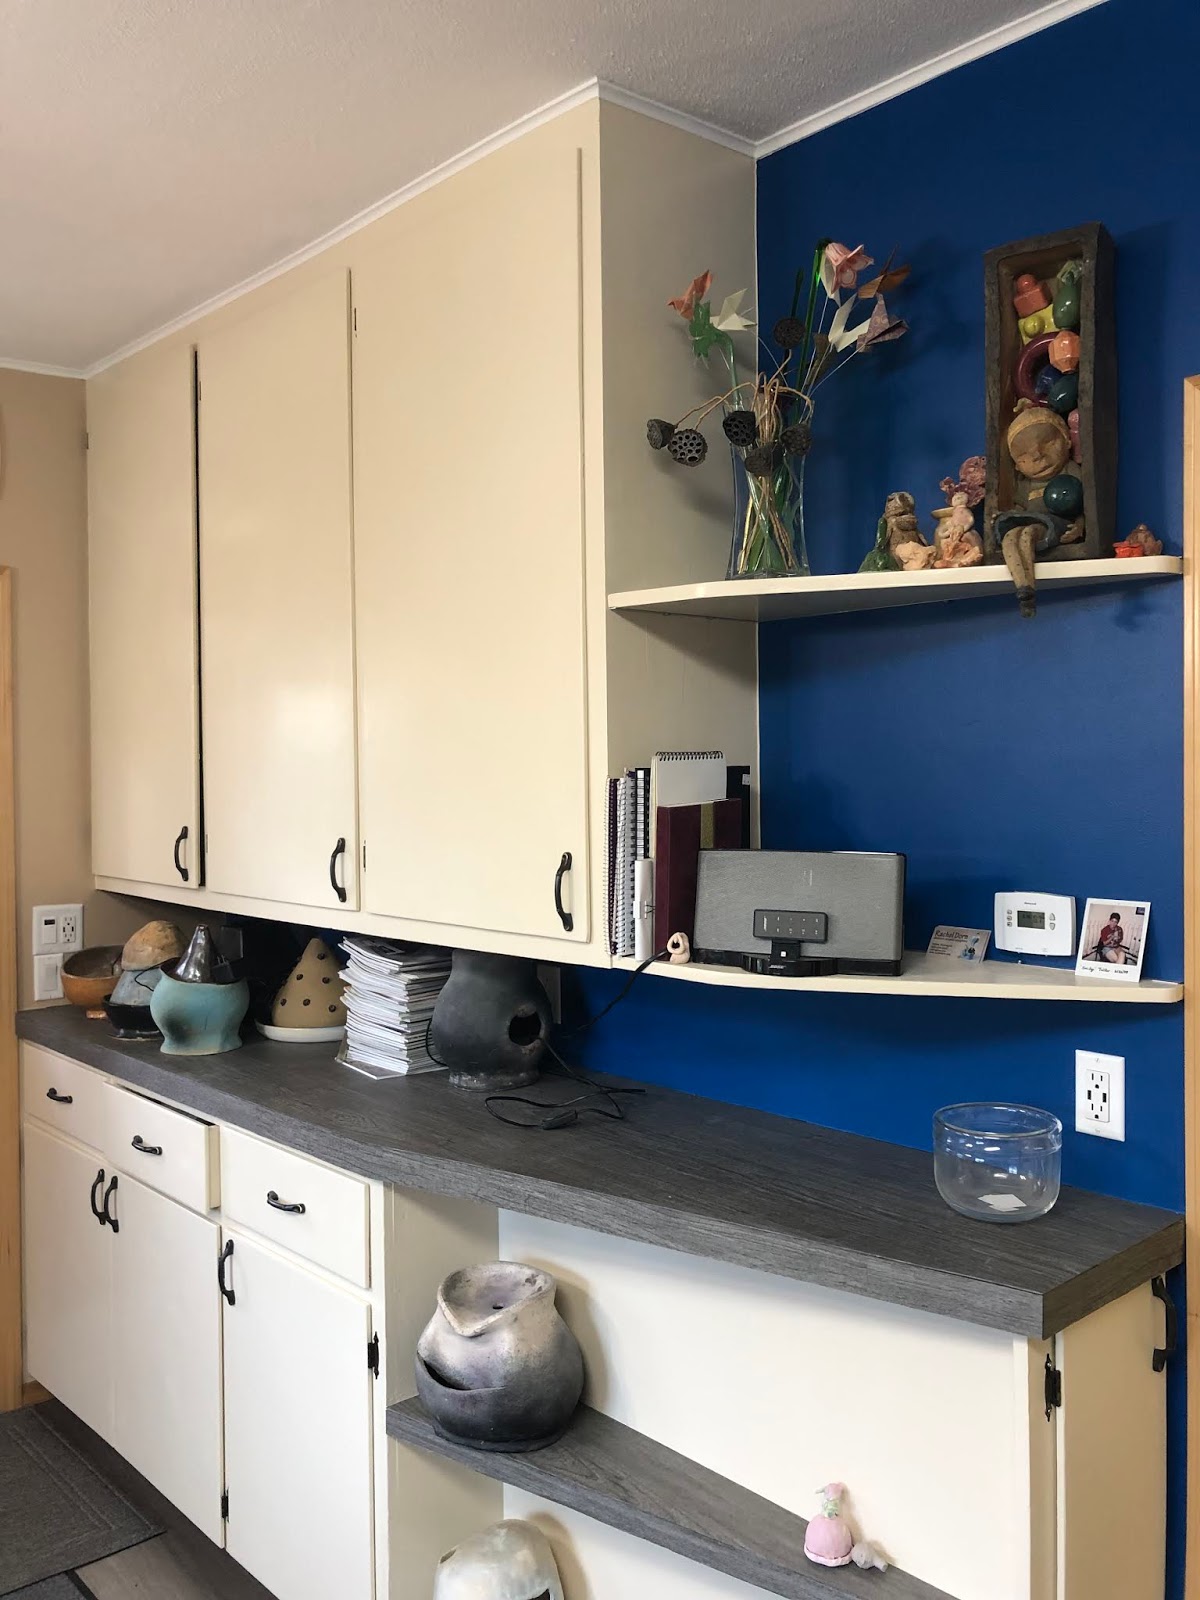
My cleaned and remodeled studio as viewed from (nearly) the doorway to the house.

I've finally finished my studio move-in. I've got everything (or, very nearly everything) cleaned and put away. Furniture has been replaced and is where I want it. Drawers and shelves are organized and lots of random papers, tools, etc have been cleared out. I could actually use this space now, if I weren't, like, writing a blog post about it instead.

My studio after the first load of stuff was brought in, and before we received all of the new metal shelves. In the foreground left are some pedestals that are now stored in the lean-to. In the middle ground right are the old wooden and laminate shelves. 

My husband says I'm ahead of schedule; he didn't expect me to have the studio ready until May. When he first finished the remodel, we brought about half my stuff into the studio from storage and left me to clean it, organize it, and put it away. Last Sunday I spent hours and hours working on it. I had paced myself a bit the weekend before.


The cupboards were very dusty. I have removed and cleaned everything in the bottom and the far right cabinet, but I haven't finished cleaning the top of the middle and left cupboards--where it is difficult to reach and I don't use stuff very often.


Everything needed to be cleaned because everything got dusty. When my husband prepared the floor, he ground off the glue and that was a very dusty process. Everything that stayed in the studio cupboards was covered in a fairly thick layer of dust, even though the cupboards were shut at all times. Luckily the drawers stayed fairly clean.

The open shelves on the right area clean and organized. The main and lower shelves have some fountains I am planning to test and maybe sell at YVC's clay sale in April.

Everything that was stored downstairs was also coated in dust. While sanding, Sean obviously had the door shut, but we didn't realize until he had been sanding for about 20 minutes that the dust was shooting out through the gap under the door. We plugged it up right away, but the dusty damage was done.


The new metal shelves are much deeper than the older shelves. This is a more logical use of space, at least when the space is organized. The drawers of the metal workbench contain sprigs, stamps, brushes, tools, paint, and molds, all cleaned and organized.


At first, when bring stuff in, we piled all the sculpture, large and small, on the new metal shelves on the right side of the room. I brought in a bin of water and washed every piece, every tool, every sprig, and basically every item that stayed in the studio. The shelves on the left side of the room had towels laid out so everything could dry, but it still took days.

One of four boxes of stuff I threw away during this process. I probably had another two bags of trash besides the stuff I donated, stored elsewhere, or sold.


I also tried to eliminate as much junk as I could from the studio. When I moved stuff in originally, in 2007, we were moving our whole house and we were distracted with new jobs, a new city, a whole new house, and fairly soon a new baby, so there was less intentional organization in the studio. Over the years things both useful and less-so have accumulated in the space. I threw away some old and broken sculpture as well as broken tools and storage containers, sprigs that didn't really work and random junk. I donated duplicate tools to the YVC clay studio and handed down a number of brushes to my daughter.

I also didn't let the old shelves stay in the studio. I had three types of shelves in the old studio. The actual bookcases are now installed in the guest room and in the stairway landing of the house. The two sets of wooden shelves that are easy to set up and take apart are in pieces in the lean-to where they can be used for art shows if needed. The plastic and laminate shelves that also used to be used for art shows were already in bad shape. They wobbled and had to be used upside down because one of the feet was broken off. I donated them to some neighborhood kids who were collecting stuff for a yard sale last weekend.


The main studio work table, wheel, and storage for works in progress. Old work I can't bear to part with (but probably won't sell) is on the top shelf.

Now that everything is clean and dry and I've eliminated a sizable amount of extraneous stuff, I have a fairly good idea of workflow in the studio. It isn't much different than before, but there is a lot more space for storing works in progress in the studio and there is less floorspace devoted to storing stuff that doesn't belong in the studio (including kids art stuff and a basket of yard toys). 


The bottom shelf has photography equipment (backdrop, backdrop support and tripod) as well as a PVC pipe for a rolling pin and my installation grid for my wall bulbs.

In front of the east window is my main work space with clay storage underneath, a high worktable and my main tools in the deep drawer on the left. To the left of the work table and surrounding the wheel is work-in-progress storage. On the floor are two baskets of foam for building on or for supporting or transporting work in progress. The foam also works well as a lure for studio cats if it is placed in front of the window. I used to have lots of boxes and packing material kept under the work tables, but this has been moved into the lean-to on the side of the room (or removed from our possession by a slightly more ruthless cleaner than myself). 


The blue door leads to the lean-to, the light door to the house. The wedging table and extruder match. To the right is clay recycling.

Behind the wheel is Bludolph, my wedging table, with ware boards, bats, and my Giffin Grip and tools. In keeping with the new organized and clean set-up, I made myself a Giffin Grip rack out of some scrap wood left over from a project in grad school (because we don't throw things away in my family). The tool rack replaces a perpetually dirty cup on a shelf next to the wheel.


My homemade rack for my Giffin Grip tools.


I used to keep both clay and ware boards under the wedging table. Clay storage was basically a pile in a bucket next to the wedging table. Bookshelves made this whole area difficult to access. The new set up leaves lots of open space next to the wheel. I've put two recycle buckets here, one for red and one for grey clay.


Clay recycling. Now that I look at it this way I am disappointed that I put the red clay in the grey bucket and the grey clay in the orange bucket. Missed opportunity.


To the right of the central work table I have shelves for glazed work above and shelves for fired pieces below. These pieces are designed to be put together with other ceramic pieces and non-ceramic elements in order to become a finished sculpture. Some of them are ready to be put together, others need some work.


The blue pieces are all meant to be a set, but the physics wasn't working well for me last time I tried to put them together. Maybe now I'll have some time to problem solve.


Sean is very proud of his drywall seams and painting job, so he doesn't want me to hang up anything in the studio, particularly not temporary stuff. I admit I like the clean aesthetic, but I'm not sure how long it will truly last. In the meantime, I have consolidated and edited the inspiration images I had in the studio and I've attached them to the metal shelving on each side of the main work table. This way it is easy for me to see while working, but the studio looks cleaner than when they were on the cabinet doors.


One of my four inspiration pages, including sketches of my own, old work of my own, and artists' cards.

During the cleaning process, I went through a lot of old papers, posters, images, and artist cards that I had kept for many years. I pulled out my own stuff to keep in a smaller box of history. I threw away the ones I no longer cared about, brought a few to school, and made a small stack of ones to look up. It was interesting looking up former grad school classmates to see where they are now. I also kept a small set of images that still inspire me, but I'm thinking I may try to be more intentional about replacing them more frequently than every 13 years.

Monday, February 17, 2020

Hand-built Student Work: Portraits (part 1)


Ibet Vargas started adding texture to her dog while the work was still solid. This technique allows her to add clay and eventually remove more clay, making for a thicker texture, but less weight.

This past week, my Clay 1: Hand-building students finished their solid-built portraits. For this project, which I've done every winter for several years, students can choose animal or human subjects, or even fictional characters for their portraits.

Mary Feusner's elephant had some wrinkles applied to its ears, body, and trunk before hollowing, but other we added later.

This year's group did a nice job of getting everything finished on time, and several had enough time to really get into the textures. 

Jessica Buchholtz's Grinch had deep wrinkles added before hollowing, and refined after the hollow pieces were back together. 
Early on in the process, student build solid, usually on an armature, so that they can work pretty quickly. The goal on the first day is to cover the armature, then get the large proportions of the head, chin, and neck correct for a bust, or the head, legs and body right when the animal's whole body will be shown.

Sean Wilkinson hollowed his Dionysus before adding much of the texture

Next the students position the features of the face or refine the shape of the head and body. Once the proportions and placement is correct, students let the whole sculpture dry so that the surface is leather-hard. Then they can cut the sculpture into pieces and remove the excess clay from the interior.

Amy Wade added much of her German Shepherd's texture before hollowing, but also had enough time to add to and adjust the texture after it was back together.

The solid clay cannot be safely fired and the armature would cause the form to crack anyway. Once the excess clay has been removed, the pieces are put back together and students can hide the seams, add textures, and refine details on the surface.

The Grinch, by Jessica Buchholtz, has an overall texture contrasted by the thick wrinkles on the forehead and cheeks. The smaller lines around the eyes and the open mouth also provide contrast. 
Eventually the pieces will be fired and glazed (or painted). This class was fairly well split between sculptures of animals where the whole body was visible and portrait busts that began at or above the shoulders. Interestingly their approach to eyes varied significantly and intentionally.


The Grinch has pupils drawn into the clay, which give the viewer the sense that he is looking at you. Other students chose not to distinguish the eyes with pupils, either because the intent was to replicate Greco-Roman figure sculpture, or because they plan to paint in the pupils later.

Dionysus, by Sean Wilkinson, is intended to suggest Greco-Roman sculpture and will thus be glazed or painted a monochromatic white.
Eye shape also varied quite a bit from student to student. Elves and dogs and elephants and snakes all have different shapes for their eyes and students tried to capture the different structure of the eyes, eyelids and brows.

Kascha Love's elf had noticeably protruberant eyes and thick upper lids.

Ciara Smith's snake head is small, but the structure of the head and eyes is striking.
In some cases, students had to make major revisions in the shapes of their forms. The dog that Ibet Vargas made changed shape significantly from the first few days of the project. The dog's eyes were originally facing straight forward and the head was up at an entirely different angle.

Ibet Vargas really went to town with the texture, my favorite detail is the little tufts of fur behind the front legs and above/in front of the back legs.


Mary Feusner's elephant had additions made to the height of its legs twice during the process. She also made serious changes to the shape of the backside. She pretty quickly captured the shape of the face, but the elephant was originally fairly skinny. 

Mary indicated that capturing the soft and hanging sense of the wrinkly skin was particularly challenging for this project.
Students brought in multiple pictures of their subjects, which they could use to compare sizes, shapes, and angles. Some students also used calipers or rulers to check the dimensions of their subjects and compare the size of features. The great thing about a shared studio is that there's often someone around to give you a fresh perspective or notice something you can no longer see.

Sean Wilkinson chose a slightly tipped position for his subject's head. This tipped position makes it more difficult to compare the angles of the jaw and size of the ears during building.


Sunday, February 2, 2020

Bring Tools and Work back into the Studio


The countertop partway through installation

My clay studio remodel is officially done. It's actually been officially done, according to Sean, for more than a week, but my folks visited for a week and we did more exciting things last weekend than cleaning tools and organizing the studio.

the countertop weighted down with books, rocks and cinderblocks while the glue dried

The countertop was the last thing in. We decided to go with flooring strips glued in place and they look great, though Sean is annoyed when I point this out because this was one of the cheapest items in the room. 

My pretty new countertop 

The front edge of the counter top also has a strip of floor panels and this created a new "problem" when he was installing them. The cut edge where the strips met at a right angle was white, which stood out (at least when one paid close attention) against the grey flooring/countertop. The elegant solution was to color the edge with a pencil. It worked great.

the top installed, the bottom in progress 

We also purchase some new "tables" and shelves. So far we have two tables with drawers and two sets of shelves. All are on wheels. The third set of shelves was damaged in shipping, so we're expecting it this week. Its actually good that it didn't shop up yet, because we've crammed stuff into that space temporarily.

the top has been penciled in, the bottom has not

This weekend my husband brought up most of the stuff from where it was stored in the basement. Actually, last week the wheel and wedging table were in place, but Friday when I got home from work he had "reclaimed" his tool space in the basement. As soon as I got home from work, I was, depending on your perspective, required to or able to clean and organize in the clay studio. It was actually what I had wanted to do before I left for work in the morning.

brown/black table in and wheel back in

The first thing I did on Friday was move my clay. I have a number of bags of reclaimed clay, as well as some partial bags of new clay, but some of the bags had ripped or opened and dried during their hiatus in the basement. Those will need to be slaked and recycled.

brush collection drying on my new metal shelves

The next thing I did, with a significant amount of help from my daughter, was clean my brushes. I have a LOT of brushes. For years (ok, a decade), they had been stored in this bizarre carpeted built-in drawers. Everything in the studio had gotten dusty during the remodel, so I not only needed to clean the brushes, but the carpet needed to be sprayed out, too.

ugly, and odd, old brush drawers

The brushes are now carefully organized in a wide, shallow drawer in one of the new tables. I don't actually know if I need the brushes to be organized this well, but it feels kinda good to start this way.

new brush drawer

In this silver table/workbench, I've also got a drawer of epoxy, tape, knives and resist; another for paint; one for sprigs, and another with sketchbooks. I plan to put molds in one and I haven't decided on the others.

metal table/workbench

The wood table had three drawers. This one has one drawer of sculpting tools and it's where my daughter and I have been washing and organizing most of the tools and springs. Both table surfaces have lots of extra stuff on them. The goal in moving stuff back into the studio is to decide whether to keep it. I've thrown away about a box of stuff, but I've also got some items on probation in various locations. They don't get put in drawers until I decide if they really need to be kept.

the cat has discovered the new window viewing location

The studio looks like a total and utter disaster, but it feels good. I've left the extra shelves, the ones I won't be keeping, in the middle of the space to help with planning and organizing. Currently one has stuff that either belongs to my daughter or belongs in a different room, and the other had stuff I can't yet decide about.

scary mess, hiding organization in progress

The metal shelves are the only ones that I'm planning to keep in the studio. They are 24" deep, so significantly deeper than any of the shelves I used to have in the studio. The extra space for storing work in progress will be helpful, but I don't want to end up with random pieces stuffed here.

not all of these will stay--at least not here

The sprigs were excessive. I use a lot of sprigs for the surfaces of my work, but I don't always go back and eliminate ones that didn't work that well. My daughter washed all of them, and I sorted them into containers based on what I was keeping and what I use regularly or not.

sprigs being sorted

When I use the sprigs they usually end up in a little container on the workspace, so I have organized them in the drawer in little removable containers. I also have a large container of sprigs on probation. These are duplicates or ones I don't remember using much. I want to check that they function well and are useful before I put them back into the regular rotation. 

new, clean, organized sprig drawer