 |
| Ibet Vargas started adding texture to her dog while the work was still solid. This technique allows her to add clay and eventually remove more clay, making for a thicker texture, but less weight. |
This past week, my
Clay 1: Hand-building students finished their solid-built portraits. For this project, which
I've done every winter for
several years, students can choose animal or human subjects, or even fictional characters for their portraits.
 |
| Mary Feusner's elephant had some wrinkles applied to its ears, body, and trunk before hollowing, but other we added later. |
This year's group did a nice job of getting everything finished on time, and several had enough time to really get into the textures.
 |
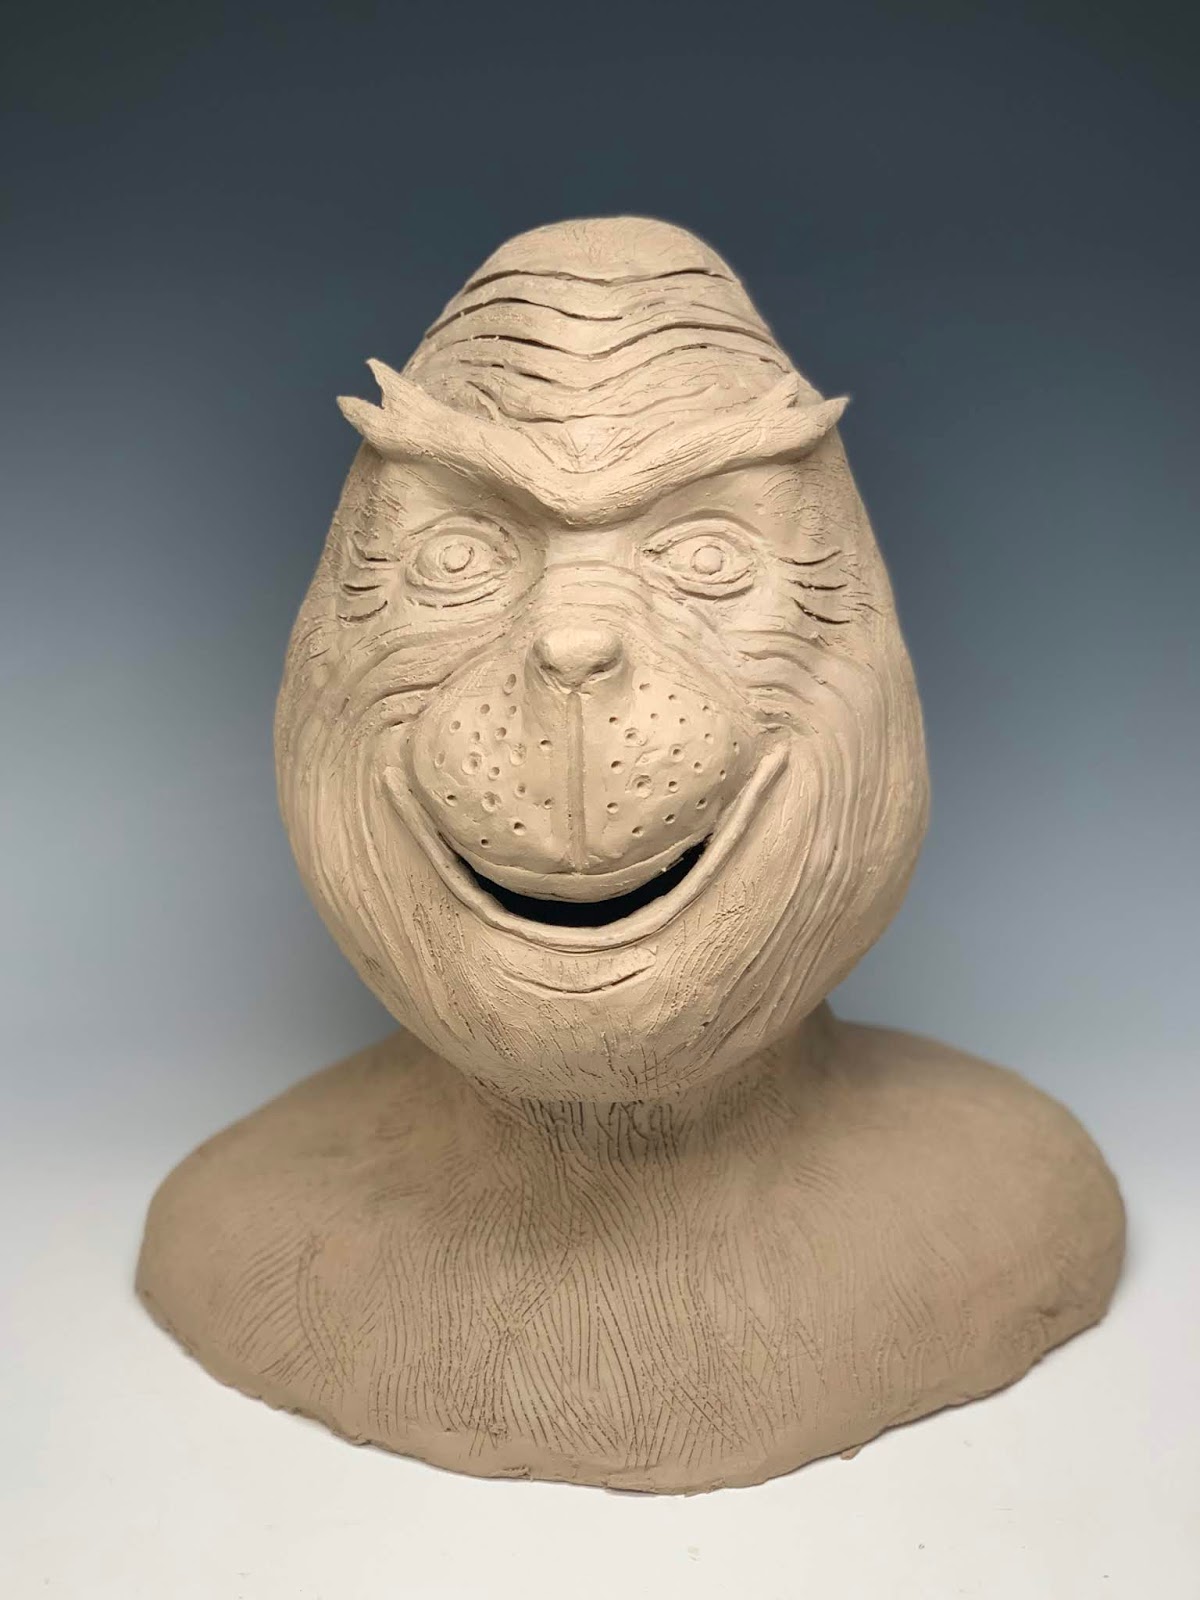
| Jessica Buchholtz's Grinch had deep wrinkles added before hollowing, and refined after the hollow pieces were back together. |
Early on in the process, student build solid, usually on an armature, so that they can work pretty quickly. The goal on the first day is to cover the armature, then get the large proportions of the head, chin, and neck correct for a bust, or the head, legs and body right when the animal's whole body will be shown.
 |
| Sean Wilkinson hollowed his Dionysus before adding much of the texture |
Next the students position the features of the face or refine the shape of the head and body. Once the proportions and placement is correct, students let the whole sculpture dry so that the surface is leather-hard. Then they can cut the sculpture into pieces and remove the excess clay from the interior.
 |
| Amy Wade added much of her German Shepherd's texture before hollowing, but also had enough time to add to and adjust the texture after it was back together. |
The solid clay cannot be safely fired and the armature would cause the form to crack anyway. Once the excess clay has been removed, the pieces are put back together and students can hide the seams, add textures, and refine details on the surface.
 |
| The Grinch, by Jessica Buchholtz, has an overall texture contrasted by the thick wrinkles on the forehead and cheeks. The smaller lines around the eyes and the open mouth also provide contrast. |
Eventually the pieces will be fired and glazed (or painted). This class was fairly well split between sculptures of animals where the whole body was visible and portrait busts that began at or above the shoulders. Interestingly their approach to eyes varied significantly and intentionally.
The Grinch has pupils drawn into the clay, which give the viewer the sense that he is looking at you. Other students chose not to distinguish the eyes with pupils, either because the intent was to replicate Greco-Roman figure sculpture, or because they plan to paint in the pupils later.
 |
| Dionysus, by Sean Wilkinson, is intended to suggest Greco-Roman sculpture and will thus be glazed or painted a monochromatic white. |
Eye shape also varied quite a bit from student to student. Elves and dogs and elephants and snakes all have different shapes for their eyes and students tried to capture the different structure of the eyes, eyelids and brows.
 |
| Kascha Love's elf had noticeably protruberant eyes and thick upper lids. |
 |
Ciara Smith's snake head is small, but the structure of the head and eyes is striking.
|
In some cases, students had to make major revisions in the shapes of their forms. The dog that Ibet Vargas made changed shape significantly from the first few days of the project. The dog's eyes were originally facing straight forward and the head was up at an entirely different angle.
 |
Ibet Vargas really went to town with the texture, my favorite detail is the little tufts of fur behind the front legs and above/in front of the back legs.
|
Mary Feusner's elephant had additions made to the height of its legs twice during the process. She also made serious changes to the shape of the backside. She pretty quickly captured the shape of the face, but the elephant was originally fairly skinny.
 |
| Mary indicated that capturing the soft and hanging sense of the wrinkly skin was particularly challenging for this project. |
Students brought in multiple pictures of their subjects, which they could use to compare sizes, shapes, and angles. Some students also used calipers or rulers to check the dimensions of their subjects and compare the size of features. The great thing about a shared studio is that there's often someone around to give you a fresh perspective or notice something you can no longer see.
 |
| Sean Wilkinson chose a slightly tipped position for his subject's head. This tipped position makes it more difficult to compare the angles of the jaw and size of the ears during building. |


No comments:
Post a Comment
Tell me what you think about my work or this post