Wednesday, March 13, 2013

Second Grade Clay

Last week I did a clay project with a group of second graders at a local elementary school. There were roughly 70 kids at nine tables. We were in a gym and unfortunately the acoustics of the room were not ideal for speaking over a multitude of kids. I had not requested a microphone. Before I got there, I wouldn't have considered that I needed one. Seventy is a lot of kids and though they were focused and well behaved, it was hard for them to be very quiet once they had started working and it was hard for me to speak loudly enough for them to hear me.

an airplane, some turtles and some other finished bells

The project was arranged by the school PTA and I was impressed by how well they coordinated everything. I emailed back and forth with my contact person maybe 30 times before the event. She was very clear about what they expected and why they were doing the project. The school doesn't have any art classes, which I find shocking, so the PTA has undertaken to encourage artists and educators from the community to do one-day projects with the kids to enrich their education. I am hopeful that McCleary decision may change this unfortunate situation in the coming years.


a kitty bell

In the meantime, I believe the PTA is still looking for artists to teach short lessons with the kids in a variety of media. I'd be happy to put local artists in touch with them. I found that the woman who contacted me was very thorough and easy to work with. She asked what we needed and got it all ahead of time so that all I brought to the school were a few example pieces. some clay stamps and a printed sheets of illustrated directions for the project. The teachers also had a handy clapping thing they did to get the students attention and turn down the volume in the gym.

The step-by-step directions I had on each table
The project seemed to go well, despite how difficult it was for the kids to hear. There were quite a few PTA parents and some teachers there to help. I'm guessing some of them had some clay experience, because some of the tables did their pinch pots before I got around to giving those directions. I also brought with me a couple of students from YVCC to help with the project. They worked with different tables helping kids do the project and making sure the kids had enough clay and attached their pieces well.

The flower/princess on the right has interesting eyes

The kids behaved very well and didn't seem to have much trouble making their bells. A few kids had pinch pots larger than their bases, but they were able to add more clay to make the base larger. A few kids squished their bells at some point during the process, but they seemed to have fun anyway and I think their bells should be able to be fired, even if they won't make much noise.


The most interesting thing by far was to see how the kids decorated their work. There seemed to be trends by table, so that one table had several turtles, another had several seahorses. One table had a bunch of very well crafted princesses and butterflies. The sea life table was impressive for how different their designs were from my examples. There were at least two seahorses and one arrangement of a seashell and other ocean stuff on top.

a seahorse

Another table that made me laugh was the one where several kids made turtles, like my example, but added top hats to the turtles' heads. A few kids added legs underneath their bell shapes. I didn't notice the legs until I picked up the pieces at the end of the day, but they were a neat effect. My turtle example's legs were stuck out to the side.

sea creatures, large turtles and a variety of patterns and textures on the tops

There was an energetic group of boys at the front table. Right after I was introduced and before I could give more directions than "pick up some clay" one of the boys already had a question for me. It turned out to be a good question (he was asking if they got to keep the stuff they made) but I was afraid it would set the tone for the whole day. Their table did end up requesting a lot of help but they also stayed on task and finished their work.

a princess/lady in amongst a variety of other bells

Unfortunately I didn't get particularly good pictures of the kids' work. I didn't take any during the event because I was so busy. One of the teachers did, but I don't know if I have permission to share the images that have the kids in them. I did take some pictures at the end of the event, after I went around and checked all the pieces to make sure they wouldn't explode in the kiln and to make sure they wouldn't fall apart when moved. Apparently I was tired, because the pictures aren't very clear.

a couple princess, something that now looks like a cat, and at least one turtle

I am hoping to get new pictures after the work comes out of the kiln. The work is being fired by a local high school art teacher, but it needs to dry, some of it quite a lot, before being fired. A few kids seemed to believe that taking a huge solid chunk of clay and sticking it on top of their hollow clay would be good. Usually I give students three rules for clay: 1) always score and slip to attach clay to clay, 2) always have an air escape for any air pockets and 3) never make any part of the clay thicker than your thumb. We didn't get around to the third rule for these kids.

a turtle with a top hat

There will be an art show open house at the school at the end of March. I am planning to go. It should be interesting to see what else the kids have been doing. I don't know if the kids will have their finished work by then, but I believe the PTA plans to have them paint the bells when they come out of the kiln.

the seashell still life, but this picture doesn't do it justice


Thanks to Anne Rojan and the Apple Valley PTA and teachers, Debbie Sundlee, Mike Hiler and Grace Keller for your help on this project. And thanks to the kids for making it fun.

Sunday, March 3, 2013

Second Grade Clay Rattle Project

This coming Thursday I have agreed to do a project with some second graders at a local school. My initial plans were altered as I started to think about the logistics of directing 60 or 70 kids in one project. I don't want the project to be so complicated that the students will get lost or frustrated. I won't be able to directly assist all the students or correct individual mistakes, so I need to make the project simple enough for the kids to follow and do with little assistance.

turtle "rattle" made as a test of the methods I plan to use

woman whose skirt is a rattle, also made as a test

I also need to make the project interesting enough to keep the students engaged and to provide a challenge for those students who finish the basic project early. A good kids clay project, in my opinion, is one that "works" for a kid who is able to do only the bare minimum, providing that kid with an object that they can be proud of. A good project also needs to be flexible enough to interest the kids who find the basic steps too easy. Kids need to be able to decorate, add to, or improve on the basic design.

start with a ball of clay (two, actually)

 I also need to be able to do this project with minimal equipment, tools and hand-skills.

flatten the first ball of clay

The project I have chosen to do with the second graders is a small bell or rattle. I have done at least 3 iterations of this project with students over my years of teaching. The only tool that is absolutely necessary is a toothpick or needle tool and the only other requirements are clay and slip (or water).

squish together any cracks or irregular edges so they are flat and round

It is also nice to have a scoring tool, a paintbrush, some stamps and some scraps of paper. Opportunities for additions and modifications are essentially endless, but the central form of the project is pretty simple to make.

create a pinch pot with a second ball of clay, squeezing the clay at the bottom first


The project requires students to roll out two balls of clay and flatten one. They need to create a pinch pot with the other, and this is the most complicated skill required of them. To create the pinch pot, they need to start with a round ball of soft clay, push their fingertips straight down into the clay and then gradually increase the size of the opening by squeezing and turning the ball of clay. The key is to start squeezing at the bottom and leave the top rim thick until the end. If kids don't listen or understand this step, they will make a pancake pinch pot with no space inside for the rattle.

score the edges of the base and the pinch pot

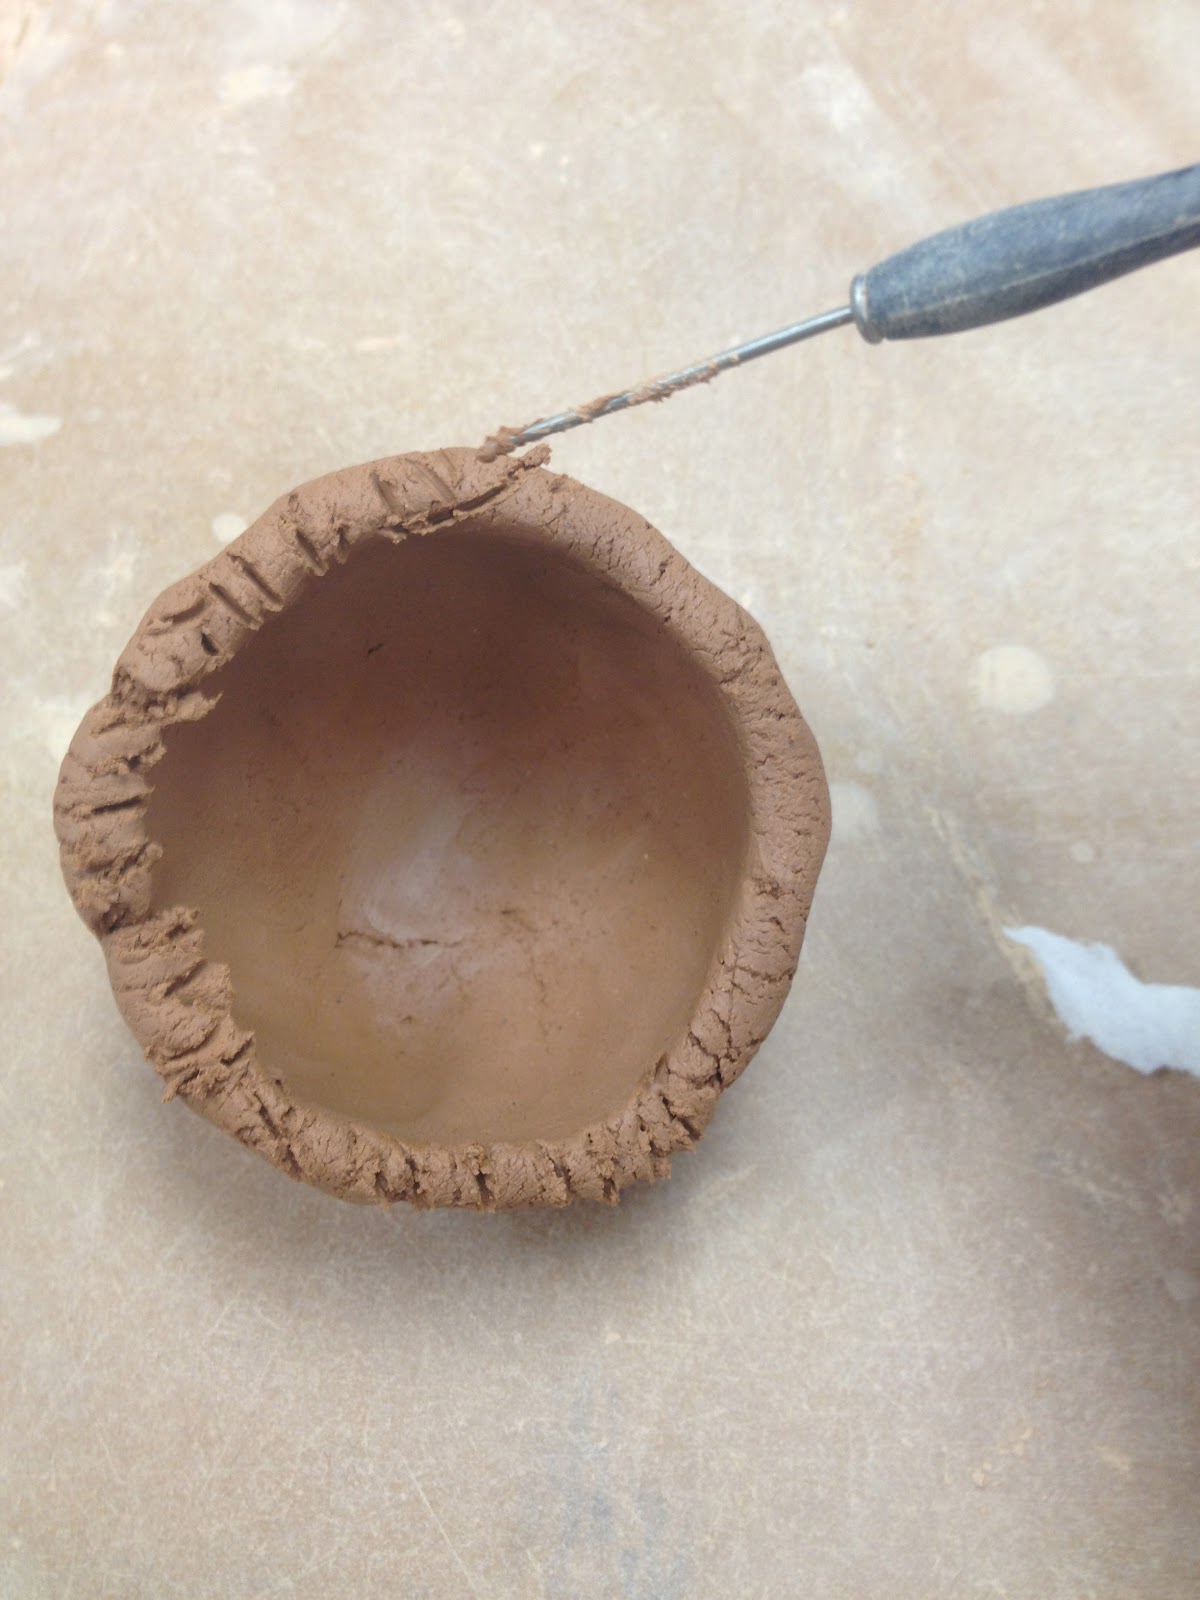
Students then score (or scratch little lines in) the edge of the pinch pot and the outer edge of the flat piece of clay. It's a good idea to punch a hole in the flat piece of clay now, though it can be done later too.

       
make balls of clay and (optional) wrap them in toilet paper


Students make little balls of clay (to be the rattling sound makers) and wrap them in paper. The little balls of clay don't need to be wrapped in paper, but it helps prevent them from sticking if kids get slip on the balls of clay. The rattles won't make any sound when they are wet. During firing the paper will burn off and the balls of clay will become hard. After firing, when someone shakes the rattle, the hard ceramic balls of clay will hit the hard ceramic interior walls and make noise.

poke a hole in the base (now or later)

The little rattling balls of clay are put in the middle of the flat piece of clay. Students need to slip the attachment by adding water or, preferably slip (watery clay) to the seam. I recommend the kids put slip on the edge of the pinch pot so that they aren't too messy with the slip. I also recommend slip rather than water because students (and teachers) can see the slip better and know that the whole piece of clay won't be getting soggy.

add slip (watered down clay) to scored edges

The pinch pot is pushed onto the flat base, trapping the little balls of clay inside. A little pressure will help keep the pinch pot attached to the base. A little slip may squeeze out the edges. It can be wiped away. Excess clay can also be trimmed away if the base is too wide. 


place the pinch pot on the base, lining up the scored edges and trapping the clay bits inside

As I was making a couple test pieces, I was concerned that the project might still be too difficult for such a large group of students. I don't have regular access to dozens of second graders, but I do have access to one preschooler, so I brought my daughter into the studio to try the project. I figured if one preschooler could do the project without help, then 70 second graders could do it with minimal help. Also, I hear second graders can read and follow multi-step directions, so I plan to bring pages for each table that show step by step illustrated directions of the process.

it's a good idea to work on paper 
score the edges using a needle too, toothpick or scoring tool
add slip with a brush, don't get slip on the clay balls or in the middle of the base
put the two pieces together. it doesn't have to look perfect so long as it sticks

My daughter was able to make the form. She had the most trouble with the pinch pot, but I didn't need to take it away or have her start over again. Of course my daughter couldn't resist decorating her rattle. She added a body and arms, decorated with a clay stamp and drew in a face. Her piece wasn't as round as mine, but she was able to make a passable pinch pot without my assistance and all her attachments were strong. Her piece will not explode during firing, since she put a hole in the base when she was almost done.

scratching in the face
The most important thing I will need to check, or have my clay student assistants check, is that each piece of clay is attached securely and that each rattle has a hole in the hollow area to allow the hot expanding air to escape during firing. It is also important that no solid clay pieces are thicker than about an inch.

adding the air hole
I always tell kids about the "wiggle test" and the "rule of thumb."  The "wiggle test" means that if I gently wiggle the clay now (when it is wet) and it comes off, it will fall off later. Usually students have forgotten to score and slip their attachments and they can do that now. The "rule of thumb" means that no piece of clay can be thicker than their thumb. If it is thick, it risks exploding in the kiln.

decorating with a clay stamp
The only other risk in this project is that students will be frustrated that they can't make the clay do exactly what they want. I plan to distract the students with clay stamps and other tools they can push into or stick onto their clay. The fun of new tools should help appease the frustrated perfectionists.

Wednesday, February 27, 2013

Texas National and other Exhibitions

I just found out that I was accepted into another show, this time in Texas. The Texas National 2013 Exhibition will be held at the Cole Art Center in Nacogdoches, Texas. The show is put on by the Stephen F. Austen State University School of Art.


The Juror this year is Peter Selz. According to the Texas National press release, Selz is "...past curator at MoMA and founding director, University Art Museum at Berkeley; renowned art historian who curated shows on Giacometti, Graves and Rothko, has written for many art publications, recipient of numerous awards, and author of The Art of Engagement..."

"Taka Kozonaka" for the Texas National Exhibition

I actually entered the show because of the juror. I have made an effort this year to enter more national shows. Call For Entry.org makes it easy to apply to a bunch of shows at once, so I got myself organized, uploaded a bunch of images to their site and started applying. Over the holiday break, I basically applied to everything that seems reasonable, but this show I believe I chose for the name of the juror. He is a big name, but he also was curating important shows at an interesting time. I read a little about him after I was accepted into the show. He seems to be a fan of good art as opposed to trendy art and it is interesting to see him talk about Abstract Expressionism and Pop Art.

"SRAM Gears" for The CVG Show

The interview I link to above includes a portrait of Peter Selz, titled "Portrait of Peter Selz." Interestingly, the Texas National press release also includes this image, but it is labeled differently. On the Texas site, it is called "Portrait of the artist" and in that context I thought it might be a portrait of Phong Bui, the artist who drew the image. When I initially looked at the image I guessed it was Selz, but the title, next to a description of an art historian, confused me.

"Ooishi Pod" for Women's Works
My strategy of applying to a bunch of shows this year seems to have been pretty successful. I applied to  seven shows, I was invited to show work at four and one is still in review. In the Fall I had work in the Mighty Tieton 10x10x10 show (I just went back to look at my posts and discovered I wrote but never published a review of the show), which I would have entered anyway and which motivated me to start applying for a batch of shows on Call For Entry. I also have work that should be on its way home soon from The CVG Show in Bremerton and I have work that I just sent to Illinois for Women's Works.

"Aka Marumado" for Tieton 10x10x10
The Texas National Exhibition runs April 13 through June 8, 2013 for any of of my readers who plan to be near Nacogdoches this spring and summer. "Taka Kozonaka," the piece I will be sending to this show, was one of the very few non-bike-parts pieces I finished this summer while I was working on my bike parts project.

Wednesday, February 20, 2013

Graffiti and Street Art

This weekend I finished "Graffiti and Street Art" by Anna Waclawek. I wouldn't have picked up this book for its cover design or the blurb on the back, but I was looking for a book about graffiti and this was one of the few options. Luckily, the content of the book was much better than what I was expecting.

not an inspiring cover

Before reading this book my knowledge of graffiti was pretty limited but probably not more so than your average college art instructor. It certainly wasn't a standard topic when I was in college and even in graduate school there was no formal way to educate oneself on the topic from inside the academy. When I lived in the midwest I probably would have generally supported the validity of graffiti as an art form with no real idea about the history or significance. Once I moved to Yakima, I started to see graffiti as an urban nuisance and a gang-related crime. I didn't see much evidence of anyone exploring the expressive or "art" aspects of the medium, just tagging garages and abandoned buildings. I painted over graffiti on my garage and sometimes the fence and got annoyed at the vandals and at the neighbors who didn't get their graffiti covered quickly. Visiting "home" in the midwest, I marveled at the fresh clean garages and fences on every street.

graffiti inside the tunnel at the local park
In the last couple years I have started to see more expressive graffiti in Yakima. I see what Ms. Waclawek informs me are called "throw-ups," which are the large, filled-in signatures, as opposed to the linear signatures or tags that show up on my garage and on abandoned buildings, fences and even trucks all over Yakima.

a "throw-up" at Jagz barber shop

The Salvation Army and Jagz barber shop in town have both commissioned graffiti style artwork as advertising or decoration or even graffiti prevention on their buildings. On the way to YVCC there is a line of fence that has several throw-ups, though I have no idea if these were allowed or requested by the owners or if they were put up illegally. From an artistic or visual culture perspective, these works are much more pleasant to look at than the ubiquitous tags.

(part of) The Salvation Army graffiti style mural

Other than my personal experience with illegal tagging on my property and the second-hand experience of larger scale local graffiti works, my experience is limited to watching "Exit Through the Gift Shop" and confronting concerns over lettering style in my experimental "Mural in a Quarter" class at Yakima Valley Community College. In 2007, students in this class designed and installed a mural in the Sherar Gymnasium Foyer at Yakima Valley Community College. As part of the process, the students had to propose their design to a college committee for approval. Their initial designs were met with hesitancy because of some graffiti style lettering and the students were asked to revise their plans.

the completed mural without graffiti style lettering

In the context of a city infested with tagging and starting to exhibit more expressive throw-ups, I wanted to learn more about graffiti. I went looking for an academic treatment of the subject and "Graffiti and Street Art" was the most promising looking book I found at the Barnes and Noble in Seattle.

graffiti on Jagz barber shop

After a disappointing introduction, I enjoyed the book and eventually was impressed with the treatment of the subject. The book starts with a history of signature graffiti (tagging) in the 70s. I think it is this first section of the book where I find the writing to be repetitive and elementary. The history was useful, but I felt like the author was trying to hard to make the early tagging into Fine Art. The author also tries to deconstruct the symbolism in the tags and larger graffiti pieces, but there isn't much that needs explaining. A crown means king, a star and underlining add emphasis. The graffiti culture also was less interesting to me.
A Yakima "Street Art" poster

Most of the book talks about what I call expressive or artistic graffiti and street art that is related but distinct from the origins of signature graffiti. I was most impressed with the inclusion of unusual media including yarn bombing and delicately cut paper installed in the street. There were plenty of high quality illustrations, almost all were in color, and I thought the author did a particularly nice job of supporting her written ideas with visual imagery. The artists represent a wide range of contemporary graffiti art and "post-graffiti" street art. The author will use several artists to support a topic in an early section and then refer to the artist again with new images in a later section. By the end you feel like you recognize the work of the various artists.

graffiti on the Baskin Robbins building
I had never heard of artists cleaning dirty city walls to create reverse graffiti images visible in the contrast between the dirty and newly clean sections of the wall. My husband actually wrote on our sidewalk with a pressure washer, essentially cleaning the sidewalk in a pattern that spells out a name, but I didn't make the connection between that and graffiti writing or art. How fascinating, how beautiful and how unexpected to create this "illegal" art in a manner that is ambiguous in its legal status. Is it illegal to clean city walls? 

anti-tagging message below The Salvation Army mural

Sunday, February 17, 2013

Elementary Clay Outreach

It has been my goal with this blog to try to write twice a week or, at the very least, once a week. Usually I don't have any trouble keeping up. Lately, however, I have found it hard to keep myself motivated. I suppose I can figure it out, I've had a major schedule shift for my daily workout and am teaching a different set of classes this quarter. This quarter I am also supposed to be writing my self-assessment for work but I am finding the task to be harder than it should be.

Sometimes I reach a point where I realize that just doing the work will make me feel better, but I still don't want to do it. I don't spend a lot of time in front of the TV or on the computer, but I still manage to find ways to avoid if I want to. And avoiding what should get done makes me feel that much worse for not doing it.

As for writing in the blog, I have been feeling like the most important issues rattling around in my brain right now are verboten. I spend oodles of time thinking about some issues that have to do with the classes I am currently teaching but most of the issues seem to be a little too sensitive to discuss openly and I because I haven't been writing about the issues, I haven't figured out if there is something I can say publicly about them. In writing the first three paragraphs here, I am aware that I am creating a most audience un-friendly post. However, I am also aware that one of the reasons I set myself this twice a week goal for writing the blog was because of the benefits that come from writing the blog, namely, the opportunity to think deeply and personally about the issues that are rattling around in my brain. I will now proceed to use more pictures and write about something that does invite an outside audience in.


2nd Grade Clay
I do have a couple of things coming up that I am at liberty to discuss. One is that I have agreed to teach a clay lesson to some second graders at Apple Valley Elementary in West Valley. The YVCC art department was contacted by an Apple Valley PTA mom about presenting some art lessons to their students because the students don't have art classes. I repeat, the students don't have ANY art class. The horror!

So, as I am trying to get my head around the idea that there are elementary schools where the students DON'T HAVE ANY ART CLASSES, I am also trying to remember how to teach clay to second graders. When I lived in Cedar Rapids, I taught art classes for the City Parks and Recreation Department. I taught all K-12 grade levels and kids as young as preschool and some adult classes. The classes were small, we had basically no budget and I was pretty much on my own for setting up classes and teaching them. It was a good experience, but it was also 10 years ago.

I couldn't find the real logo version of this so I made my own with my daughter's stickers

For the past two years I have done a clay lesson for my daughter's pre-school class. Second graders have more dexterity and more ability to anticipate the end result, but I'm not sure they are that fundamentally different from pre-schoolers in wanting to play with clay. For that matter, adults taking a one-day clay lesson usually just want to play with clay. With clay, I think a flexible but not too difficult project can work well for very young kids and older students all the way up to adults. I think teenagers are probably the hardest group to please. They tend to be least forgiving and most likely to label the project as stupid or uncool.

preschool bells waiting to be fired

The biggest challenge for this lesson will be that the group includes 70 students. That's right, I am going to teach one clay lesson for 45 minutes to seventy students. What could go wrong? I expect that there will be some adults, but it's hard to guess how many. It is also hard to know how the kids will behave.

I was originally thinking of doing the the bell project I did this summer with the preschool class. I've done the basic project with older kids in Cedar Rapids as well. The bell or rattle sculpture emphasizes the neat qualities of clay, namely, it gets hard when you fire it and can thus make a noise. Kids can simply make a bell with random surface decoration like the pre-schoolers did or they can make figurative bells like my older kids did. The most patient or skillful students can do more surface decoration than average but all the kids will end up with a noisemaker once the pieces are fired.

dog bell made by a little boy in Cedar Rapids who is probably now in college


This bell project consists of a flat base and a coiled, thrown, wrapped slab or pinched body. The trick is to put in a dry rattle before closing the top. With the pre-schoolers I threw a dozen top pieces and had the kids attach the bases, insert the rattles and close the tops. With older kids in Cedar Rapids, it looks like I had them wrap slabs around probably a toilet paper roll support or possibly they free-formed the base with a slab.

bride bell made by a little girl in Cedar Rapids who could conceivably be a bride now herself

The huge group of second graders won't be able to work with slabs, since we won't have access to a slab roller. I certainly am not going to throw 60+ top pieces like I did with the ten preschoolers. I will have to decide whether I want the kids to try to coil-build a rattle, create a pinch pot rattle or scrap the rattle/bell idea all together. I could have the kids make pineapple pots. Pineapple pots are basically press-molded bowls. The kids push balls of clay securely into one another inside a styrofoam or paper bowl. As the clay dries it shrinks and pops out of the bowl. I did this with adults at YVCC for an Empty Bowls fundraiser several years ago, but it doesn't work well if the balls of clay aren't pressed together well.

In looking online, I found this guy making simple clay rattles that are too quick and maybe too small, but could be combined with my bell forms to create slab-free bell/rattles. The most important things to keep in mind as I prepare are that the kids will like playing with clay and should be allowed freedom to squish and stick things into the clay and to scratch and scrape the surface of the clay. If this can be achieved while also creating more than a solid lump of clay, the parents will also be happy. The kids will probably be happy with a lump.

I will probably make a bunch of copies of step-by-step visual instructions for the process. Having taught a lesson at Davis High School in Yakima, I now know not to expect that the classroom will be quiet enough that all the students can hear me speak. I also will want a convenient way to help the adult helpers help the kids.

Saturday, February 9, 2013

Inventory in and out

I just picked up my work from The Sarah Spurgeon Gallery at Central Washington University. Yakima River Diaries is over and suddenly I have a lot more inventory and a much messier studio. I did go so far as to unpack the work I brought home, but then I realized that I hadn't upacked the work that came home from the gallery shows I was in over the holiday.

my work at Yakima River Diaries

My studio has also become a temporary home for the boxes, bags, old clothes and printers that were removed from our living space over the holidays. We replaced two semi-functioning printers by replacing them both with one that works for often than it doesn't. My studio is heated separately so over the winter we tend not to spend time out there because we don't keep the heater on and the studio gets cold. Because it is cold outside and because the studio isn't used over the winter, the studio becomes the stopping point for things that should go out to the trailer for recycling or on to goodwill.

I will have to reclaim the studio for art before the summer, however, since I am having people visit for the Larson Gallery's Tour of Artists' Homes and Studios on May 18. Luckily spring break comes before the tour. Also, my mom has offered to help us get the house ready for the tour. I'm hoping to clean the studio over spring break and install some of my wall piece in the house. Then spread the serious cleaning out over several weeks. No one in their right mind would plan to clean ahead of time when living with a five-year-old--at least not if they planned for the place to stay clean.

Ooishi Pod--detail

After an enjoyable afternoon in Ellenburg with visits to old favorites Gallery One, Sugar Thai (please move to Yakima) and the Children's Activity Museum, my daughter and I stopped by Bailey's Biblilomania Books because my mother-in-law's dog's name is Bailey. I was impressed with the variety of books, especially since they had more than one shelf of art books and they had at least three clay books. Even Elliot Bay Book Company in Seattle only had books on polymer clay. But more than the selection, I was impressed with the fact that the owner had set up a coloring table with coloring pages. This was the first time since my daughter could walk that I was able to look at as many books as I wanted when she was with me.

We took the Canyon Road home because it was a beautiful sunny day--sorry family in the Midwest and East coast. People were out fishing and watching the hawks and big horn sheep. I even saw a heron fly overhead.

When we got back I packed up a piece to send to Woodstock. The piece will be in a juried show, Women's Works, at the Old Courthouse Arts Center in Woodstock, IL. The website is pretty vague on information but the show runs March 7 through April 28 with a reception from 7-9 on March 16. I won't be able to go, but perhaps folks I know in the midwest will be down that way. I would post hours, but based on the outdated state of the Old Courthouse Gallery website, I wouldn't trust the times anyway.

Ooishi Pod (currently en route to Illinois)

Now that my inventory is back home, I guess its either time to enter some more shows or find shelf space in my studio until May.

Saturday, February 2, 2013

Throwing Lessons

Tonight The Seasons Performance Hall in Yakima is hosting Light Night, a fundraiser for Larson Gallery and The Seasons.


Besides the lighted hair show and music performances and the light themed art show and the fire dancers, there will be quite a few items auctioned off at the event. Some of the items are jewelry, tickets to other events and experiences and artworks.


I have been asked to donate a private throwing lesson for the auction. I think there is some demand for private lessons, but I don't know if this demand is attached to a willingness to pay for a private lesson. Of course students always sign up for my throwing classes at YVCC. I have had several requests to give private lessons, but the only request that has turned into a private lesson was a request from my mother.


I love teaching pottery at YVCC and I enjoyed teaching my mother to throw. It will be interesting to see how a private lesson compares with teaching my mother or a class full of students. The lesson will probably be at my home studio, unless the person who purchases the lesson owns their own wheel. It will also matter whether the person wants to just dabble in pottery or really wants to learn how to throw regularly. My mother took to throwing more quickly than the average student. I often find that students who have been around clay or even other art media have an easier time learning the throwing basics.

Knowing the audience that is likely to attend Light Night it may be that my private lesson student is familiar with art and even owns his or her own wheel. Just yesterday I answered a question for a fellow Yakima artist about her kiln elements and in the last week I heard of two people who were asking about private lessons.