Sunday, April 28, 2019

DoVA Student and Faculty Exhibition 2019

"Judas" by Jennifer Martinez, Winter 2019 hand-building
This coming Tuesday is the first day and opening reception of the annual Department of Visual Arts Student and Faculty Exhibition at Larson Gallery on the Yakima Valley College campus.

this cat portrait is a collaborative piece involving 16 different students from one class.

The show features work by students in all studio art and photography classes at YVC in the Spring, Summer, and Fall of 2018 and the Winter of 2019. Student work on display includes ceramic sculpture and functional pottery, paintings, drawings, prints, photographs and mixed media. This year's show also features at least one collaborative piece done by a whole class.

Portrait by Samantha Sugihara and other functional pottery and ceramic sculpture by YVC students

My student work includes an unusually high amount pieces from the hand-building portrait project, including work I've talked about before in this blog.

Portrait by Anjela Sevilla and work by other students

The show opens on Tuesday, April 30 with a reception from 5-7pm and awards at 6pm. The exhibition continues through May 25, 2019.

"Strider" by Isabella Johnson and tea sets by Kim Hansen and Ivy Shearer

The Larson Gallery is located on the corner of Nob Hill Boulevard and 16th Ave on the Yakima Valley College campus (across from Taco Time). The gallery is open Tuesday - Friday 10am - 5pm and Saturdays 1 - 5pm. The gallery is always free and open to the public.

Faculty corner in the exhibition featuring work (left to right) by David Lynx, John Bissonette, Chris Otten, Bruce Lindell, Rachel Dorn, and Meghan Flynn

The show also features faculty work from both full-time and adjunct faculty at the Yakima and Grandview campuses. David Lynx teaches online Art Appreciation, Asian Art History, and Art of Yoga. John Bissonette teaches drawing, painting, printmaking and Humanities classes, Chris Otten teaches digital photography, History of Photography, and Digital Design classes. Bruce Lindell teaches drawing, painting and Art Appreciation in Grandview. At the moment I teach clay classes and art history classes. Meghan Flynn teaches drawing, 2D and 3D design, and sometimes Art Appreciation classes.

Thursday, April 18, 2019

Knob 'n Alls

Knob 'n Alls by Lauren Coffey
Spring quarter has gotten off to a busy start. Shows, installations, kid projects, hiring committees, and perhaps I've said "yes" to a few too many things. My winter quarter students were so prolific that I've got two more posts partially done, but I just haven't finished and posted them.

Knob 'n All by Kim Hansen
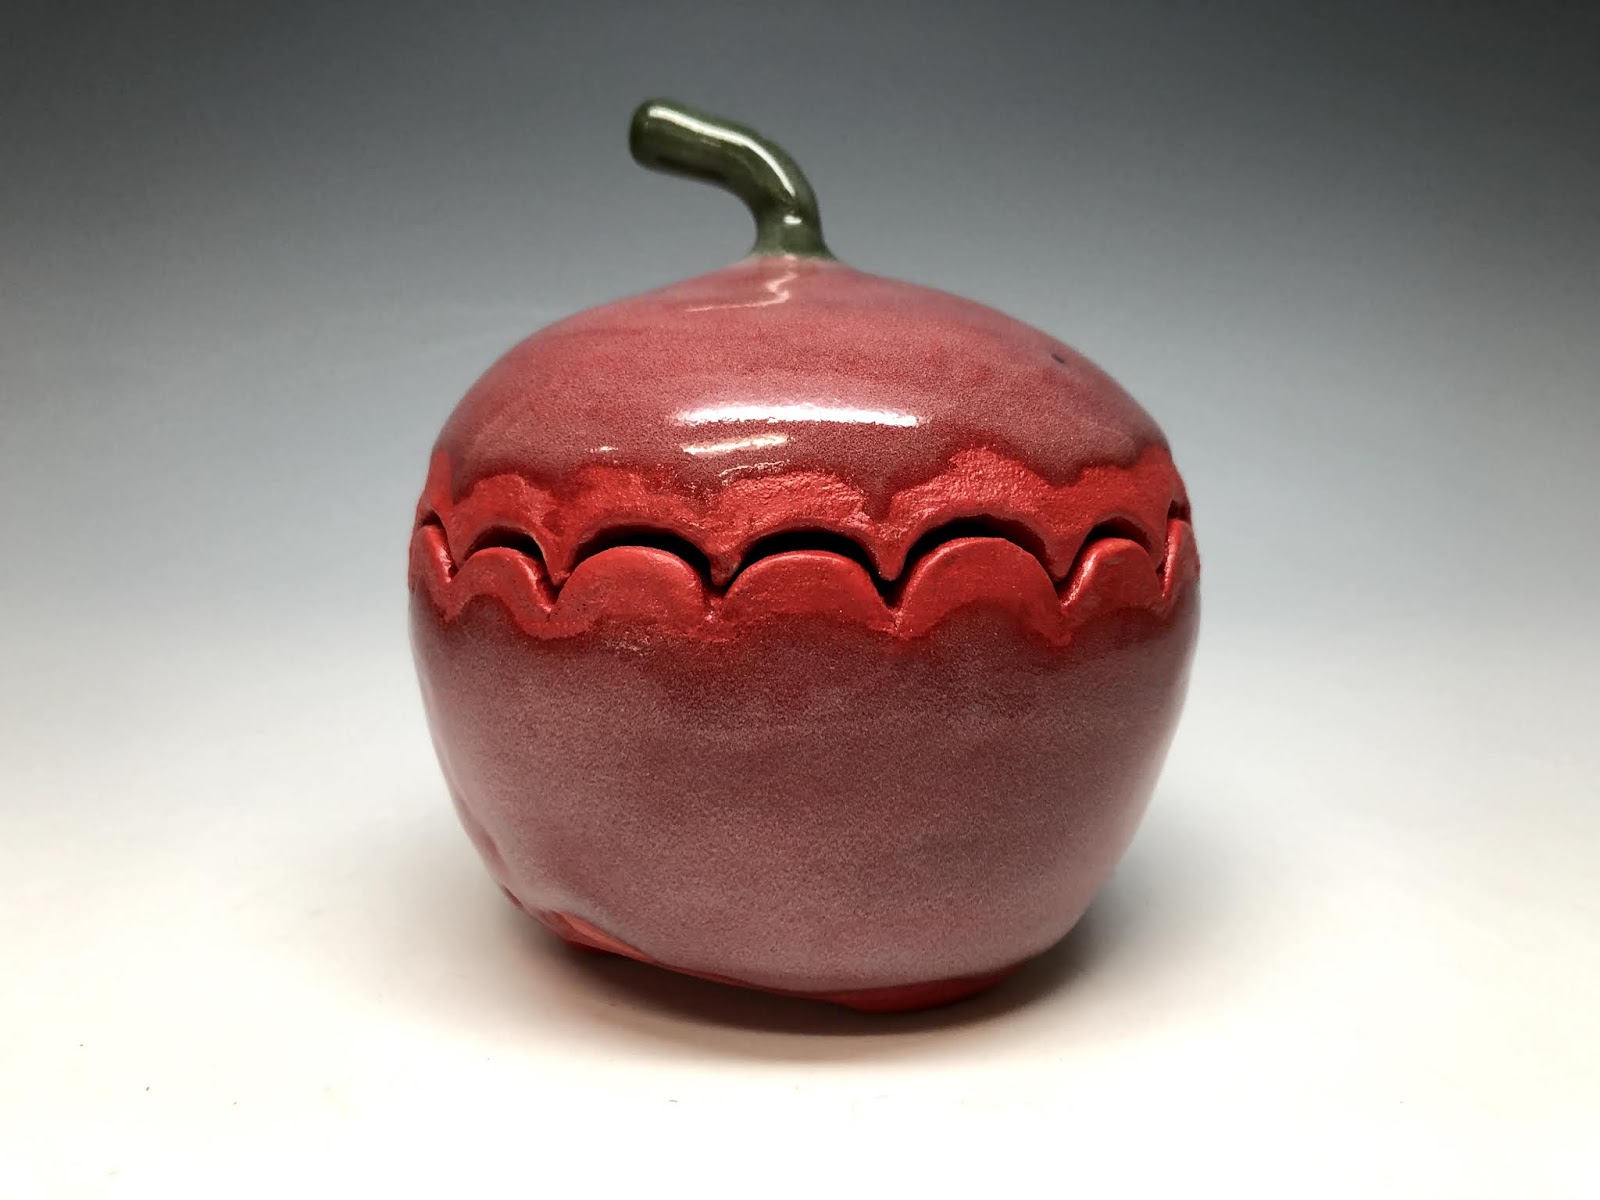
One of the things my winter quarter classes did a lot of was knob 'n alls. I don't really know how it is supposed to be spelled. (It used to annoy Shannon, one of my advanced students when students would call them "nominals.") However they're spelled or pronounced, they're lidded containers made by throwing the lid attached to the bottom in one closed form.

Knob 'n All by Kim Hansen

These forms are usually a fairly popular shape to make. The basic shape, if you don't cut off the lid, is fun to throw and I use it as a basis for a lot of my own forms. 

Knob 'n All by Amber Ryan
The shape can be thrown, then the lid cut off when the piece has dried up a bit. The lid can be cut off with a "key" which basically means you cut the lid irregularly so that it fits on only one way. The cuts can be a part of the overall design of the form. They also don't take a lot of pre-planning.

Knob 'n All by Amber Ryan

The other way to do the lid was something I learned from a student. Of course some of my students are more than students. They make a significant impact on the studio and they make my job easier and more fun. Janice was the one who discovered the technique I now prefer for knob 'n alls. 

Knob 'n All by Lauren Coffey
Janice's technique is to press a flat tool into the side of the wet wall once the form is closed. The wall then becomes the gallery that holds the lid on. Lauren and possibly Leticia (from this post) used this technique. You can't see the galleries in these views of the finished work, but you can see them in this post of my work in progress.
Knob 'n All by Lauren Coffey
The knob 'n alls from winter quarter were done mostly by beginners for their third project. Lauren's was in the advanced class and she did these as a kind of recuperation break while she dealt with an injury.
Knob 'n All by Adela Arciga
There was a great deal of variety in the lidded forms, decoration, and glazing. Adela and Lauren both used Ninja Junior Crawl glaze on their lids and Adela just managed to avoid sticking her lid to her base as the glaze ran.

Knob 'n All by Adela Arciga
Adela's lidded jars were tiny, but she made each one very differently. The orange was a favorite during critique, as was Amber's apple. Strangely no-one tried to make a banana knob 'n all.  Adela, Amber, and Lauren also achieved the challenging tall knob. Lauren threw some of her's separately and then attached them to the lids later. I think Adela threw hers in one.

Knob 'n All by Adela Arciga
Last quarter I ended the quarter will a full class of 16 students, three of them advanced. This quarter is shaping up to be a similarly strong quarter with a full class and 6 intermediate students, which might be the largest group of intermediates I've ever had.

Lidded container by Leticia Ortiz

If you're in the Yakima area and you are interested in seeing some of my students' work in person, we have two exciting opportunities coming up soon. The Department of Visual Arts Student and Faculty Exhibition opens April 30 with a reception from 5-7pm in Larson Gallery. The show continues through May 25. The spring clay sale is May 9 from 11am - 7pm in the lobby of the Palmer Martin building (building 20).


Saturday, April 6, 2019

New Political Bulbs Installation at Boxx Gallery in Tieton

I have work in a show at Boxx Gallery this month. The sculpture show opens today, Saturday, April 6 with a reception Saturday from 11-4. The gallery is free and open to the public. And there will be snacks.

Installation view of Political Bulbs

The gallery is located at 616 Maple Street in Tieton. I have installed my political bulbs for this show. I decided (at the last minute) to install them in a different arrangement than the grid I have done before. While I was installing, I realized I should install them in the shape of the United States, which is kind of how they ended up, but since I didn't decide this until partway through the process, it isn't really clear.

Installation view of Political Bulbs in Tieton

This show features my most recent political work. I showed these pieces in a grid in Hood River this summer, but I never managed to get great installed images. Maybe I'll remember to take some this month. This installation features both references to the flag, the congress building, and the constitution, but also some more blatantly offensive works.

ice cream or the poo emoji?

The gallery is open every Saturday this month from 11-4, and there will be another reception and associated events on April 27 for International Sculpture day.


I also have work up at Artebella Gallery, at 1111 W. Spruce Street in Yakima. Artebella is open Thursdays - Saturdays 10-4. (and by appointment). The gallery is free and open to the public.

Monday, April 1, 2019

New work at Artebella Gallery for International Sculpture Month

New work, April 2019, now on display at Artebella Gallery

April 27 is International Sculpture Day and there are several sculpture events going on in the Yakima area. Boxx Gallery in Tieton is having a sculpture show (I'll have an installation in this show) and there will be an associated community event in the square that day. And Mike Hiler is showing work at Oak Hollow Gallery.

New work, Summer 2018 (not on display at Artebella)

Artebella Gallery at 1111 Spruce Street, next to Taste and See Deli in Yakima is having some events, including artists talks and a display illustrating the process of lost wax casting. The gallery owner had contacted me earlier this year to ask for new work from me. 

New work 2018-2019

When she first contacted me, I told her I didn't have any new work, but then I realized I might have time to make something before April. So I actually got myself into the studio and made something new this winter. Of course when I went to pack up to take her the new piece and a few older pieces, I realized that I did have two or three new pieces from the summer that I had forgotten about.

New work, Winter 2019
I pulled the latest sculpture from the kiln Saturday morning. I had tried a combination of underglaze layers and cone 6 celadon glazes. I was trying to create a sense of thickness and color variation that was a bit more subtle than the underglazes on their own.

celadon on underglaze, detail

I fired the work in my small kiln, since I was firing so little, but the kiln didn't quite reach temperature. Regardless, I was pretty happy with the results fo the firing. The blue celadon has some mottled texture on the top bulb that is only evident when you look closely at the work.

I was trying to get away with not setting up a backdrop for photos. This is the result of my laziness.

I used a blue celadon over two layers of blue underglaze on the main body of the piece. I used the same blue celadon over two different types of blue underglaze on the bulbs and I like the similar texture and different color result. I used clear celadon over the orange and cinnamon underglaze on the sprigs.

Celadon over underglaze (and a small glaze fault)

 The results weren't perfect, however. Two of the bulbs have small dry spots after firing. It looks like I brushed up against the side of the piece after glazing, but I am sure this isn't what happened. The strange thing is that I underglazed the entire piece, then bisque it. Three coats of blue underglaze were applied the entire surface, then fired. After bisque firing I added the celadon. So for bare clay to show up, both the celadon and the underglaze came off during firing.


New work, Summer of 2018, on display at Artebella

I've had similar issue in the past when underglaze has peeled off of a pot after glaze firing. This has happened a couple of times in the last few years. I think the problem is the fit between the glaze or underglaze and the clay body. I have never seen this issue on a textured surface, only on a smooth, burnished surface. I don't remember every seeing it with underglaze alone, but it shows up as brittle pieces of glaze (with the underglaze attached) cracking off the surface, leaving no evidence of either glaze or underglaze on the raw ceramic below. 

New to the gallery work at Artebella

Luckily, on this piece the glaze faults were pretty tiny little spots, but I think I do need to do some research into this in the future (though the thought of doing this does not fill me with joy). This is also something I occasionally see in student work, so it is worth it to figure out the problem.


new to the gallery work at Artebella

If you'd like to see my new work, or slightly older work, including almost everything pictured in this post, stop by Artebella Gallery at 1111 W. Spruce in Yakima. Tomorrow I will be installing some political work at Boxx Gallery in Tieton. More on that in a future post.


Saturday, March 30, 2019

Raku Winter 2019


Raku vase by Amber Ryan
Most quarters, now that we are in the new building on the south side of campus, we do a raku firing at the end of the quarter. This quarter we had to shovel first, so we wouldn't be standing in snow. During the firing, students asked me what the bucket of salt was for, thinking this might be related to a salt firing. The uninspiring answer was that the salt was for the ice on the ground. We had a lot of snow and ice this year. 

Extruder bowl by Malea Esqueda

The raku firing process is lots of fun, but also fairly exhausting. We fired on Monday for the hand-builders and again on Tuesday for the throwers. It snowed on Tuesday morning, but not enough to stop us. About half the hand-builders were involved in the process on Monday. In fact, I was a little bit concerned about some of their pieces making it through the firing.

Raku vase by Austin Peart


The raku firing is a pretty intense process for the pots. We fire them up to temperature rapidly, then remove them, with tongs, when the glaze is molten. We take the pots out of the kiln and put them into a bucket of combustable materials (shredded paper, dry leaves). The materials light on fire and we close the top of the bucket to trap the smoke inside with the pot. As the pot cools, the exposed clay absorbs the smoke from the firing, turning any unglazed sections black.

Raku bird jug by Malea Esqueda

Some students took advantage of this effect and used wax to protect sections from glaze. Malea waxed the branches of the tree on her press-molded bird vase. Amber waxed what she says look like cow spots on her white vase and lines spiraling up her blue vase (the first image in this post). The contrast between the dry black clay and the white or blue glaze is striking.

Raku cow vase by Amber Ryan

Some of the students used copper based glazes. The copper in the glaze reacts differently when there is or is not available oxygen in the firing. With plenty of oxygen during the firing and/or after in the reduction bucket, the copper tends to turn green or blue. Without oxygen during the firing, the glaze tends to turn red. In the post firing reduction bucket a combination of reds and metallic coppers can show up.
Faceted vase by Ruby Mayo

We have several copper raku glazes in the studio. Two tend to melt to a glossy finish. On of those, the one we see in Amber's first piece tends to stay a teal blue with not much change to coppers and reds. The The other on Ruby's vase above goes green, red, blue, and metallic copper.  Our  third copper glaze does not melt to a shiny surface, instead it stays rough and even a bit crumbly. This is the glaze used on Ivy's small cups and lidded sugar dish below.

Raku tea set by Ivy Shearer

Several students chose to use a horse hair raku method during this firing. These pieces have no glaze on them. We fire them up with the other work and remove them when the other glazes are molten, but we don't put them in the post-firing reduction bucket. Instead, we take individual pieces of horse hair and apply them to the hot surface.

Horse hair coil piece by Anjela Sevilla
Since the pot is so hot, the horse hair begins to burn immediately. As it burns, the smoke is absorbed into the clay just like it would be in the bucket. Students can control how much horse hair they apply to the surface. The horse hair is burned off by the end, but the smoke from the burning hair is a permanent part of the pot (until it is fired again, or until it sits in direct sunlight for a few months or years).

horse hair extruder jug by Jennifer Martinez

During this last firing I was amazed that Jennifer Martinez's extruded jug survived. The pots go through pretty serious heat shock as they are cooled from 1800 degrees Fahrenheit to the outside temperature (about 30-40 degrees on the days we were firing). This heat shock, as well as the fact that we have to move the hot pots using tongs, can cause the pots to crack during firing. 

Horse hair coil piece by Anjela Sevilla
Angela Sevilla's horse hair pot is entirely black on the inside. That is because while she was applying horse hair on the outside she put some shredded paper inside and set a ceramic biscuit on top. The fire and smoke were trapped inside and had the same effect as the smoke inside the buckets for other pieces.

Pit fired and painted coil piece by Raquelline Llaguno

Raquelline Llaguno was the only student this quarter to choose to fire her work in a pit kiln. In fact, she was the only students in about the last 4 years to pit fire on campus. We set up a metal trash can with a few holes in it, loaded it up with shredded paper with her pot buried in the middle. Then we lit the paper on fire. It fired for several hours and created a variegated smoky effect on her burnished clay surface. Raqui then painted the yellow and red on the surface after the firing.

Extruder bowl (top view) by Malea Esqueda


Wednesday, March 27, 2019

Ninja Junior Crawl

Lidded Jar by Adela Arciga. The Ninja Junior Crawl Glaze is used only on the lid, where it was applied over a copper/cobalt glaze that caused it to melt.

The quarter ended last week with final critiques and final photos of work. In my clay classes the last week before finals are spent glazing and firing kilns, so that by the end of the week most students are done working and are just waiting on kilns. I also have them all take photographs of their work on a nice clean backdrop and put them in a folder shared with me. The work looks so much better on a backdrop and I like them to get the practice of taking good quality photos of their work. Even if they never do pottery again, they have this record of what they made. All the photos shared in this blog were taken by the students themselves (I did crop some of the students' photos).

Mug by Amber Ryan. Ninja Junior Crawl was applied over a cobalt glaze that doesn't run or flow too much. The dark spots on the side and handle are where the NJC glaze fell off before firing.

This quarter's wheel and hand-building classes were particularly strong. One indication of this was that all students had all but two of their works glazed and finished on time for their last critique. This probably shouldn't be a surprise, but it isn't unusual for hand-building projects to break before or during firing and it isn't unusual to have a few students who just don't get their work glazed in time to be fired, or at all.

Lidded Jar by Lauren Coffey. Ninja Junior was applied on the lid over a  fairly think coat of a semi-transparent glaze.

This quarter I was firing lots of kiln loads at the end of the quarter, but I didn't have really any abandoned student work to deal with after finals were over, meaning the students either took their work home, loaned for the Spring Student show, or donated it to the studio. On the other side of the equation, both final critiques were lots of fun and the students had great work. 

Bowl by Amber Ryan. This bowl has NJC only on the bottom, again over the blue glaze she used on the mug above.
In the throwing class in particular, there were some trends I noticed as far as the forms students chose to make. I'm not sure if a glaze choice can be a trend, exactly, but during their final critique my throwers spent a lot of time discussing our Ninja Junior Crawl glaze. This is a glaze recipe I developed in graduate school and brought to the YVC studio during my second year (while I was heavily pregnant). It was named after my daughter's tendency to kick fairly hard before she was born. I remember throwing for class one day and she kicked so hard she moved my arm.

Tiny bowl by Taelynn Loyd with just NJC
The conversation during the critique focused on students' preferred methods of applying the glaze. Ninja Junior is a crawl glaze, meaning it is designed to have some thickness and pull away from itself (or crawl) on the surface of the pot. When applied alone, as in Taelynn's tiny bowl above, it has a matte texture and cracks in the surface. The edges are linear and the edges can start to peel upwards. With thick applications, it can fall off before firing, or even peel up so far during firing that it barely seems attached. If it is applied excessively thickly, it can start to melt, but it will still pull away into separate pieces.

Lidded Jar by Lauren Coffey with NJC on the lid over a runny copper glaze


When this glaze is applied over another glaze, the other glaze can impact the texture and the shape of the NJC glaze. The reaction of the two glazes together lowers the melting point of the combination. This is sometimes called eutectics. A glaze that melts during firing, but retains a more satin texture will cause Ninja Junior Crawl glaze to also melt a bit, rounding out or flattening the individual sections of the NJC glaze over the top. A glaze that melts to a high gloss finish and also moves on the surface of the pot when in the kiln will cause NJC to start to move and mix with the gloss glaze during firing. In the images shared here, the dark blue glaze melts the least. The red glaze melts the most.

Bowl by Taelynn Loyd
Of course the thickness of the Ninja Junior Crawl glaze also matters. In Taelynn's bowl above, she applied the blue fairly thin, but the NJC is fairly thick, causing it to look different from both of Amber's examples earlier in the post. The NJC on blue in Taelynn's bowl is divided into large glossy blobs, whereas Amber's mugs and bowl with the same blue glaze show smaller and more geometric divisions of the NJC, mostly because NJC was applied thinner.

Underside of bowl by Beau Filbert
Beau Filbert created a thick texture with several glazes, simply based on his application. In the bowl above, he applied a Copper Red glaze, which melted enough to create even drips all the way around, but not enough to drip onto the shelf. He used a think coat of Ninja Junior Crawl on the rim. Though is is a thin coat applied in a small area, we can see how it acts differently on its own and over the copper glaze.

Mugs by Beau Filbert
Beau did lots of experimentation with drips on the sides of both bowls and mugs. In the photo above, the mug on the far right has drips that similarly get thick at the bottom but don't melt off the piece. This glaze combination does not involve NJC.