Showing posts with label COVID-19. Show all posts

Wednesday, August 25, 2021

Announcing: Two On-Campus Clay Classes this Fall!

Student work from Clay 1: Hand-building and Functional Pottery at the Spring 2019 Student Exhibition. The foreground sculpture is "Judas" by Jennifer Martinez, the bowl on top is by Ruby Mayo.

This week I got approval to offer two clay classes on campus in the Fall. I will be offering Functional Pottery and Clay 1: Hand-Building, both as hybrid courses, meaning they will be on campus 2 days a week and online for 2-3 hours a week. Students will also have some access to the Yakima Valley College clay studio (in Yakima) to practice throwing, meet with me, or work on projects.

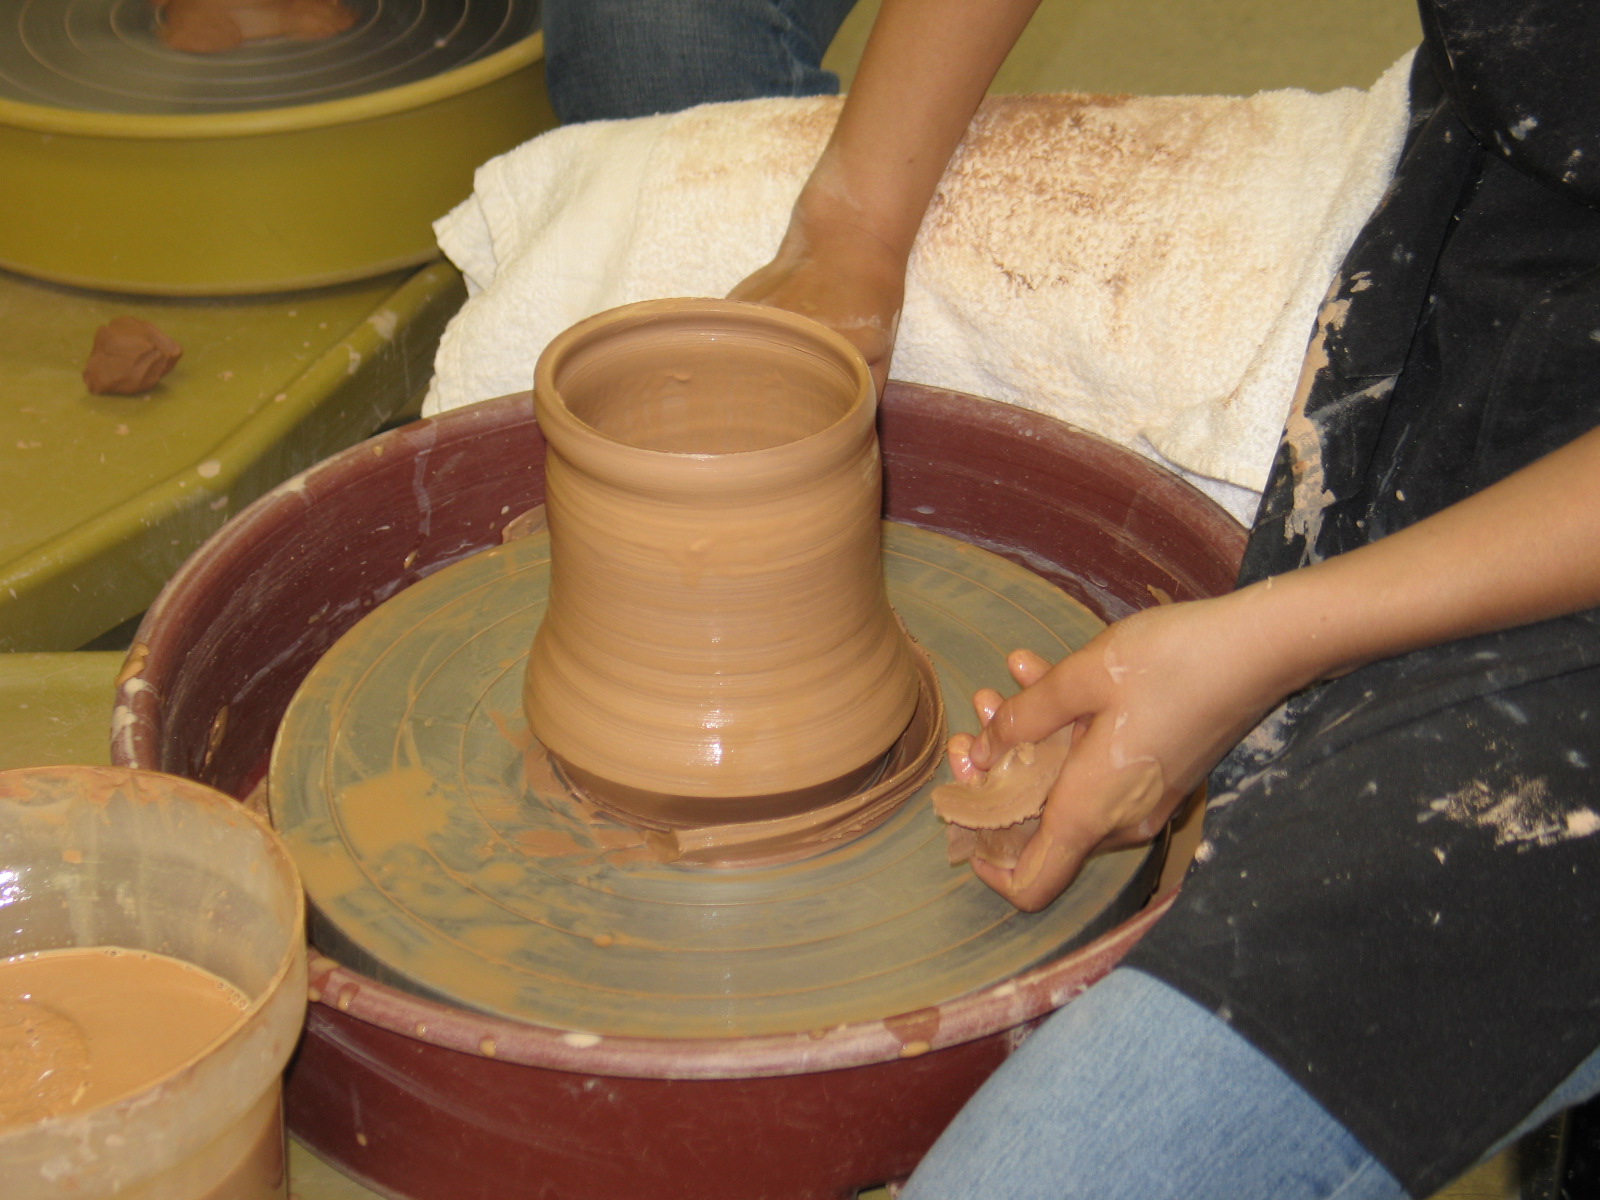
student throwing on the potter's wheel (in the old studio in Palmer Hall)

Though YVC is mostly online this fall, a few classes are being offered on campus, including lab sciences, art making and performing art classes, as well as Workforce Education classes that have accreditation requirements for in-person classes. I wasn't able to offer classes on campus last year, so I am very happy to be going back, even in a somewhat limited capacity, this Fall!


don't wear your mask like this


We will, of course, be wearing masks during class. This isn't such a big change, as we wore masks in the clay studio pre-pandemic for glazing and clay mixing. But we didn't generally wear them on the wheel. All faculty and staff must also be fully vaccinated by October 18 (I'm already done) and students are encouraged to get vaccinated as well.

me, in March 2020, trying to figure out how I would tell a student something about the wheel from 6 feet away

A year ago, the 6 foot distancing requirement would have made it difficult to have class in person, even though our studio is pretty big, but the new requirement is 3 feet. In most cases we already had 3' or nearly 3' between wheels in the studio.

the YVC studio wheels as they are currently set up

I'll need to rearrange some of the wedging tables and we'll need to glaze and load kilns in shifts, but much of that we already did to some extent. It's a lot easier to imagine teaching someone to throw from 3 feet away than from 6. On the other hand, spending the last year + teaching via video puts any kind of physical distance in perspective a bit.

Palmer Martin Hall, where the YVC clay studio and my office are located

Read on if you are interested in what we're going to to be doing in these classes this fall. If you are a student, you can find information, times, and entry codes at the Yakima Valley College class search tool here. If you aren't yet a student but would like to take a clay class this fall, check out YVC admissions page here. You can also contact me for help or questions.


Functional Pottery

Functional Pottery was added to the course listing just yesterday. This class will be set up nearly the same way it was when I taught it pre-pandemic, in Winter 2020. The class will meet on campus twice a week (Tuesday and Thursday afternoons) and will also have an online component as well.

student throwing on the potter's wheel (in the old studio in Palmer Hall)

YVC is trying to ease back into on-campus offerings and still wants to limit the amount of time that students and employees are on campus together. For this reason, the class meeting time is a little shorter than it had been. Instead of offering students the option to "flip" their class by watching demos online, they will be required to watch demos online.

screenshots of some of the many interactive online tools I created around clay, firing, and glazing this past year

I've spent a lot of time and energy over the past year putting together online activities and interactive lessons for hand-building, including interactive lessons to introduce glazing and loading and firing kilns. I plan to use some of those lessons for throwing students this fall as well.

students in functional pottery made bowls, mugs, teapots, pitchers, vases and more

Students in Functional Pottery class will throw bowls and cups, probably mugs and maybe teapots, lidded containers, and/or pitchers (students have some options in their third throwing project). Students will also glaze and fire their work and will get some hands-on experience loading kilns, in addition to what they learn about kilns and firing in the online part of the class.

raku firing during class, playing with fire!

I have lots of examples of student work from previous quarters in this class. You can check out many of these examples in previous posts on my blog (links in blue). 


Clay 1: Hand-Building 

The Clay 1: Hand-building class is also moving from online to hybrid. It will meet on Monday and Wednesday monrings and will also have an online component. This class is one I did offer all year, but I believe I will be able to offer students a higher quality experience my meeting them on campus for some of the time.

This very full kiln represents some complicated glazing techniques, not to mention large and complex building methods that just weren't achievable in an online class. Sarcophagus by Isabella Johnson.


Offering hand-building online was pretty different from offering it on campus. The class "worked" and I had a number of students both successfully complete the class and make quality work, but I also had an unusually high number of students run into troubles that caused them to be unable to complete the class.  I think that most, if not all of these students would have been successful if we met on campus at least once a week. 

The online class forced us to work small. Small work can be quite good, but it was a forced limit, rather than a choice.

There were lots of challenges that resulted in more frustration from students. One challenge was finding a decent space (and enough time) to work with the clay at home. Lots of students made the best of their situation and made good work, but I could sense that students were more frustrated, more often than in a "typical" quarter. Some students experienced this frustration more than others and I was frustrated to not be able to help in the way I knew would be most useful (in person).

My home studio is a dedicated space with work tables, storage shelves, floors I can mop, drawers for tools, and a potters wheel and wedging table. Most people don't have this space at home.

As I move this Clay 1: Hand-building class to hybrid (some online and some on campus) it will be going back to nearly what I was teaching before the pandemic. Like Functional Pottery, we'll be spending a bit less time on campus and a bit more time online than in the time before the pandemic. For safety, travel, and flexibility reasons, this is good, and I do have lots more stuff online for students now compared to a year ago. 

These carved boxes by Kristin Benjamin in the online class were made for a project that was brand new for the online class.

I suspect we may find, when everything is "back to normal" that this class would benefit from a bit more time on campus, but I may be surprised. It may be that after a year and a half online, student and faculty both are better at balancing their time between online and on-campus aspects of a class. I know I have more resources to share with students (not to mention better technology at home with which to connect). I suspect the level of comfort and familiarity with online learning tools has jumped significantly for many students over the last year and a half. 

Jayleigh Butler's fingers climbing out of a planter was created for an installation project created for the online class to take advantage of the fact that not all students could bring their work to campus for firing.


The particular projects and parameters changed a bit when I moved hand-building online, and I plan to change those expectations and projects again as we move into the studio. In the hybrid class this fall, we will build sculptural forms using coil, pinch, solid-building and and slab methods. We may also use the extruder, molds, and/or the 3D printer as we did when we were last on campus, or we might keep some of our stop motion animation and carving techniques from the online class. 

The kiln load from the above picture before firing. This is what the glazes and ceramics looks like before the glazes have reached their maturation temperature.

Unlike the online class, everyone will be able to glaze and fire their projects and load kilns. We will also learn about clay and glaze materials, processes, and firings. I plan for us to work at a larger scale than students were able to do in the online version of the class. I am also very interested in developing a project that, conceptually, references some of the upheaval of the past year, though I want to be thoughtful about how I do this in a classroom in which students may have had a really rough year.


I have lots of examples of student work from previous quarters in this class, too. You can check out many of these examples in previous posts on my blog (links in blue). 


The Advantages of Hybrid

I've worked really quite hard over the past few years to create a hand-building class experience that is designed to support students making bigger, better, more thoughtful, and more complicated work. One of the big changes I made a number of years ago was to flip this class. I moved all of my demonstrations online so that students could watch the demonstrations, at their own pace and on their own time, before coming to class. That way, class time was nearly all devoted to the students making work. 

This large turtle blew up in the kiln because it was too thick. This was made before I flipped my classes and I think the flip would likely have prevented this explosion.

Making work in the clay studio, as opposed to at home means that students can take advantage of four main features. One is obviously the space. The work tables and storage areas at YVC are spacious and sturdy and students can (with few exceptions) trust that their work will not be interfered with between classes. Compare this to working at home where children, roomates, family members, and pets might all poke at, bump into, or otherwise damage or destroy their works in progress.

students who wanted to fire their work during the online quarter had to very carefully wrap their fragile unfired greenware and bring it to campus in a box for firing, both a logistical and physical challenge

The second advantage is the tools and equipment. At YVC, students building scupture can use the slab roller, rolling pins, canvas, extruders, texture mats, textured fabrics, stamps, sprigs, carving tools, a 3D clay printer, a damp room, internal and external armatures, large paddles, texture paddles, drape molds, press molds, banding wheels, and more. And that's not even mentioning the real value, sometimes, of having a classmate hold a thing for a minute, while a student makes an adjustment.


Malea Esqueda used lots of tools and supports not available at home, including an internal armature, extermal supports, a helping hand from classmates, and special carving tools from the studio. See her finished build here.

The third major, significant, difficult to quantify advantage of an on-campus (or partly on campus) class is one I didn't even fully value or recognize before I started teaching this class online. It's me and the other students in classroom. Of course I knew I was valuable (they pay me, don't they?), but I didn't really comprehend how much I do that isn't written down or listed in a lesson plan. Sure, I do the demonstrations and those were relatively easy to move online. And I create assignment parameters and provide the students with the materials and struture for the project. But the really amazing thing to learn was how valuable it is for me to just be in the room while students are working. 

 Isabella Johnson's "Strider" got some leg extensions during class, just before this photo was taken. See what incredible progress was made after this photo here. Because she was working on it during class, I was there to help her decide on and execute the leg extensions.


While students are working in the studio (and this applies to handbuilding and wheel throwing, both), I am constantly monitoring what students are working on. Because I have much more experience with clay, I can anticipate problems before they happen. If a wall is getting to heavy or too wet, I can stop the student and help them adjust their build, timing, or plans to prevent collapse. I can look over students shoulders to check if their pieces are too thick or too thin. By catching errors early, the student can fix them (and improve their technique) before the piece starts to crack or collapse and before damage happens in the kiln.

Ashley Lawson was able to create a large, complex, and well-crafted box with a lid and drawer in her online class this Spring. She did all this without the advantages discussed here. 

Obviously I don't alway prevent every problem, but me being there is both a prevention and a boost to students' confidence. I learned this before and after I flipped my hand-building class. Before the flip, students would watch me build and cut apart a large sculpture on an armature during class. After class their homework would be to do the same. It was a big, intimidating assignment to do on their own. 


After the flip, students watched videos of me building and cutting apart a large scupture on an armature. (The added advantage being that the videos covered a longer time span and I could show them more of the steps all at once.). Their own building and cutting happened mostly in the classroom. On cutting day, I would simply walk around the classroom from student to student asking where they planned to cut, then, in most cases, telling them it was correct and to proceed. Having me there boosted the confidence of the students who were just a little worried. Of course I was also able to redirect those students who either weren't quite ready or didn't understand some part of the process.

Cutting into the sculpture is always the most intimidating part because students have just spent a week on this sculpture and don't want it to break. Sean Wilkinson finished this sculpture just before classes were cancelled in March 2020. See his finished build here.

Notice, too, that I said that the third major advantage is in having me AND the other students in the room together. Those other students aren't insignificant. Studnets often sit 2 or 4 to a table (we'll have to check spacing for Fall) and while I can't be looking at or helping 16 students at once, the suggestions and support I do give end up overheard and reproduced by classmates.  If I come over to student A to help them with the wall thickness, Student B and C at the same table might also see and hear that information and understand what needs to change in their own work. But then Student C might walk over to the next table and explain to Student D what I just said. And the next day, when Student D sits next to Student E who missed the last class, Student D passes the information on to Student E. 

Margarita Cruz missed some class because of a family emergency. She was able to come into the studio between classes and catch up on the project very quickly. Flipped class videos helped, as did her determiniation, but she was also working in a studio next to other students who she could talk to and ask questions about what she missed.

This sharing could theoretically happen in an online class, but I haven't figured out how to make it work yet. So the student sharing coupled with the space and equipment make it worth quite a lot, in my opinion, to be able to have this class meet sometimes on campus. The fourth advantage of being in the same space has to do with the sense of touch and how we observe and process information in real space. In the online class, students watched videos, did interactive lessons, answered questions, wrote about and shared pictures of their progress, and met with me on Zoom. All of this was great, but the third dimension and the feel of the material continued to be challenging to communicate in all these formats.

gauging wall thickness is just a seriously tough skill to develop without help

In a video or Zoom, it is just simply difficult to communicate those things that are usually communicated through the sense of touch. How thick is the wall of the piece (especially at the bottom)? How wet is the clay right now (and how wet should it be for this process)? How soft or flexible is the material? How much pressure should I exert with my fingers or this tool when the clay is this wet or flexible, vs if I wait an hour or two?

Other Challenges for Online Studio Classes in Clay

I have been teaching my hand-building class online for the past year, but I haven't been able to offer my functional pottery class since Winter 2020, before the pandemic began. The functional pottery class is all about throwing clay forms on the pottery wheel, but most students don't have space for a wheel at home, let along the ability to purchase one for class. 

My wheel at home, with clay wedged up and ready to throw. It's ok if I get clay all over the floor (and walls) in my home studio.


Even if YVC could have checked out wheels to folks, throwing on the wheel is a tough thing to learn on one's own. Having a teacher in person to correct and support you is really important. Of course the additional problems have to do with transporting a heavy wheel, keeping it in good shape, recycling the clay, finding a space to put the wheel (where you can make a mess), and keeping the workspace from becoming covered in clay or clogging everyone's drains with slip, slurry, and bits of clay in the sink or washing machine. 

Recyling used clay to get it to the right consistency can be a pain. It needs to be wet or dried (depending on the consistency) and then wedged. Here my daughter is foot-wedging a very large batch a few years ago.

I did teach Clay 1: Hand-building online all three quarters of last year. We put together studio kits and sent students home with clay, tools, and sometimes glaze, but working from home is tough, particularly when working with three dimensions and in a material that can be too wet or too dry, too thick or too thin. All this doesn't even address the complications of family obligations, noisy, crowded, or cramped home spaces, pets, kids, illness, and all the other things that can get in the way.

the studio kits we sent home with handbuilders.

I'm very much looking forward to teaching these classes online. I'm excited because I love to teach these classes and I miss being in the same space with students. I'm also looking forward to learning from this experience. After being online for a year, what will have changed? What will feel different? Will I teach the same way? Will students interact the same way?

This is where I've felt that I've been all year, set up behind a camera, and alone in a studio

I also anticipate that doing this with 3' social distancing and masks will be a little strange. On the other hand, our conceptions of strange have changed quite a bit in the past year and a half. 

Before kids could get vaccinated, I gave my daughter and her friends a throwing lesson, but we all wore our masks inside my home studio, so I've got a bit of experience.


Sunday, June 20, 2021

Online Clay Student Pinch Projects

Student work, Spring 2021, This student added eyeballs and teeth to these planters/ring holders. I'd love to see these pieces glazed in bright colors. There may also be a bit of Instagram influence here (it's great to see student's using other sources besides what I show them in class).


This spring I taught my entirely online hand-building class for the third consecutive quarter. It really is a strange experience to teach a hands-on 3D studio class via a visual and mostly asychronous medium. Not alway getting to handle the work really changes how the class feels and makes it a little difficult to keep track of what's actually being made in the class.

Ashley Lawson, Spring 2021, These sculptures and face containers also have a lot of character and are a nice example of a set combining functional and scuptural forms.


Today's post includes pictures of student work from the pinch projects in these online classes. Students in all three classes were asked to create a set of six pinch objects. I also included some requirements for students to add attachments, like handles, and for lidded or closed hollow forms (sculptures).  Students went in a whole variety of different directions for their sets, creating tea sets and incense holders and planters and sculptural forms and even interactive stacking games out of the different parts of the sets. I've included some of my favorites, though I have at least 2 or 3 other favorites that I didn't get permission to show.

Ashley Lawson, Spring 2021. I particularly love the teeth on this cup. I have no idea where the idea came from but it was especially well executed.

I start with the pinch technique because it is immediate and requires no tools other than the hands, but it also helps students to really get a feel for the clay. Because they are pinching with their fingers and thumbs, they have to learn, fairly quickly, what too thin feels like (they learn this when they pinch all the way through the walls). Ideally they also learn what is too thick, but this is harder to instruct on online. 


Sophie, Winter 2021. The amoeba shaped saucer is the highlight of this set for me, but I also like the choices the artist made in photographing her work on the deck. Photographing work in a way that makes the work look professional, given students' limited spaces, was a challenge each quarter, and required me to do more intensive instruction on photography early on than I need to do on campus.


There are a number of barriers between me and the students that get in the way of my immediate experience and understanding of their work. I can't always tell the size of the work or thickness based on just a photograph on a screen. I did, eventually, get to see and handle the work of students who chose to fire, but firing wasn't a requirement this year. It couldn't be, really, because transportation and timing, as well as pandemic concerns, didn't necessarily allow students to get their work to campus.


Sophia McDougall, Winter 2021. Sophia's set has a leaf theme. She presented the work via video for her critique, which helped me and her classmates to understand the whol of each form, including leaf handles and the leaves under the tealight item second from the right.


Ocassaionally, I was surprised by the work that came in. In one instance, the lidded forms I took to be maybe 3-4" wide turned out to be closer to one inch wide. Thickness was also a major surprise. In an on-campus class, I spend a lot of time on thickness, helping students see, feel, and measure thickness. Often this includes simply telling them the work needs to be thinner. Work that is either too thick or has thick areas adjacent to thin ones is likely to crack or explode in the kiln. Not only is judging thickness difficult online, I don't necessarily see the work until students are done with it. Video meetings (via Zoom) are great for helping me gauge size and thickness, but it isn't really feasible to ask students to meet with me via zoom for hours each week (as they do in an on-campus class).  On one ocassion a student held it up her piece during a video chat. Suddenly the piece I had thought was about 6" tall doubled in size, as did my estimation of the effort she'd put into the work.


Harrah Hanson, Spring 2021. Harrah's stacking set was delightful. There are three heads, two bodies, and a bowl/bottom. The heads and bodies can be swapped around a bit like a ceramic exquisite corpse game.


As I am frustrated and distanced by the camera and screen's flattening and isolating of student work, I am sure that students are likewise frustrated by seeing demonstrations and techniques only via video or photo and text descriptions. Students are likely using fairly small screens, but even if they are viewing the videos on a large screen, there is something lost in trying to understand a three-dimensional process via a flattened medium.


Harrah Hanson, Spring 2021. The heads of the stacking set are particularly evocative with their textured hair.


As I write this now, I am actually fairly frustrated with Blogger's format, as the pictures seem too small (and I know if I increase the size of the images they won't show up correctly when I publish). The same kind of frustration happened when I worked on my school issued laptop (which I use when I go into the clay studio and also for Zoom and other work at home).  Sometime in the fall, I realized that I couldn't grade artwork submissions on my work laptop because it was unfair to the students to view their work on such a tiny screen.


Harrah Hanson, Spring 2021. The bottom and middle sections function on their own, but are so much more fun when seen together as a set.


But it was also fun to offer this class online. It was my only chance this year to offer a clay class, and I think that those students who enjoyed the class enjoyed the opportunity to manipulate a physical material, rather than stare at a screen all day. The format was more frustrating than an on-campus class, the class was also more fun than staying entirely digital for the whole day or the whole quarter. In the art program, we noticed that our usual online art history and art appreciation classes didn't fill as well as the studio classes we moved online. I think students of all sorts were looking for a change, a way to get off the computer and use their hands. I also think that students who never were able to take on-campus studio classes, because of work, family, distance, or other responsibilities were, for the first time, able to access some of our studio offerings.


Student Example, Spring 2021. This elephant teaset was one I got to see for firing. The thickness was very nice, but the ears didn't travel well. The wrinkles on the trunk are my favorite element here.


I kept the clay students' projects fairly similar all three quarters, though I made major adjustments in the order of the projects and other aspects of the class and lecture structures. Each quarter we started with pinch techniques and a pinch project. In fall, I introduced the technique but failed to require to the students to follow along with me, which meant the first things they tried to make were the sets. They didn't practice beforehand, which they would do with me in an on-campus class. 


Student Example, Winter 2021. This stacking set preceded the previous stacking set and may have had some Instagram influence. It is particularly well rendered and the stacking is both thoughtful and well-executed.


On campus, on the first day, I have students grab clay and follow along with my demo. I get them started, then walk around checking on each student to make sure they are getting it. After they work for a while, I stop them and show them all some ways to fix common mistakes and how to clean up edges, sides, and rims. The students have maybe an hour of supervised class time in which to complete 4 pinch pots. They have a chance for me to check the size, shape, and thickness and students are allowed to stay late after class if they like. Usually I stick around the studio after the end of class to clean up and have a chance to check on those who stayed a bit later. 


Sophie, Winter 2021. In winter I started requiring students to create pinch bowls for practice and also asked that they increase in size.


With the Fall online class, I foolishly assumed that the students would follow along and make the pinch pots during my video. I say foolish, because I didn't clearly tell the students to do this. So some may have followed along, but certainly not all. In Winter and Spring I tried to make this more explicit. I also required the students to make 4 pinch bowls in the first week with an earlier due date than their pinch set. 


Student Example, Winter 2021. I also provided students with some handmade stamps they could use for decorating the surfaces of their clay objects. In the YVC studio we have a ton of texture tools, but handmaking stamps for students was something I could do to give them a bit more to work with at home.


Timing is funny in an asynchronous online class. I want to give them flexibility to work in the morning or the evening and to schedule their class stuff around work, other classes, and family responsibilities, but I don't want them to try to do everything on the same day. Trying to do all the work at once doesn't allow the clay to dry in between working sesssions. Students are also more likely to get tired, sore, or frustrated working all at once. Additionally, I can't necessarily get help them troubleshoot if they're trying to do all the building on the same day, especially in the evening or weekends.


Sophia McDougall, Winter 2021. Students were asked to create the pinch bowls as practice, but they were welcome to decorate, add handles, and eventually fire them. They were a great opportunity to practice glaze for those who wanted to glaze their sets.


At the same time, I know that students work, have other classes and family obligations, so telling them all that step one is due Monday night, step two on Tuesday, and get help on Wednesday, and finish on Thursday doesn't given enough flexibility for folks who work Monday-Thursday and then have 3 days off. The students who have reserved the weekend for their studio time might do step 1 Friday morning, get help Friday afternoon, move on to step 2 Saturday morning, and finish on Saturday afternoon. Both timelines are fine, but depending on their schedule, one or both of these might be inappropriate for some students.

Alexis Gonzalez, Spring 2021. This melting set shows off some of the fun and creativity that came out online. One disappointing thing about the online class was that students couldn't see each other working in real-time, meaning that they had limited opportunities to see each other's ideas before they were completed. Seeing each other working can be a spur to creativity in a studio class.


I tried to spread out the deadlines and to explain why, but I still ended Spring with some students who said they didn't know why there were early progress deadlines--that they were confused as to why I wanted to see progress on their project before they submitted their project. And a number of students simply submitted a picture of their finished work into the assignment and the progress check on the same day.  I've been thinking about it this month and I think next time I might simply give them some example schedules. Maybe one that assumes they work daily and another that assumes they work for longer on the weekend. 

Mia Bautista, Spring 2021. This set suffers a bit in the photo becaue it is difficult to see the texture on the octopus, seastar, turtle and pufferfish. The student used a combination of carving, texture stamps/rollers, and slip to create these surfaces. 


The exciting thing, from my perspective, about starting with pinch techniques is that the students can build lots of different shapes and make the set fit their own interests. Pinch bowls are often round, but they don't have to be. They can be oblong or tall or narrow or even square. A set I don't have permission to show was created to be long wiggly rectangles, a pretty unusual shape for pinching, but clearly something the student enjoyed. Several students created plant or animal inspired forms where the plates, handles, or bowls themselves are twisted and curved to seem like leaves or flowers or animal forms.


Ryann-Elizabeth Fridley, Spring 2021. This smooth tea set was decorated with carved and sculpted mushrooms. The smooth surfaces and the well-positioned spout were both challenges to achieve.


The pinch projects in both the Winter and Spring classes went fairly well and I got some really exciting work out of a number of students. I didn't get around to asking the fall students' permission to share work on this blog, which is why I haven't included it here. I did have students do good work in that class, but I also lost a number of students in fall. YVC added the class late, which led to fewer students signing up. Students who add very late are generally more likely to drop, which also happened.


Jayleigh Butler, Winter 2021. This set of incense burners includes a house topper that was a challenge to create. This would be another one fun to see in color.


The biggest difference between the work in these online classes and my on-campus classes is that relatively few students chose to glaze or even fire their work. All students had the opportunity, but not all were able to or chose to bring their work in to fire. At the start of the quarter in Winter and Spring students were able to choose to get glazes or to get extra tools in their studio kits instead of glazes.


Jackeline Corona, Spring 2021. This fairly large teaset has well proportioned cups with impressively thin walls. The texture on the teapot was done with slip.


If you'd like to see more student work from YVC, check back here in the next few weeks/months and also check out the DoVA Student and Faculty Exhibition currently online at Larson Gallery (through July 2, 2021).


Tuesday, May 18, 2021

Covid mugs and planters

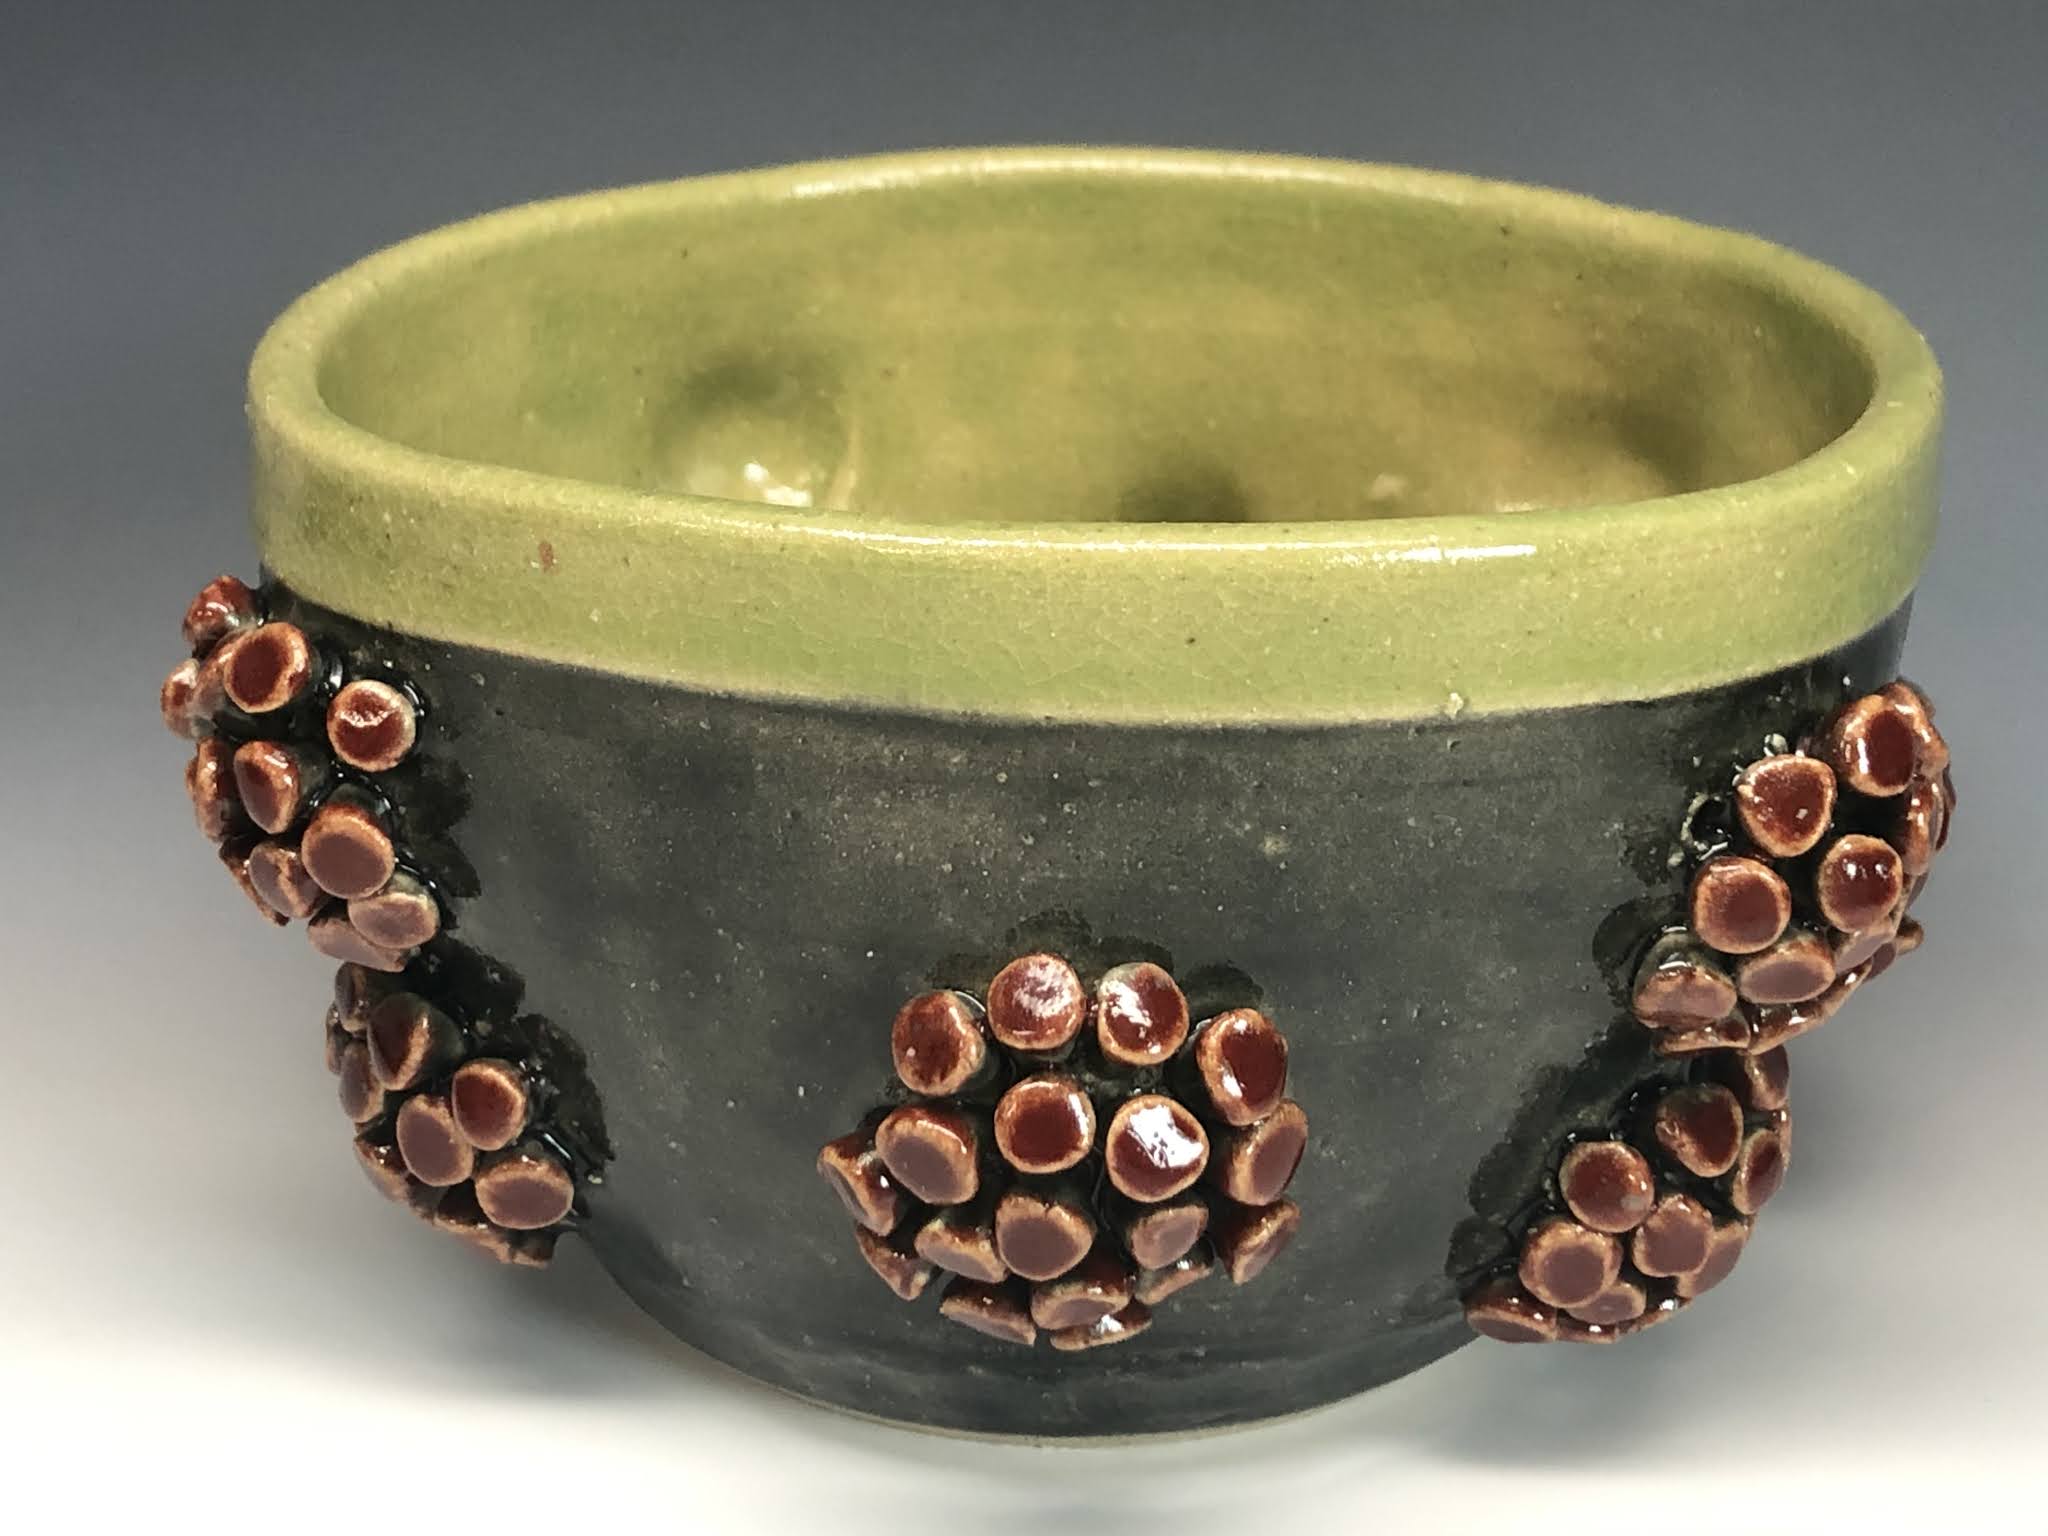
COVID planters

At the end of last month, Gallery One in Ellensburg had a planter fundraiser event. I thought I might be able to get work made and fired in time, but I was just a bit too slow. Though I will point out that I got these done with plenty of time before next year's planter sale. 

COVID mug version 2

I had the idea to make some COVID inspired planters similar to the COVID mug I had made at the end of last year. That mug was fun, but not well engineered for other than very careful use. It is fairly delicate and the red parts risk breaking off if they get bumped into. This time around I build the red parts are closer together and shorter to help with their strength.

The other day my daughter mentioned that she can drink out of these now that she's gotten her first vaccine!

I tried several variations of the red parts, including little triangle shapes for which I had to make a mold for the bumpy top parst. These triangle pieces were super slow to make because of the mold and I found making them kind of annoying, but the textured tops show up much better with glaze. This is one of those ocassions where I actually like the fired work better than the wet work.

These mugs have the textured triangular sprigged decorations, which look better fired.

For the first COVID mug, I also sculpted hollow round parts onto the surface of the smooth mug. This was good for sculpting and inserting the red parts, but the result is that that mug has hollow hemi-spheres all around it. For this reason I wouldn't want to risk using it in the microwave. For this reason and the fragile bits, I wouldn't want to run it through the dishwasher. I don't even leave it in the kitchen to prevent my family from using it incorrectly.

Inside this planter you can see where I pushed the wall out to create the bumbs for the COVID balls

For this second-round of COVID mugs and planters, I made the bumps when the clay was wet. Most of the forms were thrown, so I pushed the wall out right after it was thrown and before they were trimmed. This made adding the red bits more difficult. In the first version back in November, I put the little red bits into holes in the hemispheres. 

 
A COVID mug in progress. I made just a ton of the little stick out red parts and then lots of holes, score, slip, slot in and clean up.

This time I couldn't do that because a hole would go through to the interior of the planter. The made the attachments a little more precarious. In fact, I think I actually lost one of the red bits from one of the mugs before firing.

The pugmill can be set to mix or pug. When mixing, nothing happens outside the pug mill. This day I forgot it was set to pug (push out the clay), so it puged some tubes onto the floor.

I used my pug mill extruder for a few of the mugs. I was using the extruder already to make some hollow tubes for a whole bunch of stuff. The extruder attachment is pretty great. I have an extruder already in the studio, but this speeds things up and makes it easy, too. Sometimes too easy as you can see above. So far this year I've used the hollow die extruder to make mugs for sample textures for class demos. I've cut open the extrusions for slabs for slab building, texture samples, and glaze tests, and I've also made biscuits (in case of glaze drips) which I've always been far too lazy (or otherwise occupied) to make for home.

This little slab pill box was made from slabs started from the extruder.

I also used the tube extrusions with my kid and her friends to make mugs. The extruded form is already the walls of the mug. We can cut another extrusion apart to make a slab for the base and a handle. The kids can spend less time building and more time decorating. Also good for short attention spans (or 9 year olds).

These two mugs were both made with extruded tubes.

The covid mugs made with the extrusions aren't great. The rims just kinda stop, which is disappointing, but the goal was to test some stuff out, so I did that with color and attachments. I was pretty disappointed with this glazing firing, mostly because I switched clays. I've been using my recycled clay which is a mix of whatever I used over the course of probably a decade. Before I got the pugmill, I had been using porcelain which looks different with these semi-transparent celadon glazes.

COVID planters

In fact, I took these out of the kiln more than 2 weeks ago and took pictures more than 10 days ago, but I couldn't get around to writing about them until now.  I'm feeling a bit better about them with some distance, though it also helps that I started working on something new.