April & May Art Events
The end of April and beginning of May are busy times. It seems like we have a two- or three-week span during which events are pretty much non-stop. Saturday, April 27 was International Sculpture Day, with events in Yakima and Tieton. Tuesday, April 30 was the opening reception for the DoVA Student and Faculty Exhibition at Larson Gallery (exhibit continues through May 25). And next Thursday, May 9 is the Spring Clay Sale at YVC.
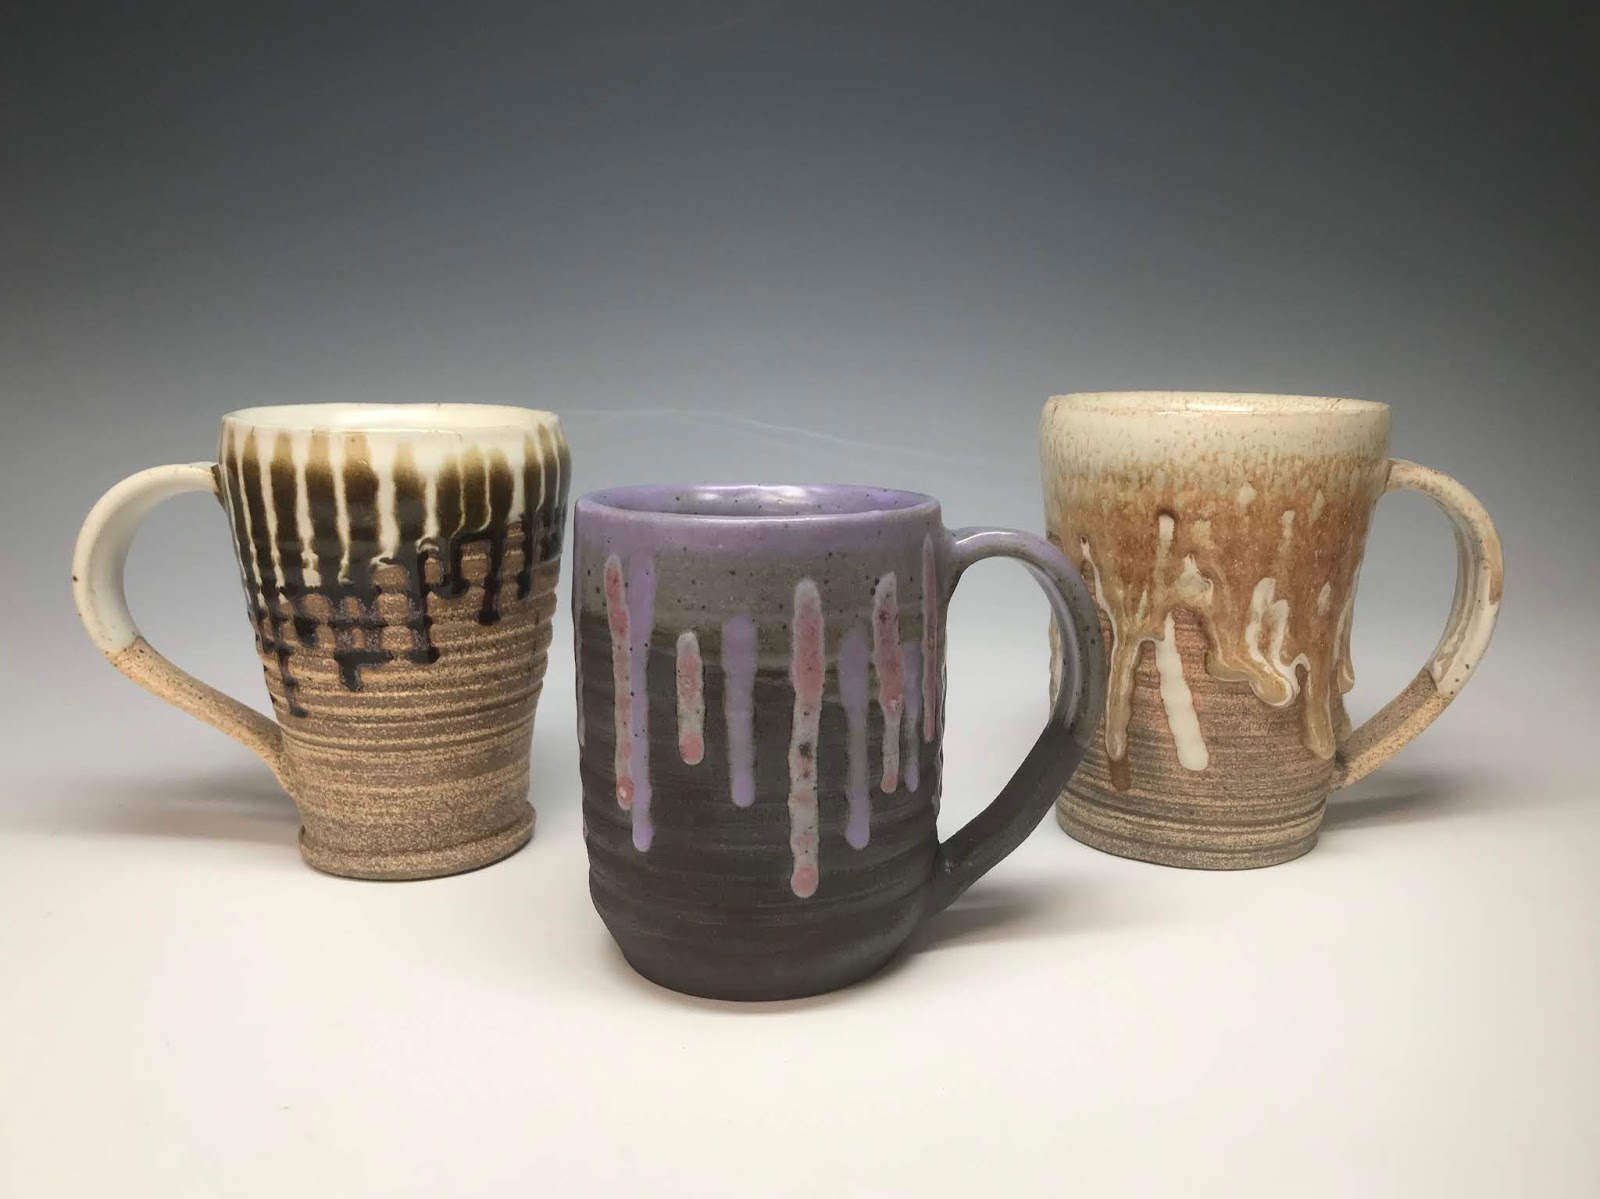 |
| Mugs with glaze drips by Beau Filbert |
Clay Sale: Thursday, May 9, 11-7, Palmer Martin Hall (YVC Campus)
The clay sale features functional pottery and sculpture made by current and former YVC clay students and faculty for sale at low, low prices! The sale runs Thursday from 11am-7pm in Palmer Martin Building (building 20) on the south side of the Yakima Valley College campus. We take cash, checks, and credit cards. Many pieces are priced below $10 and even $5 dollars. YVC clay T-shirts, as well as prints from the Winter 2019 printmaking class (not clay) will also be on sale. |
| Standing spoon rest with underglaze decoration, by Amber Ryan |
This quarter, my students (and even employees, when they have time) have been working hard to throw, trim, glaze and fire new work for the sale. In fact, though it is only week 5, we've already fired one load of glazed work and are getting ready to fire another kiln full on Tuesday so that the work can be ready for Thursday's sale.
 |
| Oxidation copper vase by Amber Ryan |
 |
| Reduction copper vase by Amber Ryan |
Firing Atmospheres
Both reduction and oxidation firings in our studio reach the same temperature (cone 10 or roughly 2300 degrees Fahrenheit) and can be fired in the same kiln. We used the same glazes for both firings, but we adjust the gas and air in the kiln to create different atmospheres. An oxidizing atmosphere is one in which there is plenty of oxygen for the fire. For a reduction atmosphere, we reduce the amount of oxygen available in the kiln so that the fire must pull oxygen out of the glaze chemicals or the clay itself. This process turns the Iron Oxide in the clay body into metallic specs of iron when the oxygen is used to react in the firing process. |
| oxidation copper bowl with glaze drip by Austin Peart |
Similarly, the oxygen in copper carbonate (CuCO3) reacts with the fire and changes the look of the copper in the glaze. In an oxidation atmosphere (seen above in Amber and Austin's greenish pieces) there is plenty of oxygen inside the kiln, so the copper remains this greenish color. My comparison for students is the statue of liberty. The copper on this statue is out in open with plenty of air and thus as a greenish appearance.
 |
| Reduction vase with bent rim by Austin Peart |
In a reduction atmosphere, on the other hand, the copper reacts to the removal of oxygen by turning red. My comparison for students is a copper penny kept in a pocket and not exposed to the air. The result in our firing is that copper in a reduction atmosphere turns red. The red copper glaze in Amber and Austin's pieces above and Leticia and Beau's pieces below has turned a vivid red and has become fairly opaque in the glaze.
 |
| reduction copper glaze with incised decoration by Leticia Ortiz |
The firings can also be loaded a bit differently. We have found that if we load the bottom of the kiln tight, with pieces close together, and run out of work (or have irregularly shaped work) at the top for the kiln, so that the pieces have lots of space around them, the kiln will not be able to maintain a reduction atmosphere. The extra space around work tends to cause those loosely loaded areas of the kiln to have more oxidized look, especially with copper glazes.
 |
| bowl with glaze drips (upside down) by Beau Filbert |
In the red and green examples above, Amber, Austin, Leticia, and Beau have used the copper glaze in combination with other glazes. Beau used some Ninja Junior crawl on his rim, Leticia and Austin have layered a different white glaze over or under their red copper glaze near the top. I believe Amber's copper glaze is over the same white in both instances and I believe Leticia's white is over the copper, but I'm not 100% sure anymore.
 |
| bowls with glaze drips by Beau Filbert |
Austin also has a drip of some other glaze running down the oxidized copper into the middle of his bowl. Our copper glaze has a lot of "flow" meaning it melts relatively early and keeps melting and moving during the firing. This movement can lead to the drips we see on Austin's piece (his are intentional, but sometimes students underestimate the movement and end up with their glaze stuck to the shelf). This movement can also cause other glazes on top of the copper glaze to move a lot too. This is what is happening with Austin's bowl and probably what is happening with the white glaze in Leticia's vase.
 |
| oxidation mug with mountain design by Leticia Ortiz |
The copper glaze I've been discussing isn't our only glaze with copper. We have another glaze, seen in Leticia's mug above and Austin, Kim, and Ruby's pieces below, that contains both copper carbonate and cobalt oxide. The cobalt itself doesn't change much based on the firing, but the copper does. The combination of the blue cobalt and the transparent greenish of the copper in oxidation results in a blue glaze like we see in Leticia's mug.
 |
| reduction mug by Austin Peart |
The same glaze in reduction looks purple because of the combination of red copper and blue cobalt. This glaze tends to vary more than others due to variations in thickness or atmosphere, so we get a range of different red/purple/blue colors in the one application of glaze. In Austin's mug above, the thinner layer at the bottom looks different from the thicker area at the top/middle. The interior of this mug has a different cobalt blue glaze.
 | ||
| shaped vase by Kim Hansen
Students can create further color variations by layering glazes over one another. The order in which two glazes are applied can result in different colors and textures as the glazes react and combine. A high-flow glaze underneath will pull the top glaze with it, while a high flow glaze over a fairly stable glaze won't cause the first layer to move as much. In Kim's vase above she has layered three glazes together, making it difficult to distinguish the transition between the copper/cobalt glaze and the dark glaze at the bottom.
Copper and iron aren't the only materials that react differently in one firing compared to another, but their effects are the most dramatically different (of our studio glazes) and I have the best examples of these color changes today. In Ruby's mugs above, we see the copper/cobalt glaze reduction purple over a different lavender glaze (the front most mug). In the taller mugs in the back, we see an iron based red glaze, probably fired in oxidation. The iron red and the Shino underneath it (on the left) both react to atmosphere changes as well.
|

 |
| glaze vase by advanced student Lauren Coffey |
Writing as Discovery
One of the fun things about writing a blog is that I don't always know where I'm going when I start. I began this post about a month ago (or more) when I simply wanted to show the great stuff my Winter 2019 throwing class had made. At that point I had just added the images. When I sat down to write today, I thought I might write about the upcoming clay sale (this coming Thursday, 11-7 in Palmer Martin's lobby), then as I started to write the post turned into a discussion of chemical reactions in firing oxidation and reduction. Surprise!
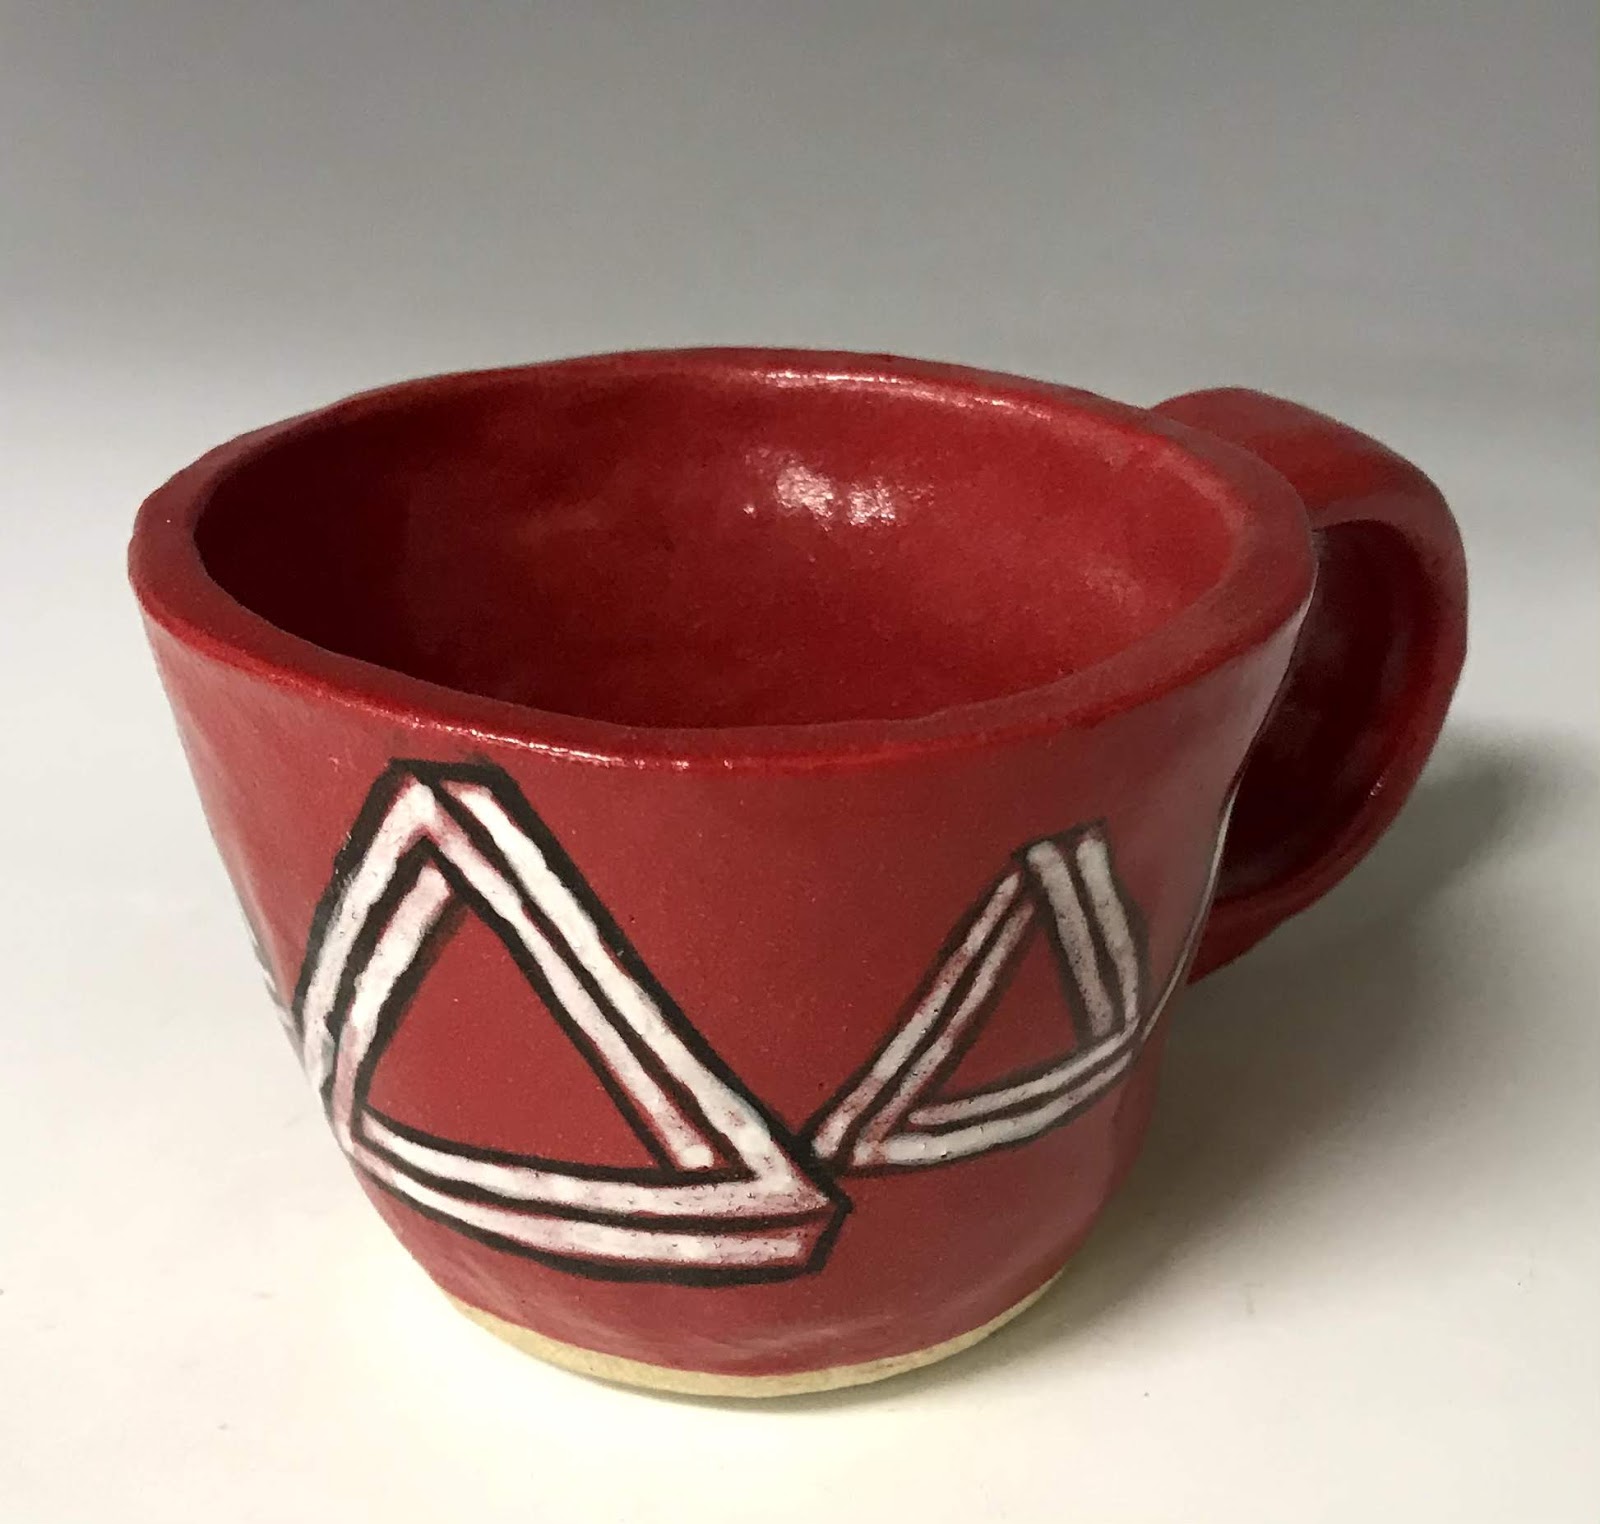 |
| graphic mug with underglaze decoration by Autumn Wilson |
Though these last few pieces by Lauren and Autumn don't exhibit the dramatic changes in glaze color that we see in the copper glazes, I can still fairly confidently recognize the firing. I can guess, based on subtle variations, that Lauren and Autumn fired the vase and the red mug in oxidation (the red is an underglaze, not a copper based glaze). The middle of Lauren's vase has a subtle tinge of green that makes me thing she layered the copper glaze over the white. Underglaze colors tend to become more dull in reduction firings so I would have advised her to fire oxidation (plus, I think she and Lauren were finishing these after we loaded the last reduction kiln).
 |
| blue and white mugs by Autumn Wilson |
The blue and white mugs, however, were probably fired in two different kilns. The two on the right exhibit little specks of iron in the white glaze. These specks are the iron oxide from the clay body reacting to the lack of oxygen in a reduction firing. The iron loses its oxide and turns into metallic iron bits that we can see through the glaze. The mug on the left does not have these specks, which means either it was fired in an oxidizing atmosphere, or the student used a porcelain clay for this piece (and stoneware for the others). Porcelain clay does not contain iron oxide, and thus stays (or turns into) a pure white color in a reduction atmosphere.
 |
| Bowl with gold luster decoration by advanced student Ruby Mayo |
Well, that's today's chemistry lesson. Maybe next time I'll talk about gold luster and mother of pearl overglaze decoration (like in Ruby's bowl above).
Artwork and Photo Credits
All the artworks in this post were created by Winter 2019 Functional Pottery students (except for the advanced work, marked as such in the caption). All photos were taken by the artists who made the work (using the YVC clay photo setup).
DoVA Exhibition
You can see some of their work now at the DoVA Student Exhibit at Larson Gallery through May 25. Location: Larson Gallery on the YVC campus (corner of 16th Ave & Nob Hill Blvd, across from Taco Time).
Hours: Tuesday-Friday 10-5, Saturday 1-5 (admission is always free, open to the public)
Dates: April 30-May 25, 2019
YVC Clay Sale
You can also purchase some work (though probably not what is posted here) at the YVC Clay Sale this coming Thursday.
Location: Palmer Martin (building 20) Lobby
Hours: 11-7pm, Thursday only
Date: Thursday, May 9, 2019


