 |
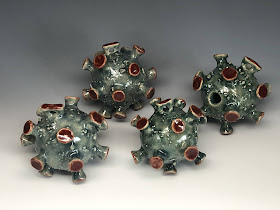
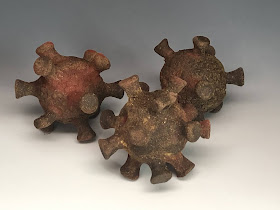
COVID planters
|
 |
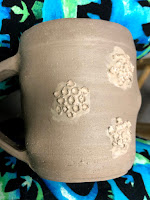
COVID mug version 2
|
I had the idea to make some COVID inspired planters similar to
the COVID mug I had made at the end of last year. That mug was fun, but not well engineered for other than very careful use. It is fairly delicate and the red parts risk breaking off if they get bumped into. This time around I build the red parts are closer together and shorter to help with their strength.
 |
The other day my daughter mentioned that she can drink out of these now that she's gotten her first vaccine!
|
I tried several variations of the red parts, including little triangle shapes for which I had to make a mold for the bumpy top parst. These triangle pieces were super slow to make because of the mold and I found making them kind of annoying, but the textured tops show up much better with glaze. This is one of those ocassions where I actually like the fired work better than the wet work.
These mugs have the textured triangular sprigged decorations, which look better fired.
For the first COVID mug, I also sculpted hollow round parts onto the surface of the smooth mug. This was good for sculpting and inserting the red parts, but the result is that that mug has hollow hemi-spheres all around it. For this reason I wouldn't want to risk using it in the microwave. For this reason and the fragile bits, I wouldn't want to run it through the dishwasher. I don't even leave it in the kitchen to prevent my family from using it incorrectly.
 |
| Inside this planter you can see where I pushed the wall out to create the bumbs for the COVID balls |
For this second-round of COVID mugs and planters, I made the bumps when the clay was wet. Most of the forms were thrown, so I pushed the wall out right after it was thrown and before they were trimmed. This made adding the red bits more difficult. In the first version back in November, I put the little red bits into holes in the hemispheres.
A COVID mug in progress. I made just a ton of the little stick out red parts and then lots of holes, score, slip, slot in and clean up.
This time I couldn't do that because a hole would go through to the interior of the planter. The made the attachments a little more precarious. In fact, I think I actually lost one of the red bits from one of the mugs before firing.
 |
| The pugmill can be set to mix or pug. When mixing, nothing happens outside the pug mill. This day I forgot it was set to pug (push out the clay), so it puged some tubes onto the floor. |
I used my
pug mill extruder for a few of the mugs. I was using the extruder already to make some hollow tubes for a whole bunch of stuff. The extruder attachment is pretty great. I have an extruder already in the studio, but this speeds things up and makes it easy, too. Sometimes too easy as you can see above. So far this year I've used the hollow die extruder to make mugs for sample textures for class demos. I've cut open the extrusions for slabs for slab building, texture samples, and glaze tests, and I've also made biscuits (in case of glaze drips) which I've always been far too lazy (or otherwise occupied) to make for home.
 |
| This little slab pill box was made from slabs started from the extruder. |
I also used the tube extrusions with my kid and her friends to make mugs. The extruded form is already the walls of the mug. We can cut another extrusion apart to make a slab for the base and a handle. The kids can spend less time building and more time decorating. Also good for short attention spans (or 9 year olds).
These two mugs were both made with extruded tubes.
The covid mugs made with the extrusions aren't great. The rims just kinda stop, which is disappointing, but the goal was to test some stuff out, so I did that with color and attachments. I was pretty disappointed with this glazing firing, mostly because I switched clays. I've been using my recycled clay which is a mix of whatever I used over the course of probably a decade. Before I got the pugmill, I had been using porcelain which looks different with these semi-transparent celadon glazes.
 |
| COVID planters |
In fact, I took these out of the kiln more than 2 weeks ago and took pictures more than 10 days ago, but I couldn't get around to writing about them until now. I'm feeling a bit better about them with some distance, though it also helps that I started working on something new.


